Cutting-Edge Couture: Avant-Garde Fashion Design

This portfolio features a collection of avant-garde fashion designs that challenge conventional notions of beauty and style. Each design is a work of art, pushing the limits of imagination and creativity in fashion. The designer uses a mix of unconventional materials, bold colors, and experimental silhouettes to create striking couture pieces.

experimental silhouettes to create striking couture pieces. The collection is a testament to the designer’s artistic vision and technical expertise. It invites viewers to explore the boundaries of fashion and to appreciate the artistry involved in creating avant-garde apparel.

Digital Dreams: Innovative Graphic Design

This portfolio showcases a range of graphic design projects that demonstrate creativity and innovation in the digital realm. From brand identities to interactive websites, each project is a blend of visual aesthetics and functional design. The portfolio highlights the designer’s ability to communicate ideas effectively through digital mediums.

The collection also reflects the designer’s versatility in adapting to various styles and trends in the digital design world. It’s a display of how graphic design can be used to create impactful and memorable visual experiences.

Captivating Portraits: A Photographic Journey

This portfolio is a collection of portrait photographs that capture the essence of each subject. The photographer’s ability to connect with subjects, understanding their personalities and stories, is evident in each image. These portraits range from candid shots to carefully staged compositions, each telling its own story.

The collection showcases the photographer’s skill in using light, composition, and mood to reveal the unique character of each individual. It’s a celebration of human diversity and the art of portrait photography.

Revolutionary Runway: Breakthrough Fashion Shows

This portfolio presents a series of groundbreaking fashion shows that have redefined the runway experience. Each show is a display of creative vision, merging fashion with performance art. The portfolio captures the essence of these shows, from the innovative designs on display to the dynamic choreography and staging.

The collection not only showcases the garments but also the creative process behind staging a successful fashion show. It highlights the collaboration between designers, models, artists, and technicians in bringing a fashion vision to life.

Elegance Redefined: High Fashion Photography

This portfolio showcases a series of high fashion photographs that capture the essence of elegance and style. Each image is a testament to the meticulous planning, creative vision, and technical skill involved in high fashion photography. The portfolio highlights the interplay of light, texture, and form, bringing out the unique qualities of each fashion piece.

The collection also emphasizes the collaboration between the photographer, models, and fashion designers, creating a cohesive and striking visual narrative. These photographs not only showcase fashion items but also tell a story, inviting viewers to immerse themselves in the world of high fashion.

Modern Spaces: Innovative Interior Design

This portfolio presents a series of modern interior design projects that blend aesthetics with functionality. Each design demonstrates a keen understanding of space, color, and materials, creating environments that are both inviting and innovative. The projects range from residential spaces to commercial interiors, each with a unique character.

The portfolio highlights the designer’s ability to transform ordinary spaces into extraordinary experiences. Through a mix of contemporary furnishings, thoughtful layout, and attention to detail, these designs redefine the way we perceive and interact with interior spaces.

Urban Lens: Capturing the City’s Soul

This photography portfolio is a deep dive into urban landscapes, capturing the soul of the city through the lens. It features a collection of images that portray the city’s dynamic energy, architectural marvels, and the candid moments of its inhabitants. Each photograph is a narrative of the urban experience, showcasing the photographer’s ability to find beauty in the everyday.

The collection also explores the contrast between the bustling streets and the quiet, unnoticed corners of the city. It’s a celebration of urban life, highlighting the diversity, culture, and vibrancy that make each city unique.

Fashion Forward: Innovative Apparel Design

This portfolio features a range of innovative apparel designs that push the boundaries of fashion. It showcases the designer’s flair for combining unconventional materials and techniques to create clothing that is both artistic and wearable. The designs reflect a deep understanding of fashion history and a bold vision for its future.

Each piece in the collection is a statement, challenging traditional fashion norms and inviting the viewer to reconsider their perceptions of style and functionality. The portfolio not only displays the garments but also tells the story of their creation, from concept to completion.

Sculptural Delights: Furniture Design Portfolio

This portfolio presents a series of innovative furniture designs that blur the lines between functionality and art. Each piece is a result of creative exploration, combining materials, forms, and textures to create furniture that is both practical and visually striking. The designs range from minimalist to complex, catering to diverse tastes and spaces.

The collection showcases the designer’s versatility and commitment to craftsmanship. Whether it’s a sleek, modern chair or an intricate, sculptural table, each design is a testament to the designer’s ability to reimagine the possibilities of furniture design.

Landscape Visions: Exploring the Natural World

This photography portfolio takes viewers on a journey through the natural world, capturing breathtaking landscapes from around the globe. Each image is a celebration of nature’s beauty, from the serene to the majestic. The photographer’s skill in composition, lighting, and perspective brings each scene to life.

The collection is not just a showcase of scenic beauty but also a reminder of the fragility of our natural environment. It encourages viewers to appreciate and protect the world’s natural wonders.

5 Electric Kitchen Appliances You Have To Have

electric kitchen appliances

June 14, 2021 | Cristina Dinulescu

Electrical safety in the kitchen is very important, and every contractor knows now the importance of having AFCI and GFCI circuit interrupters in kitchens, especially the countertop area. The reason for it is that the kitchen is most likely the one room in your house with the largest number of appliances. Whether you love to cook or you want to make things as easy as possible for you, electric kitchen appliances can help you bring healthy and delicious meals to the table. 

Convenience is one of the main reasons why people have an array of electric kitchen appliances, as cooking food without them can be time-consuming and tiring. However, if you don’t have a big budget or a big kitchen, then you might be limited when it comes to the number of appliances to have. After all, kitchens come in all shapes and sizes and a studio apartment kitchen will not give you as much space and flexibility as a suburban home kitchen.

That said, no matter how much space you’ve got, here are 5 electric kitchen appliances that you must have on your counters, and that won’t break the bank for you. Or, if they do, they’re totally worth it!

1. Electric Food Processor

electric food processor

An electric food processor is a highly versatile kitchen appliance that can do many things in your kitchen. If you have a family, opt for larger capacity models, like a 12-cup processor. However, for a single meal, a mini-prep food processor can work wonders. 

The most time-consuming job when cooking is the prep. The food processor helps with that, as it significantly reduces preparation time. It can make dough, chop onions, puree tomatoes, and so on. The appliance has razor-sharp blades, so if you do have kids, make sure to keep it away from them. Also, handle with care when washing the appliance.

2. Electric Juicer

electric juicer

Juicing can be a great way to stay fit and healthy. Buying freshly squeezed juice on a daily basis may not be sustainable,  but owning a juicer can change the way you see nutrition. There are several types to choose from too: triturating juicers, citrus juicers and cold press juicers. You can use them not only for fruits, but for veggies as well. 

Although using an electric juicer is pretty straight-forward and there’s not much electrical involved, you’d also want to be careful when cleaning it or washing it. In fact, you should consider the ease of cleaning as a factor before buying one. 

You should also take into account noise level, as some juicers can get pretty noisy, which limits the time frame to use them. Capacity and speed settings are also features to research before deciding on a brand or model.

3. Electric Stand Mixer

electric mixer

Electric mixers have been around for decades, but the technology has evolved a lot. Usually, you have a choice between a hand mixer and a stand mixer. It is considered a splurge, as some makes and models can be quite expensive, but it is a worthy investment, especially if you bake a lot.

It will definitely make your life easier even if you’re not an avid baker, with a series of basic tasks, such as beating egg whites, making whipped cream and so on. It provides great stability and you can make sure that nothing will spill over due to its usually large bowl. It’s faster too and has a strong motor, which means it will whip any kind of dough, even if it’s thick, very efficiently.

4. Electric Blender

electric blender

Blenders are also super versatile and helpful, but do you really need a countertop one or can you just get by with an immersion blender? The choice comes down to preference mainly, as well as space and budget, but an electric countertop blender will come in handy for sure. It helps with emulsifying, blending, and mixing food items

A blender will most likely mix everything from veggies to frozen fruit to big ice cubes. Take into account not just its features and size or capacity, but also how multi-functional it is and how easy to clean. Generally, it is simpler to use a blender than a mixer. 

5. Pressure Cooker

electric pressure cooker

Last, but not least, a pressure cooker deserves a spot in your kitchen, no matter how small the room may be. It’s an appliance that will also save you time, which is why many people prefer it to a slow cooker. However, if you want the best of both worlds, get the Instant Pot. 

The pressure cooker uses steam to cook food much faster than usual. It also helps with nutrition, as it keeps the food rich in nutrients. The pressure cooker saves not only time, but also water and energy. Plus, it will allow you to be more versatile in your cooking. 

Capacity is one of the main considerations when people buy a pressure cooker. Just like with the food processor, if you have a family, then a bigger capacity pressure cooker is ideal. However, you should be aware of other features as well, especially safety features like a power indicator, lid rock or steam release. You should also make sure that the pressure cooker’s handle is made out of Bakelite or any other material that’s not a heat conductor. 

Gas vs. Electric Stove: Which To Buy?

gas vs electric stove top

June 10, 2021 | Cristina Dinulescu

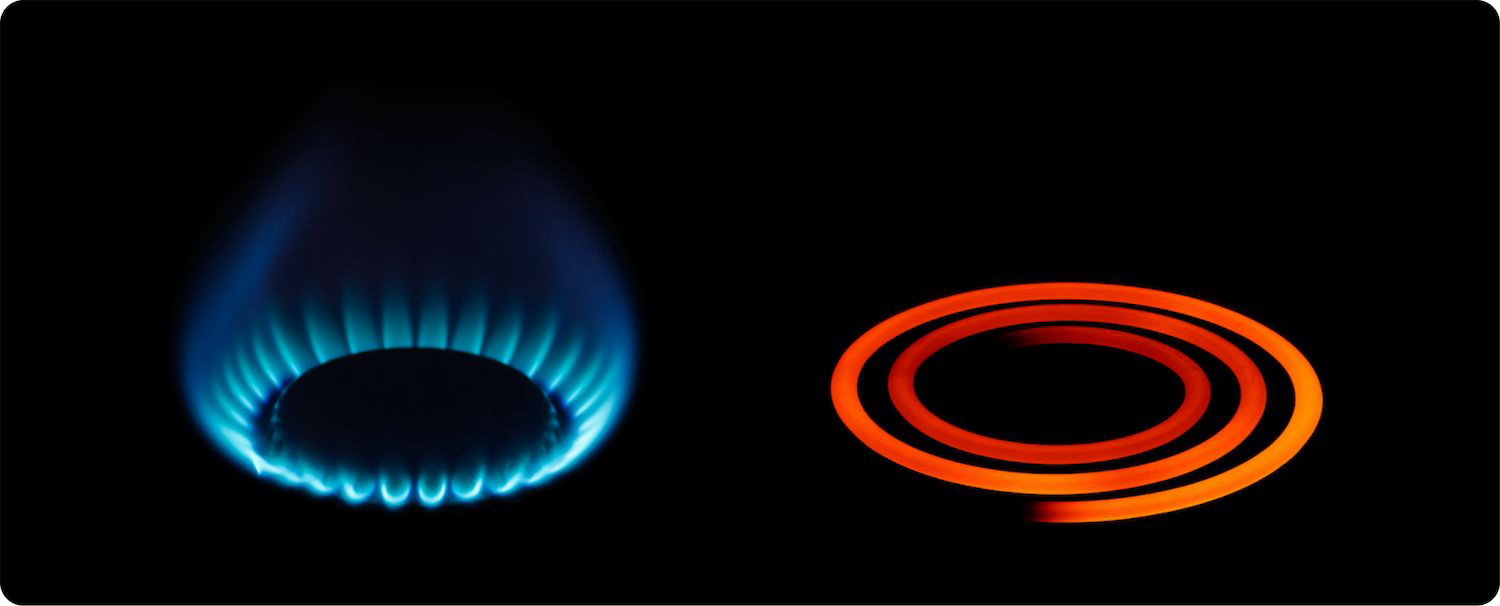
If you’re in the market for a new range, you’re probably already thinking of gas vs electric stove. There are many factors that can influence that decision, from your cooking habits or ambitions to your home’s location. There are also trade-offs no matter what you decide, but to make the best decision it’s ideal to know the specifics of each pro and con.

When you’re not necessarily moving into a new home or new construction, but your old range breaks, then you might automatically make the decision to replace it with one that runs on the same fuel as the old one, be that electric or gas. Statistically speaking, most of the homes in the US rely on electric, no matter how much hype around gas stoves is happening in the real estate market. 

And the truth is that most of the time electric ranges do outperform gas models. Of course, there are exceptions, and if you check Consumer Reports range ratings, you’ll see plenty of models with top scores regardless of the type of fuel. 

Gas vs. Electric Stove: What To Consider?

gas vs electric stove top

The first step in the gas vs electric stove debate is knowing what to look for. Yes, the final decision may rest on your cooking preference, but many people switch between the two and find that their allegiance can change. 

The flame heating in gas stoves provides cooking accuracy and versatility, but electric ranges are safer, therefore preferred by families with young children. Cleaning can also be a consideration, as busy parents prefer a range that’s easy and quick to clean, which is the case of an electric stove.  

While preference and features play a role for sure, cost is almost always a consideration. And not just the acquisition price, but also the cost to operate.

When comparing performance, there are certain things to research and take into account, such as high heat performance, low heat, baking or broiling. Of course, these could differ from one model to another, but you’ll be able to find which fuel type has the edge. 

High Heat & Low Heat Comparison

High Heat is important because it maximizes the output of large burners. Let’s say for instance you need to boil a big pot of water to make pasta, you wouldn’t want to do that on a small burner, would you? You also wouldn’t want it to take a very long time. 

To that extent, manufacturers have been constantly trying over the years to maximize the heat output. Generally speaking, electric ranges are faster in this category. 

At the opposite end, Low Heat reflects a stove’s ability to maintain a low, steady simmer which is very important as well. A cooktop with erratic simmering can ruin sauces or desserts, if you’re melting chocolate or any other activity that requires low heat. 

Here as well electric ranges offer a slight edge. A Consumer Reports test showed that more than 60% of electric models earned Excellent marks for low heat tests.

Which Is Better For Baking?

gas vs electric stove for baking

Gas vs electric stove would not be a real battle without a bake off. Desserts are sometimes more complicated to make than delicate sauces or any other dish. Whether you’re a fan of baking cakes, browned cookies or pies, you need an appliance that bakes evenly.

This is the one spot where gas ranges shine. Statistically speaking more gas range models and brands earned high ratings in baking than electric models. That’s not to say an electric range will be terrible for baking desserts, but if you’re a passionate baker, you might just be safer with a gas model.

Which Is Better For Broiling?

Broiling seems to be one of the biggest differences in performance between gas and electric ranges. Many people assume that gas models are better at broiling because they cook with a flame. However, Consumer Reports tests have shown that, in fact, gas ranges underperform when compared with electric models. 61% of electric ranges score Excellent or Very Good in this area, while less than 20% of gas models do the same.

Which Is More Efficient?

As mentioned above, cost is almost always a consideration when deciding between a gas vs electric stove. And many people today worry about the efficiency of their appliances, no matter what that appliance is. 

Generally, electric stoves tend to be more expensive to purchase than gas models, but this highly depends on the brand and model you choose. The same goes for operating costs, as it’s hard to compare since utility rates differ from region to region. Typically, a gas range costs 10-30% less to run on an ongoing basis, but that might not be much of a difference in absolute value.

Electric stoves are more energy-efficient. The reason why gas models may be cheaper to operate is because gas is cheaper than electricity, but they do waste more energy. Electric ranges transfer about 74% of energy to food, while gas models only transfer about 40%. A study in the American Council for an Energy-Efficient Economy’s Summer Study on Energy Efficiency in Buildings showed that, if you’re looking for the most efficient range, induction cooktops are even better, with almost 90% of energy transferred to food.

Power Drill Types & When To Use Them

drill

June 7, 2021 | Cristina Dinulescu

A power drill, also known as an electric drill, is a highly versatile tool that many passionate DIY-ers absolutely love. Not only does it help drill multiple kinds of holes, but it can also sand or grind, as well as drive screws. You can use it for many purposes, including stirring paint or plaster.

It’s not just that power drills are highly versatile, but they also come in a variety of sizes, the large ones differentiating from the small drills based on chuck capacity. The chuck is the part of the drill that grips the end bit which is the part that actually cuts. For pistol-shaped drills, this is located where the barrel of the gun would normally be. Most models allow for tightening or loosing of the chuck with a specially made key that has a beveled gear.

Newer drills come with keyless chucks, which are usually larger than the traditional ones. Their size and molded shape make it easy for you to securely grip and tighten the bit in the chuck with your hand. Another difference between newer and older models is corded vs cordless drills. Take a look below to understand the many options available and when to use each.

No matter how experienced you are as aDIY-er, an electric drill is a powerful tool and you should always exercise caution when working with one and follow safety guidelines. Also be sure to follow the manufacturer’s instructions for usage. Always wear safety equipment when using such a powerful tool.

The Corded Power Drill

corded power drill

As mentioned above, one of the main differences between the types of power drills is corded vs cordless. Even though cordless might seem like the obvious convenient choice, the best one for you actually depends on the task at hand. If you’re tackling a time-consuming task, then a corded drill might be a better option, as you don’t risk a dead battery. 

Another advantage of the corded drill is that it’s usually less expensive than the cordless models. It comes in a variety of models, from hammer and right-angle drills to drill drivers and impact drivers, so you can tackle any project. 

You will need high power to work with a corded grill. You’ll be able to see an amp rating on the package that will tell you the power of the model. Since you have a steady supply of electricity coming into the tool, you’ll enjoy greater runtime. The downside is, of course, that the cord restricts mobility to some extent. It also means that you might need an extension cord depending on how far the workstation is from the power outlet. There are safety measures to consider when working with an extension cord as well.

Cordless Power Drills

cordless power drills

The cordless electric drill gives you more flexibility and mobility, with the only downside of a smaller runtime. You’ll have to stop and recharge the battery periodically. You’ll have a choice between different voltage ratings, with light-duty drills ranging between 4 and 8 volts, and more powerful drills ranging between 12 and 18 volts. The latter will most likely meet any of your needs.

The higher power models are better for heavier work, but obviously that makes the tool bigger and the battery heavier. So it will be more difficult to handle. Since you’ll have to recharge the battery from time to time, it might be a good idea to invest in a spare battery that you can have available in order to keep working while the other recharges. You can look at the amp-hour rating to compare runtimes of different batteries. However, the material you’re working with will affect the amount of time the battery lasts.

Freedom and convenience are the two biggest advantages of cordless power drills. You can minimize the disruption of an empty battery by making sure to charge the drill’s battery after every job. Many models have a LED light that indicates when the battery is done charging. 

Another tip is to choose a cordless drill that has a brushless motor and lithium-ion batteries if you want greater runtimes. This is because a brushless motor provides more torque than traditional ones.

Power Drill Drivers

power drill driver

A power drill driver spins the bit clockwise or counterclockwise, no matter the power level. It has a basic chuck that opens and closes around the bit. There are models that come with a clutch, which allows you to set the amount of power it uses when driving the screws. 

The drill drivers are best to use for basic hole drilling and they work with a range of materials, from plastic and wood to metal. The power choice comes from the size of the hole you need. The bigger the hole, the more powerful driver you need. You’ll have to check the manual to see what sizes a certain drill driver can handle. Sometimes, depending on the type of material you’re working with, you might need to drill a pilot hole first. 

Hammer Drills

hammer drill

A hammer drill is also known as a hammer drill driver. In terms of design, it looks very much like a drill driver, but it has a hammer mechanism that’s added on. This enables the bit to be pushed in and out, which chips away at concrete while the motor of the drill spins the bit. A great advantage of the hammer electrical drill is that you can actually turn the hammering feature off, which means you can hammer drill, drill or drive with the same tool. 

As mentioned above, you can use a hammer drill for pretty much anything, and it works for drilling and driving in a range of materials, such as wood, plastic, metal and concrete or masonry. When it comes to concrete drilling though, most hammer drills have a maximum rating of 1/4″. You’ll also need a vacuum and shroud when using such a drill, in order to avoid inhaling silica dust. 

Impact Power Drills (aka Impact Drivers)

Impact power drills are also known as impact drivers. A lot of professionals in the field will tell you that this is not really a drill, as it does not have a forward chipping mechanism. Impact drivers feature a rotating hammer and anvil mechanism. When the tool turns, the hammer strikes the anvil violently, which gives it a much greater turning force than the standard drill. 

The most common use of impact power drills are as a drill-impact driver combo kit, because then you don’t have to switch bits while you work. Most bits today come with 1/4″ hex shanks, which means they are “impact ready” and allow you to drill with this tool. The impact driver drives screws faster, which saves you time, although it’s not as smooth. 

Right-Angle Drills

If you need to work in tight spaces, a right angle power drill is the best option. It’s great for drilling between floor joists or other such spaces, as it has a drill that’s mounted at a 90-degree angle to the body. They don’t usually come in every kit, due to their specialized use, but you’ll be surprised at how helpful having one can be.

Basically an electric drill with a head that’s set at 90-degree angle to the grip, a right-angle drill is usually a lot shorter than the traditional ones. The grip is also designed to be very comfortable as it’s often operated with one hand.

Apart from tight spaces like between floor joists, a right-angle drill can also be used in plumbing projects or other construction tasks, such as drilling inside a cabinet. It’s a great tool that will eliminate the need for you to use a screwdriver or any other manual tool. 

Best Electric Grill For Barbecue Lovers

electric grill

June 3, 2021 | Cristina Dinulescu

If you’re on the hunt for the best electric grill, then you’ll be happy to know that the industry has been perfecting them over the past few years and you now have a myriad of choices. For fans of grilled food, who like to enjoy the flavor and ease of grilling no matter the season, both outdoor and indoor electric grills are an option. 

The best part about electric grills is that you don’t have to spend as much time cooking or put in as much effort as with charcoal, or even gas ones. Electric models come in all sizes and shapes, so we put together a guide to help you navigate the market. Even though you don’t need an electrician for installation or anything like that, there are still some safety measures you should keep in mind, such as connecting the grill to a ground fault interrupter.

Before jumping into options and products, there are a few things to know about electric grills. They will most likely not give you that charred, smoky flavor that barbecue purists adore, but since not everyone has a big yard or a warm climate all year long, electric models are very handy. They allow you to grill indoors or out on a small balcony. 

In addition to being convenient, electric models can also be healthier to use. Newer grills started using infrared heat, so there’s no char or any of the other potential health risks.  Infrared heat cooks meat more consistently. The heating element of an electric grill is usually located inside, sometimes just beneath the cooktop. It is powered by a cable or cord, similar to any other kitchen appliance, so all you have to do is plug it in. 

1. Char-Broil TRU-Infrared Patio Bistro Electric Grill

char broil electric grill

With its heavy-duty construction and infrared heat, the Char-Broil TRU-Infrared Patio Bistro Electric Grill easily earns best electric grill or at least one of the best for sure. It grills food thoroughly without cool spots and cooks meat consistently. The model also features a removable warming tray, which helps keep the food at an ideal temperature.

The Patio Bistro is a self-standing model that’s easy to assemble and provides any home chef with plenty of cooking surface. So, even though it’s compact, you can enjoy big grill features. It works well in apartments and condos, whether on a small patio or even on a balcony. 

This electric grill comes with a precision dial, which allows you perfect control over the 1750-watt burner. The cooking surface is 240 square inch and it’s porcelain-coated, but the grill also features an 80 square inch secondary cooking surface. Overall, it gives you enough cooking space to grill 8 to 12 hamburgers.  

Buy it here

2. George Foreman Indoor/Outdoor Electric Grill

George Foreman electric grill

Large enough to cook for a get-together, the George Foreman Indoor/Outdoor Electric Grill is a great choice for people who like to host. Among its many great features, this model has a nonstick grill plate that’s easy to clean and can be used both indoors and outdoors, due to its removable stand. 

The cooking space is similar to the Char-Broil Patio Bistro, a 240 square inch surface, which accommodates about 15 servings at a time. The grill plate is removable, and it also features a sloped surface, which means the fat can easily drain off the meat. Also, you can safely put the drip tray into the dishwasher. 

The grill is not only easy to clean, but also to assemble. It comes with an adjustable temperature control, which allows you to choose from 5 heating settings. The only downside is that the heat control can get spattered with grease. 

Buy it here.

3. Kenyon Frontier All Seasons Portable Electric Grill

Kenyon electric grill

The Kenyon Frontier All Seasons Portable Grill could very well be the best electric grill, but it does come at a hefty price. However, it features high-quality construction and materials, as well as the capacity to produce heat similar to charcoal and gas grills. The grill has a 1300-watts burner that can reach temperatures of 600 degrees within 10 minutes, and a 155 square inch cooktop. It also features a low smoke output and disposable pan, which makes prepping, grilling and cleaning very easy and convenient.

Perfect for areas where gas or even charcoal grills are not allowed, this portable grill is easy to take with you anywhere. Because the heating element is concealed, the smoke is almost entirely eliminated, which means you can easily use it indoors. As an extra perk, the grill is designed, assembled and shipped from the USA.

Buy it here.

4. Weber Q 1400 Electric Grill

weber electric grill

Durable, yet very easy to transport, the Weber Q 1400 Electric Grill is quick to assemble, making it a great choice for when you’re on the go. It’s a tabletop model that features cast iron cooking grates, which help retain the heat. The Weber Q 1400 features a 1560-watt heating element and a generous cooking surface of 189 square inches.

On the downside, the grill takes a long time to preheat and it also doesn’t display the temperature.  However, you do have control over the temperature, as it has heat control settings that you can adjust. The sleek design, with large grip handle and control knobs, as well as ergonomic side handles, makes it a really cool gadget, while the porcelain-enameled cast-iron grates add delicious sear to the food. 

Buy it here.

5. Cuisinart 30-Inch Electric Smoker

cuisinart electric grill

If you’re looking not just for the best electric grill, but for the best smoker, then you can’t miss the mark with the Cuisinart model. It’s super easy to set up and use, and also very spacious. To add to its qualities, the electric smoker features precise and steady temperature control.

While it may take a few hours for it to deliver deliciously smoked meat, you can create all sorts of yummy recipes on this electric grill. It features a 1500-watt heating element that can heat up the grill anywhere between 100 and 400℉. The model also comes with a dial-style thermostat, which allows you to control the temperature. You can cook several foods at once, as the unit features a very generous 548 square inch cooking surface. 

Buy it here.

5 Steps To Switch Your Electric Company

switch electric company

May 27, 2021 | Cristina Dinulescu

When you buy a home or move into a new house, it’s generally pretty easy to find out who your utility company is and they usually service the entire area. Many homeowners think that it’s therefore a given and you can’t really do much about it. However, you can switch electric company if you want to, provided that you live in a state that allows it.

Not all states allow households to change their electricity  provider, but California does and this could potentially save you a lot of money. The level of difficulty in changing your electric provider is not high at all, despite common belief. You can do most of the research online, and then deal with the actual switch on the phone. It may require some time commitment, depending on how much in-depth research you want to do.

Before you get really excited at the chance to switch your electric company, there are a few basic questions you should answer. Below, we walk you through 5 most common steps you’ll have to take, as well as basic considerations to take into account, from potential cost savings to customer service comparison and more. 

1. Can You Switch Electric Company?

As mentioned above, the first step you need to take is figure out if you are even able to do this. There are currently 15 deregulated energy states, which allow homeowners to switch and choose their energy provider. California is one of them, together with Texas, Pennsylvania or Illinois. Because of this choice, electricity providers face more competition, which can work in your favor. They will be more willing to offer you better rates and terms in order to gain your business. 

Even after a certain company has gained your business, you can still change your mind and switch as often as necessary to meet your needs. One thing to know and remember though, is that even though electricity providers are deregulated and compete for business, the delivery of electricity is regulated by the state, so even if you switch companies, your electricity will be delivered the same way.

To that extent, moving from one company to another should not disrupt your service in any way, as in most cases it doesn’t even require an on-site visit from the new company’s technician.

2. Will You Get Better Rates?

Now that you’ve established you are in a position to switch, the second step you need to take is figuring out if it’s worth it. People usually consider making this change in order to get better rates and save money. You can use comparison websites, such as Utility Choice, or any other you can find, to compare plans and rates in your area. Just make sure the information you get is up to date for the current year.

But the cost to consider is not just in terms of electricity rates. If you switch before your current contract is up, then there may be early termination fees that you’ll have to pay. You’ll have to check what terms your contract is under, as some utility providers offer month-to-month or short-term contracts, while others offer multi-year options. 

To understand your existing rates, terms and penalties, you need to properly read your contract, and only then you’ll be able to accurately compare to other suppliers. Sometimes, it makes more sense financially to stick to your current provider than switch before the end of the contract and have to pay huge penalty fees. However, other times, it may be worth it, so just keep in mind the potential for value when making these comparisons. 

3. What’s The Best Deal?

As mentioned above, lower rates are not the only thing to take into account when you want to switch electric company. You have to also look at the available plans and consider what works best for your household’s usage habits. So, the next step would be trying to calculate the best possible deal. In this stage, you may want to look into the type of billing different providers offer. Some may offer equal billing throughout the year, which may be convenient to you. You can also check for automatic payments discounts and other such things that could sweeten the deal.

Costly contract stipulations are also something to look for. You don’t want to make the switch only to have to deal with unforeseen costs. Check things like the length of commitment, termination fees, incentives, auto-renewal, and more. Obviously, check the price per kilowatt-hour, but also the type of power provided. 

4. Can You Negotiate With Your Current Provider?

Before you commit to switching to a new supplier, you can also ask your current provider for better rates. This is an important step as it can save you any hassle. If you already have a good deal offer from another company, you can call your current one and ask them to match it. Since it’s much easier to retain a customer than to acquire one, companies may be willing to match your offer. 

5. Make The Switch

The last step is to make the actual switch in case your current provider couldn’t match the offer. You can either do that online, or you’ll have to contact the new electricity provider by phone and request to establish service. If you haven’t during your research stage, then ask your new supplier all the questions you want answered now. For instance, even if you checked the price for kWh, you should ask whether this offer is fixed rate, variable or indexed. You should also ask if you pay for energy you don’t use or if there’s a penalty for installing solar in the future. All of these are important aspects to know before you give them final approval. If you have any questions about hour home’s electrical system, then contact us and our licensed electricians will be happy to help.

How To Save on Electric Bill: 7 Tips & Tricks

how to save on electric bill

May 17, 2021 | Cristina Dinulescu

Living in quarantine for the past year and spending more and more time at home has made all of us take a deeper look at our homes. It has also made many people more aware of the extra electricity consumed, whether it was using lights more, doing laundry more often or cooking at home all the time. But you can learn how to save on the electric bill.

One could literally say that keeping the lights on is not cheap, let alone all the other appliances. The Energy Department states that a typical household in the US spends over $2,000 a year on energy bills.  

Most of it goes into heating & cooling, followed by the use of electronics. However, there are many tweaks you can make to your usage so if you want to learn how to save on the electric bill, read on. Some of these tips and tricks can help lower your energy bill with as much as 25%.

1. Get an Energy Audit

There are some utility companies that offer free energy audits to household customers, so check with your provider to see if that’s the case. Even if it’s not, a home energy audit is worth investing in, because it will give you valuable information about any areas where you may save energy.

The energy audit will not only help you identify any additional ways to save on your electric bill, but will also point out areas of concern, such as whether you’re losing energy anywhere or not. 

2. Get Rid of Phantom Loads

Any quick research you do about how to save on electric bill will reveal phantom loads. You might not be aware, but 75% of the energy used by your appliances and electronic devices is used when they’re off. This is called phantom load and it applies to TVs, computers, sound systems, as well as many kitchen appliances. 

In order to get rid of phantom loads or reduce the amount of energy consumed, you can plug all of these appliances and devices into power strips. Then, simply turn off the strips when you’re not using them. 

3. Reduce Heating & Cooling Costs

As mentioned above, heating & cooling bear the biggest percentage when it comes to power usage and energy bills. Therefore, this is one of the best places to start when looking for cost-cutting opportunities. Here are a few things you can do to reduce heating and cooling costs:

  • Make sure windows and doors are properly sealed – poorly sealed doors and windows will let energy seep out, which means you’ll use more power to keep a room warm during the winter, or cool during the summer. The same applies to appliances doors, such as your fridge or freezer, which need to be properly sealed in order to keep the cold air in. 
  • Fix any ductwork issues – if you have any leaks in heating, ventilation or AC ducts, then your heating and cooling system will not operate efficiently.
  • Adjust the thermostat – many people leave the thermostat set at the same temperature all the time, but you can save up to 10% of your yearly costs on heating and cooling by turning it down 10-15 degrees when you’re away from home or during the night. Smart thermostats can be programmed to do this work for you.

4. Fill Up Your Fridge and Freezer 

Keeping your fridge door closed and making sure it’s properly sealed can definitely help save on utility bills. But did you know keeping your fridge and freezer full can also help? This is because food can act as an insulation, therefore it reduces the amount of time that your fridge needs to run in order to stay cool.

Another thing you can do is adjust the temperature in both your fridge and freezer. Ideally, you’d set your refrigerator to 38 degrees, and your freezer between 0 and 5 degrees. It’s enough to keep the food fresh, while also not putting too much strain on the appliances to work in order to maintain the temperature. 

5. Manage Water Properly

After heating and cooling, hot water is another large expense when it comes to energy bills. Cutting back on hot water usage can help you save significantly on energy, and therefore utility bills. Here are a few tips on how to reduce usage or manage hot water properly:

  • Trim your shower time: you don’t have to completely rush through your showers, but shaving 2 minutes off can reduce hot water usage by 5 gallons; 
  • Use efficient showeheads: replacing your showerhead with an efficient one can also help reduce hot water usage, and quite significantly. Certified products that meet the efficiency criteria can reduce usage by 2,700 gallons per year;
  • Fix leaks: if you have faucets that drip, it’s not just an annoyance, it’s also wasteful. It can add up to gallons of water every year;
  • Adjust the temperature: the water heaters typically have a default temperature, which is set at 140 degrees. If you lower it to even 120 degrees, you can save up to 10% on heating costs. You can also turn it to minimum if you’re going out of town.

6. Upgrade Your Appliances

Old appliances use more energy and can increase your utility bills. If your fridge, washer or dryer are 10 years old or more, then you should consider replacing them with newer, Energy Star models, as these use significantly less power.

Let’s take a dishwasher, for example. An Energy Star label model uses 3.5 gallons of water or less for every cycle, which is considerably less than older models, which can use more than 10 gallons. If you are thinking of replacing old appliances, start with the ones that you use most often, such as the fridge, HVAC system, water heater, etc.

7. Keep Your Lights in Check

Although lights are not necessarily a big consumer, the energy used can certainly add up if you always keep your lights on, especially if they’re full on. There’s several things you can do to keep your lights in check, such as installing dimmer switches or switching to LEDs. Dimmer switches will allow you to only use as much light as you need, while LED lights use 90% less energy than incandescent bulbs. 

Costs of Common Electrical Work

electrical work cost

May 13, 2021 | Cristina Dinulescu

When it comes to electrical work, even the most experienced DIY-ers prefer to call a professional electrician, because most people get nervous about electricity and with good reason. Even if you have knowledge of the basics, electricity can and has killed. Not only that, but having electrical work done by professional, licensed electricians is a good investment that will cover all bases.

One of the biggest concerns homeowners have when it comes to needing electrical work done around the house is the cost. Sometimes, electricians discover less obvious issues and unpleasant surprises that drive the cost up. To limit that as much as possible, it’s important to understand electrician labor cost and have a general idea of how much common projects may cost. 

In many instances, electricians will charge a flat fee for coming out to your home, but there are also professionals who waive that fee or provide a free assessment, depending on the work you need done. This fee can range anywhere between $50 and $100, depending on where you live and the company. Additionally, electricians charge an hourly rate, which also can vary greatly from $40 to $120, depending not just on location, but also the skill level of the electrician.

Another aspect of electrical work cost that should be understood is that booking an electrician to perform a small job like replacing a switch or fixing a doorbell will prove quite challenging. This is because there’s little profit margin in it. To that extent, people usually book electricians when they have a number of tasks at hand. Below, you’ll be able to find estimates of the most common projects and work electricians perform. 

1. Receptacle or Switch Repairing / Replacing 

Repairing or replacing a receptacle or a switch is a small, quick job. But if you have several outlets in your home that need work, then it might be worth calling an electrician. Some companies may have a minimum period of labor time that they charge for. All in all, this could end up costing you anywhere between $100 to $150.

Taking into account that an actual receptacle or a switch is not that expensive, you might want to wait and have this work done with other projects to make the most out of the electrician’s visit. 

2. Standard Receptacle to GFCI Replacement

If you don’t just require a simple receptacle repair or replacement, but you need to get a GFCI in place, then the cost of the project may increase. Typically, replacing a standard receptacle with a ground-fault circuit interrupter will end up costing you $120 to $150. However, it can run a little more if the job involves adding a new outlet location or running cable. If that’s the case, expect to pay anywhere between $200 to $250. 

3. Grounding an Outlet

Older homes can still have 2-slot receptacles, which are not grounded. A licensed and professional electrician will be able to turn that into 3-slot grounded outlets, which can accept 3-prong plugs. If the main panel or circuit breaker panel are grounded, then this should be an easy job that will not take longer than 30 minutes. 

In total, expect to pay around $150 – $200. Just like with the other smaller jobs, this is an example of electrical work that should be done all at once, when updating your home’s electrical system. If there’s no grounding at the main panel, then the cost will double at least.

4. 220/240-Volt Outlet Installation

When you need to install a new outlet or switch, in a place where there was none before, then it’s more work involved than simply replacing or repairing one. The electrician will have to create an opening in the wall, fish new cable to a power source, and make the necessary connections. This can cost anywhere between $150 and $200. 

When it comes to installing a 220/240-volt outlet, which is usually required for an electric range or clothes dryer, then the work is pretty much the same as any standard outlet. However, the overall cost is higher because the electrician will most likely need to run conduit and reorganize circuit breakers in the main panel. Sometimes, you may even need a new breaker. The length of the conduit will dictate the new price, but expect around $300 on average. 

5. Circuit Breaker Replacement

Working within the main service panel is definitely a job for a professional, licensed electrician. When circuit breakers wear out, which is very possible to happen,  you’ll have to call an electrician to come and replace them. On average, one circuit breaker switch replacement will cost $150 to $200, which includes both materials and labor.

6. Electrical Panel Update

The same way older homes have 2-slot outlets, they are also likely to have outdated electrical service, which is under-rated when it comes to modern appliances and devices. Decades ago, 60-amp services were standard, but now they can’t support modern loads. Even 100-amp services are considered the bare minimum, with most households going for 200-amp services. 

The cost to upgrade your electrical panel and service depends on what your current service is and what you’re upgrading to, but here are a few estimates to give you an idea. 

  • 100-amp service upgrade: $1,200 to $2,500;
  • 200-amp service upgrade: $2,000 to $3,500;
  • 400-amp service upgrade: $3,000 to $4,500.

7. House Rewiring

Rewiring a house is a big project and an important decision for homeowners. It’s usually required in older houses that have knob-and-tube or just outdated wiring. The cost depends greatly on the size of the house, the existing wiring, as well as whether or not other updates are necessary as well. 

In most cases, a house rewiring requires walls to be opened up, although sometimes it can be done without removing the drywall. See below average costs for rewiring a home:

  • Small Home (2 bedrooms, 1 bath): $3,000 to $5,000;
  • Mid-Size Home (3-4 bedrooms, 2 bath): $5,000 to $13,500;
  • Large Home (4+ bedrooms, 2+ bath): $8,500 to $25,000+

The right electrical upgrade can dramatically improve the value and appearance of any home or business. You’ll be amazed at what a difference the right electrical upgrade can make for your home or business. Make sure that when you select an electrical company to do the enhancement of your home and you have decided to take your enhancement to the level where you require an electrical upgrade that the technician at the company has a good working knowledge and the experience to properly guide you in this area.

When you decide to upgrade, our well-trained and certified electricians have all the experience and training needed to complete your electrical panel upgrade project from start to finish, with a minimum of fuss or disturbance. Please contact us right away at 310-800-2401

Service Drop 101: An All-Inclusive Guide

Avoid Using These Unsafe Outdated Electrical Panels For Your Home

May 6, 2021 | Cristina Dinulescu

An electric service drop is the main connection between the power pole of the electric utility company and your house. It’s mainly a bundle of cables that run from the pole to your property’s connection. Obviously, the power company lines are higher than residential properties, therefore the cables have to literally drop in order to reach your home, hence the naming convention.

Some homes don’t have a service drop, in which case the electrical cables are run underground. Whether it’s overhead or underground, the drops consist of a hot primary feed and a neutral feed that go from the utility line to the transformer. The transformer will then feed two hot wires and a neutral to the service drop. 

Both options are perfectly fine and it is sometimes up to the owner to choose which is best if it’s a new construction. Of course, the overhead connections are noticeable since they’re above the ground, whereas underground feeds are hidden, which can be more aesthetically pleasing. In terms of safety, there is some danger associated with both options. While overhead wires can be a hazard for tall trucks and farm implements, buried wires always leave the possibility of digging danger. 

What Is The Service Drop?

As mentioned above, the service drop provides all power to your home, it is the connection point where all electricity comes through. If, for any reason, the drop goes down, then you’d lose all power to your home. The service drop usually goes down in severe weather conditions, such as storms when there are downed trees, or even large fallen limbs, as well as heavy ice build ups. If this happens, it can be extremely dangerous, as they carry a lot of electricity. Never approach a fallen service drop. 

A standard drop consists of 3 conductors, or cables – two hot ones, each carrying 120 volts, and a neutral conductor, usually a bare, aluminum cable. The latter provides structural support for the drop. 

Service drop responsible

In some areas, service could vary from this table, so the best thing to do is contact your local power company. 

What’s The Difference Between a Service Drop and Buried Power Lines?

For many years, service drops were the absolute standard when it came to residential electrical systems. However, over the recent years, many new constructions prefer underground cables or buried power lines. In fact, when power lines are buried, they’re referred to as service lateral, rather than service drop. 

Recent constructions prefer buried lines because they’re not as vulnerable to weather conditions like high winds, or to falling trees, or any such destructive effects. Not only that, but they’re not visible, which reduces the danger of accidental contact. 

However, if you go through a remodeling or any repairs are needed that involve digging, buried power lines are at risk of being struck by the construction or repair crew. Also, the installation process and any repairs are more expensive and labor-intensive when it comes to buried lines compared to overhead service drops. 

What Are The Service Drop Requirements?

Local building and electrical codes dictate the minimum height requirements for service drop cables. However, all local provisions must follow the recommendations of the National Electrical Code, also known as NEC. Usually, the height requirements are 12 feet above ground for service drops, which also applies to sidewalks and residential driveways. For decks and porches, where only pedestrian access is possible, the height requirement is usually 10 feet, while for swimming pools is 22 ½ feet. Public roads require 18 feet above the ground for overhead service drops.

The height requirement is not the only provision to take into account, in fact, that should be the job of your utility company and professional electrician. You should know, however, that you are required to let your power company know if anything goes wrong with the service drop. You are not allowed to perform any work or repairs on it. Actually, you can’t even shut off the electricity through those wires, that’s something only the utility company can do. 

The same goes for the cables between the drop and your home’s main electrical panel. These are live at all times and if there’s any problem, you are required to call the utility company. If, on the other hand, you notice an issue with the service head or the cable between the service point and the main panel, then you may call a licensed electrician. 

What Are Service Point & Service Head?

The service head is the assembly that connects to the service drop when this reaches your home. The service head is also known as service mast or masthead. The assembly is usually a steel conduit topped with a fitting resembling a shell. This is called a weather cap or weatherhead. The conduit runs along an exterior wall or up through the roof, depending on your setup.

The service point is the connection between the service drop cables near the mast and the cables that start at the service panel and the electric meter, running through and out of the service head. This point is the dividing line between the property of the utility company and yours. The service cables have to make a downward loop near the service point, which is also known as a drip loop. This is done in order to prevent water from running down the cables and entering the service head. Instead, any water that travels down outside of the cables collects in the loop, and eventually drops off. 

The right electrical upgrade can dramatically improve the value and appearance of any home or business. You’ll be amazed at what a difference the right electrical upgrade can make for your home or business. Make sure that when you select an electrical company to do the enhancement of your home and you have decided to take your enhancement to the level where you require an electrical upgrade that the technician at the company has a good working knowledge and the experience to properly guide you in this area.

When you decide to upgrade, our well-trained and certified electricians have all the experience and training needed to complete your electrical panel upgrade project from start to finish, with a minimum of fuss or disturbance. Please contact us right away at 310-800-2401

3 Types Of Commercial Lighting & Their Uses

commercial lighting

March 4, 2021 | Cristina Dinulescu

Whether your business involves an office space, a warehouse or a retail space, commercial lighting has a significant impact on how your employees or your customers feel in the space. Each type of commercial property has different lighting requirements, but universally a good setup will combine different kinds of commercial lighting to create the best space.

Not only that, but lighting is oftentimes the easiest and best way to improve an office or retail environment. However, you should still always consult with a commercial electrician in order to make sure that your commercial lighting plan is cohesive and effectively illuminates all the different spaces you have under one roof. 

In addition, you’d also want to ensure you follow the necessary energy codes, that all concerns about energy efficiency and costs have been taken into account, as well as scalability of the lighting system. For all of these, you need a professional, experienced licensed electrician.

To accomplish all of the above, you’ll generally need to think about 3 main types of lighting:

  • Ambient or general lighting;
  • Accent lighting;
  • Task lighting.

General Commercial Lighting

commercial general lighting

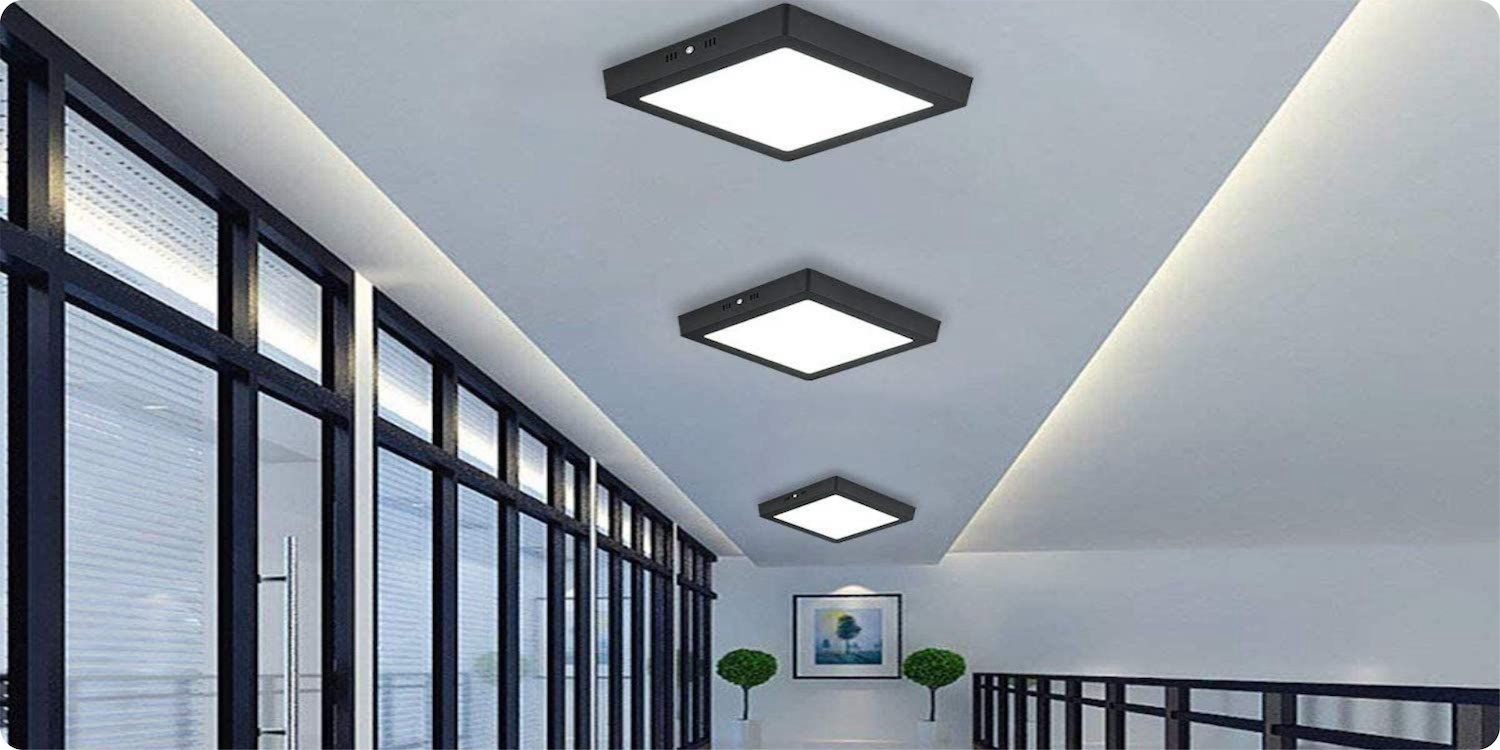
General lighting, also known as ambient lighting, true to its name, sets the tone for your space. In terms of illumination, ambient lighting should create just enough light for people to see and move around safely and comfortable. Due to the fact that it’s a uniform, base level of property lighting, it can help with energy efficiency and cost reduction, since the light levels can be lowered. The standard recommendation for ambient lighting is 30 to 50 footcandles.

Usually, general commercial lighting uses ceiling fixtures or overhead ones, like track lights, recessed pot lights, chandeliers or ceiling lamps. One could also use standalone lighting fixtures like table or floor lamps, in which case this type of lighting can double as task lighting. Vertical lighting is also an important aspect of ambient illumination and it can be done with sconces or wall washers, which make the space feel larger and create a welcoming, pleasant environment.

To achieve this welcoming look and feel, it’s often recommended to use commercial LED lighting with warm color temperature for general or ambient lighting.

Accent Lighting

accent commercial lighting

Accent lighting is designed specifically to create a focal point. It adds dimension to the illumination of a room, being generally built upon the ambient lighting. Oftentimes, it reinforces the aesthetics and design of the space, creating a dramatic accent on shapes, color and textures. It achieves this by using a focused light source. 

In order to achieve this dramatic effect and draw the eye, this type of lighting should be at least three times more powerful towards its focal point than the rest of the lighting in the room. Usually, it makes use of recessed or track lighting, wall-mounted features and sconces that are angled towards the feature you want to spotlight. Adjustable trims and point source lamps that provide directional control also work.

If it’s artwork that you’re trying to highlight, then it’s best to use LED lights, because they don’t have UV light and they emit almost no heat. This will ensure that your artwork doesn’t get damaged over time. 

A common mistake business or property owners make when it comes to accent lighting is accenting too many things and emphasizing nothing. The recommendation from IESNA is to have a 5:1 ratio of accent to ambient lighting. This will help you achieve a significant visual effect. In terms of illumination, the recommended levels are 150 to 500 footcandles.

Commercial Task Lighting

task commercial lighting

As its name predicts, task lighting is supposed to help your employees when working on a task. There’s a variety of sources that can help achieve this type of localized lighting, and can also provide adjusting options. This means a certain space or work area can be made brighter or darker to suit specific needs.

The purpose of commercial task lighting is to reduce glare and prevent eye strain. This is very important, because both of these can have a harmful impact on employees from headaches and reduced productivity to severe migraines and more. 

The right light fixtures for tasks will depend on the type of work carried out. It can also depend on the average age of your employees, as when people get older they become more sensitive to glare. Regardless, task lighting should generally provide anywhere between 269 to 1076 lumens within a workspace.

Out of the three types of commercial lighting, task light is perhaps the most varied when it comes to fixtures. It can be achieved by overhead sources, as well as desk lamps, floor lamps and more. Recessed and track lighting can also do the job. In order to reduce glare and limit the possibility of shadows, if you’re using lamps, these should be adjustable and angled down .

LED bulbs, as well as halogen ones, are used for task lights, although LED is clearly the better option, because these bulbs don’t get hot even if you’re working for large periods of time. They provide direct, bright light, which is ideal for task completion.

Commercial Electrical Sub Panel Installation: What Do You Need To Know?

electrical sub panel

February 22, 2021 | Cristina Dinulescu

Given the latest technological advancements, more and more businesses are forced to constantly upgrade or completely replace the electrical wiring. Oftentimes, the power needs specific to their equipment surpass the electrical network the business has. Whether you need an electrical sub panel installation or new wiring in both indoor and outdoor spaces, one thing commercial properties need to consider is respecting local and national safety codes and requirements.

Commercial spaces have an even greater responsibility to do everything by the book because the stakes are higher. As a business owner, you are not only responsible for your business, but for your staff as well. You need to ensure a safe workplace and avoid exposing your employees to any risks. 

Because the power requirements of your business diversify and expand through the years, installing an electrical sub panel becomes a valid solution. The sub panel is actually one of the most efficient ways of ensuring that your entire electrical work is up and running, especially if your business is growing fast and you are constantly adding offices or rooms to your building. Plus, the electrical sub panel offers easy access for repairs and maintenance which is an important advantage. 

Electrical Sub Panel Installation: A Job For The Pros 

If you do decide in favor of adding an electrical sub panel, make sure you find licensed electricians with experience in commercial installations, because: 

  • an experienced electrician will provide a proper, professional installation, reducing any potential risks. The more experience they have with the particular type of project you need, the better, so you can always ask about previous work. 
  • a professional electrician will know the safety rules and regulations that apply to your particular commercial project and local codes depending on where your business operates. 

The bottom line is that this installation can be quite complex, especially if your electrical system is complex in itself. Having a sub panel installed can very well interfere with the safety and efficiency of your electrical system. Therefore, the choice of commercial electricians is crucial. They should be able to properly assess your needs and recommend the right size sub panel. 

Commercial Safety Requirements

Owning a business means adhering to existing electrical safety standards. These regulations come in different forms:

  • Local safety codes;
  • National safety codes; 
  • Industry-related safety codes.

The NEC Code

The National Fire Protection Association is responsible for a series of guidelines that represent the National Electric Code (NEC). The NEC code presents a series of recommendations, as they are not laws per se, regarding the installation of electrical components, including electrical panels and sub panels. For instance, the location of the panel box is one of them. 

Even though localities and states are the ones determining the rules, all codes agree on one aspect: the importance of precision. Whether it is an electrical sub panel installation or the wiring of a workshop, it is highly recommended that the electrical work be carried out in a highly precise manner, paying attention to each detail. Keep in mind that any mistake opens up significant electrical risks due to a malfunction of either appliances or systems. 

OSHA Standards 

OSHA (Occupational Safety and Health Administration) is well known for providing workplace safety recommendations, including electrical safety. Among their most important standards are: 

  • Safety for Electricity Generation – this code provides special instructions for those who work in electrical power generation, distribution, and transmission.
  • Personal Protection Equipment – When working on dangerous electrical systems, it is required that adequate electrical protective equipment is worn. 

Installing An Electrical Panel/Sub Panel 

The NEC provides you with several requirements regarding the installation of an electrical panel and sub panel. To ensure safety, these recommendations need to be followed: 

  • Mind the working space: When installing a sub panel, the electrician needs to make sure that it has a minimum of 36 inches of clearance in front of the panel, 78 inches above the floor, and a minimum of 30 inches of clearance across the face of the panel. 
  • Mind the room: You might need to install a sub panel because you’re adding an expansion to your business and you need a separate panel to serve that side of the property. However, in order for the installation to be possible, it;’s essential that you choose a dry location that has easy access. Also, install a sub panel in an area that is not exposed to flammable materials or moisture like a bathroom or swimming pool. The same rule applies to the main panel as well. 
  • Mind the height: According to NEC, the handle of the highest grip should not be higher than 6 feet. 
  • Mind the light: At least one light needs to be present in the room where the sub panel is installed. This way you can see what you are doing in case repairs are necessary. 

Installing a sub panel is not an easy task. It is not enough to have some electrical experience. Your electrician needs to be skillful, precise, and informed. They also need to respect all safety recommendations and be up to date with any changes in the national or local codes. 

The right electrical upgrade can dramatically improve the value and appearance of any home or business. You’ll be amazed at what a difference the right electrical upgrade can make for your home or business. Make sure that when you select an electrical company to do the enhancement of your home and you have decided to take your enhancement to the level where you require an electrical upgrade that the technician at the company has a good working knowledge and the experience to properly guide you in this area.

When you decide to upgrade, our well-trained and certified electricians have all the experience and training needed to complete your electrical panel upgrade project from start to finish, with a minimum of fuss or disturbance. Please contact us right away at 310-800-2401
Electrical Sub Panel Sizes: What Does Your Business Need?

commercial sub panel

February 25, 2021 | Cristina Dinulescu

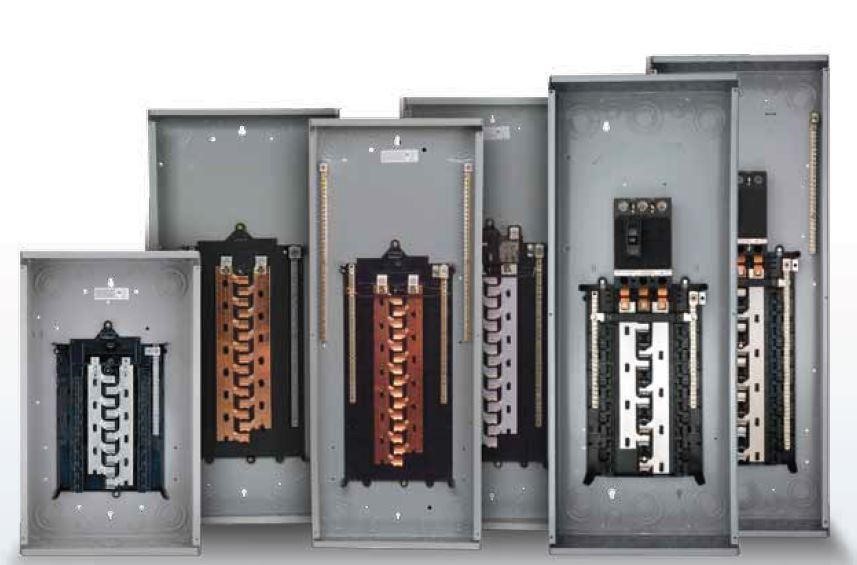
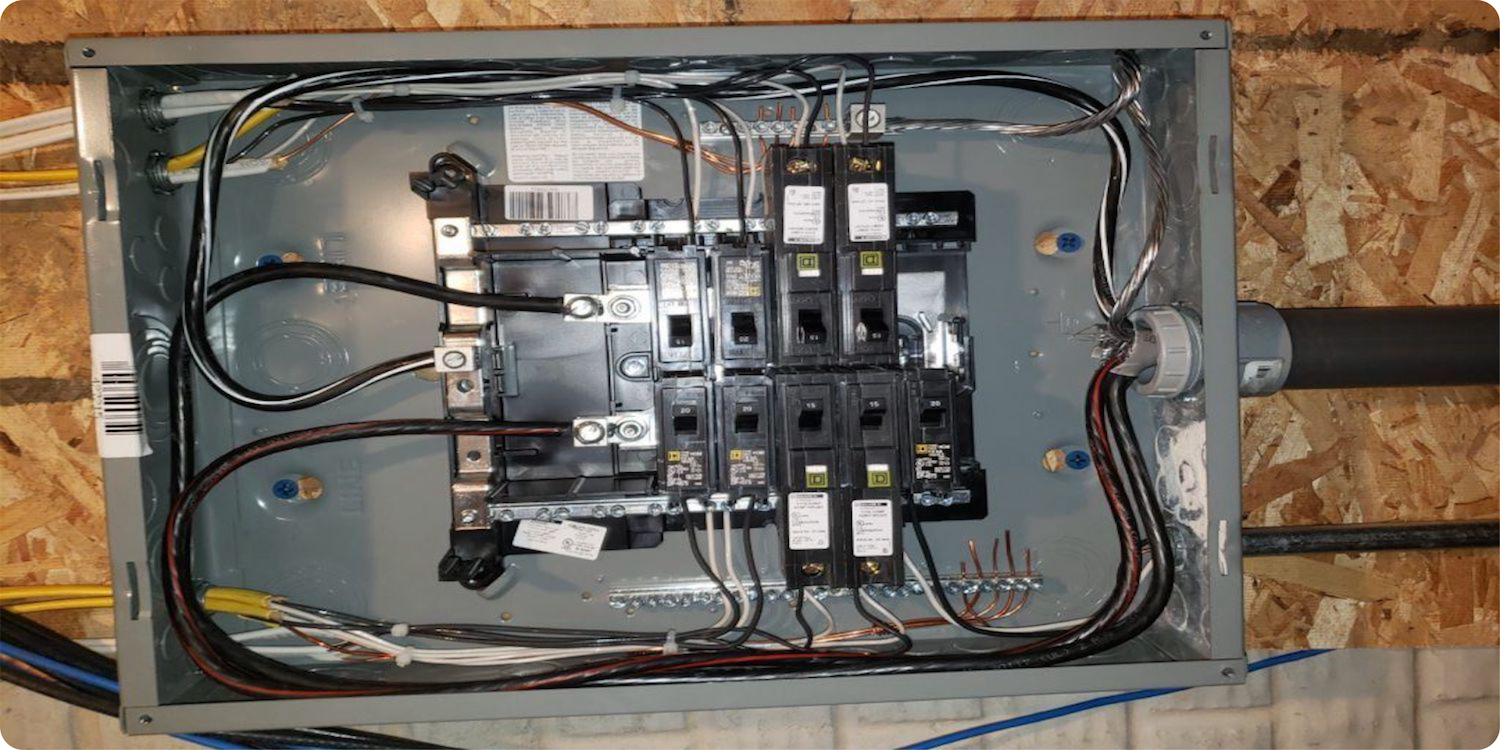
A sub panel is a small electrical panel that feeds off the main panel. It holds circuit breakers that are different from the main panel’s and it usually has 4 to 12 slots. Just like with the main panel, there are several electrical sub panel sizes, so if your business or commercial property needs this addition, then you have to know which size fits your needs best.

There are many similarities between a main panel and a sub panel, they both have the same two hot bars, same neutral bus bars and ground ones. However, the sub panel does not have the main shut off breaker, which can discontinue electricity throughout your entire system. 

Another difference is that, since the sub panel is usually installed to service a certain area of your business, when talking about electrical sub panel sizes, it’s actually the load you need to pay attention to. Determining the safe electrical load for a sub panel requires several calculations. One can find more information on load calculations in Article 220 of the National Electrical Code.

Why Use Sub Panels?

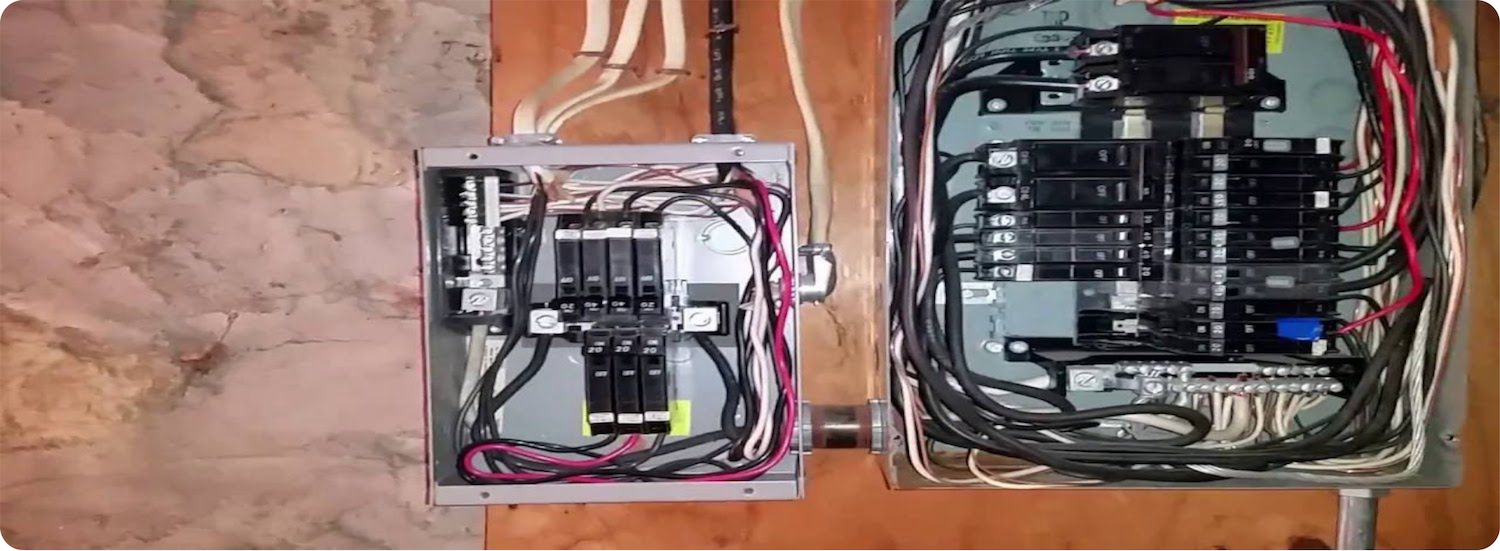
There are two main reasons your electrician could recommend adding a sub panel to the electrical system of your business or commercial property. The first one is there’s no more room to install circuits on the main breaker panel. The second one is to have a control point near the area that the circuit serves. 

In the first case, if the sub panel is not meant to serve a certain area, such as when you expand your business or add extra office space, then it’s generally installed next to the main panel. Since its sole purpose is to have space for more circuit breakers, it simply sits next to the main and connects through a feeder cable from the main panel. 

If the sub panel’s purpose is to serve a dedicated area, then it will be installed as close to the area it serves as possible, and the feeder cable is run from the main panel to the sub panel. This is usually a 3-wire cable, with 3 insulated conductors, and a bare copper ground wire. 

Once the sub panel is installed and connected, it’s ready to take individual circuit breakers for additional circuits. This is great if you’re expanding your office space, adding new equipment or manufacturing lines, anything really that would require a dedicated circuit. Beware though, that the sub panel doesn’t bring additional power, it just helps manage the power from the main panel more efficiently. 

Electrical Sub Panel Sizes & Capacity

As mentioned above, when adding a sub panel to the electrical system of your business or commercial property, you need to take into account your power needs and whether or not the current system can support the load. 

To that extent, there are 2 capacity issues to consider:

  • the sub panel’s amperage capacity;
  • the extra demand created by the sub panel.

Whether it’s serving a different area or it just houses extra breakers for additional circuits, the sub panel must have the right amount of amperage capacity. The electrical sub panel sizes to consider will depend on the application. For instance, smaller equipment, light power tools or lounge area entertainment systems will be adequately served by a small sub panel, ranging from 30 to 60 Amps.

On the other hand, heavy duty equipment, lifts, or entire space expansions will require a bigger sub panel, in the 60 to 100 Amps range. So, the installation can be configured from 30 amps – 240 volts to 100 amps – 240 volts. 

Electrical Sub Panel Load Calculation

As said, there are several calculations required in order to determine the safe gross electrical load for a sub panel. If the sub panel is used to serve a certain area that’s away from the main panel, you’ll need to know the square footage of that area. You’ll also need to know the type of equipment or electrical devices you’ll be powering through the sub panel.

The advantage of load calculations is that not only will they help with the sizing for a sub panel, but also help with finding the correct amperage and the feeder cable size. Here are the three main calculations to take into account.

Load Calculations According to the NEC

When calculating the electrical sub panel sizes and loads, as well as breaker and feeder calculations, electricians must follow the local electrical code. Oftentimes, these local codes are in accordance with the National Electrical Code, or the NEC. This means that they follow the “long form” load calculations. 

The form takes into account the electrical usage, or the wattage, of the equipment, devices or appliances served by your sub panel and sums it up. The total is then divided by 240 and the result is the minimum required amperage capacity. 

Coverage Area Calculations 

As mentioned before, the area that the sub panel is supposed to serve bears great importance in finding the right size. You can start by adding up the total area of the space to which the sub panel will supply power. This is particularly helpful if the additional area is office space, as it is a good way to determine the load of general lighting and circuits for receptacles. The square footage is calculated by multiplying the length of the space by the width. If there are multiple rooms, add up the square footage of all of them to find the serviceable area. Then, multiply that toale by 3 (watts).  

Wattage Calculations 

The equipment, devices or appliances powered by the sub panel have a great deal of impact on load calculations. The type of room also comes into play here. For instance, if you’re adding an office kitchen, then you need to account for small appliances, such as microwave, coffee maker, etc, as well as fastened in place appliances, such as a dishwasher or food disposer. 

All of these require different wattage, and large equipment or a large number of devices will require specified wattage. Once you have the wattage figured out, multiply by 1 if you have less than  4 fixed devices, and by 0.75 if you have 4 or more. In the end, you might need to add 25% of the largest motor load to get the wattage total, in order to meet the extra load that these require when starting up.

The right electrical upgrade can dramatically improve the value and appearance of any home or business. You’ll be amazed at what a difference the right electrical upgrade can make for your home or business. Make sure that when you select an electrical company to do the enhancement of your home and you have decided to take your enhancement to the level where you require an electrical upgrade that the technician at the company has a good working knowledge and the experience to properly guide you in this area.

When you decide to upgrade, our well-trained and certified electricians have all the experience and training needed to complete your electrical panel upgrade project from start to finish, with a minimum of fuss or disturbance. Please contact us right away at 310-800-2401

When Is It Time For A Commercial Electrical Sub Panel Replacement?

electrical sub panel

February 18, 2021 | Cristina Dinulescu

Back  in the day, the electrical needs of a home or business were far different from what they are today. Even though electricity was part of the day to day life, things were less complicated and businesses were not as dependent on technology as they are now. Because appliances and devices came in a smaller number, there was seldom a need for a commercial electrical sub panel

Today, we seem to have lost track of the number of devices used to conduct day to day activities. Using technology is not a bad thing, but it must be done responsibly. When adding equipment, increasing the electrical needs of your business, it is essential that you consider the state of your electrical system. Remember that as a business owner you are bound to respect national and local electrical safety codes and requirements. You need to ensure your employees have a safe working environment.

So, when adding extra lighting, appliances or computers, call a commercial electrician first and have them check the state of your electrical system. They will be able to tell you if your system can handle the extra load or if you need a sub panel. If you already have one, a thorough inspection will determine if it requires an upgrade or if you need to replace your electrical sub panel altogether. 

What Is A Commercial Electrical Sub Panel? 

commercial electrical sub panel

An electrical sub panel represents the waypoint between the branch circuits and the main service panel. Basically, it’s a mini service panel, separating electrical functions. Using one over the main panel offers your electrical system greater flexibility. 

A sub panel is an excellent addition to any business, considering that your power needs may grow rapidly. A sub-panel offers you the possibility to add supplementary circuits whenever you need them, without putting your business on hold. Plus, sub panels make it easier, to some extent, to ensure safety. In the event of a sub panel fire, you can isolate the area by switching it off and thus preventing the spread, as well as further damage. 

There are a few things to note when it come to a commercial sub panel installation: 

  • When installing an electrical sub panel, you are not adding more power to your office. The sub panel is creating a more efficient and simple to manage electric service running from your main panel to areas of your office. 
  • If there isn’t enough room for extra circuits within the main panel, an electric sub panel is the right solution, because it allows new circuit breakers to be installed in a different physical location. 
  • A sub panel simplifies the electrical service in your office by better distributing power in different areas of your building. 

Signs Of A Defective Commercial Sub Panel 

commercial electrician working on a sub panel

Commercial electrical sub panels are what you’d call heavy duty, but they don’t last forever either. When the electrical system is put under a lot of pressure, the panel will start showing signs of deterioration or even malfunction. Some of these signs are noticeable even by the untrained eye, so here are a few things to pay attention to. 

The sub panel has rusted components.

Rusted components are never a good sign, no matter where you find them. In the case of a commercial sub panel, rust is usually a sign that moisture has somehow managed to get inside of it. Even though there may be different reasons for rust to appear, it’s definitely a sign you want to pay attention to. 

Water and electricity don’t go well together, therefore water inside the sub panel, where a high amount of electric current goes through, is worrisome. This may cause the sub panel to stop functioning properly and exposes your business to an increased fire risk. 

Burn smell is coming from the subpanel. 

In case you notice a distinct smell coming from the sub panel, more specifically a burning smell, you need to act fast. Burn or charring marks are also an indication that something is wrong. 

Don’t wait to contact a commercial electrician and have the sub panel inspected and most likely replaced immediately. Your business and your staff are exposed to a high fire risk. 

Lights are dimming or flickering.

If you’ve noticed that lately the lights have started to flicker or they’re dimming, then this is also not something to ignore. Call a professional electrician as this is usually a sign that power isn’t managed properly. Flickering lights are often an indication that a circuit is overloaded. 

Replacing the electrical sub panel may be required in this situation. A new, up to code panel can be installed and wired to distribute the energy better and more efficiently. 

Installing The Sub Panel

Replacing the electrical sub panel can turn out to be a costly endeavor, so thinking about ways to cut down costs is understandable. You might even think to install the sub panel on your own instead of hiring a team of professionals. However, the electrical sub panel installation is not a simple task and when it is not done properly, it can expose you to significant dangers. 

Not only do you need a professional for this job, but you should also make sure to hire a commercial electrician that’s licensed and bonded. Installations done by a non-professional could expose your business to shocks, electrical hazards, or worse. In addition, failing to comply with national and local codes could have serious consequences. 

If you need to replace your electrical sub panel or are in need of a team of professionals for maintenance, installation, or verification, you can count on us. Penna Electric will help with any electrical work, commercial or residential, you might require. 

The right electrical upgrade can dramatically improve the value and appearance of any home or business. You’ll be amazed at what a difference the right electrical upgrade can make for your home or business. Make sure that when you select an electrical company to do the enhancement of your home and you have decided to take your enhancement to the level where you require an electrical upgrade that the technician at the company has a good working knowledge and the experience to properly guide you in this area.

When you decide to upgrade, our well-trained and certified electricians have all the experience and training needed to complete your electrical panel upgrade project from start to finish, with a minimum of fuss or disturbance. Please contact us right away at 310-800-2401
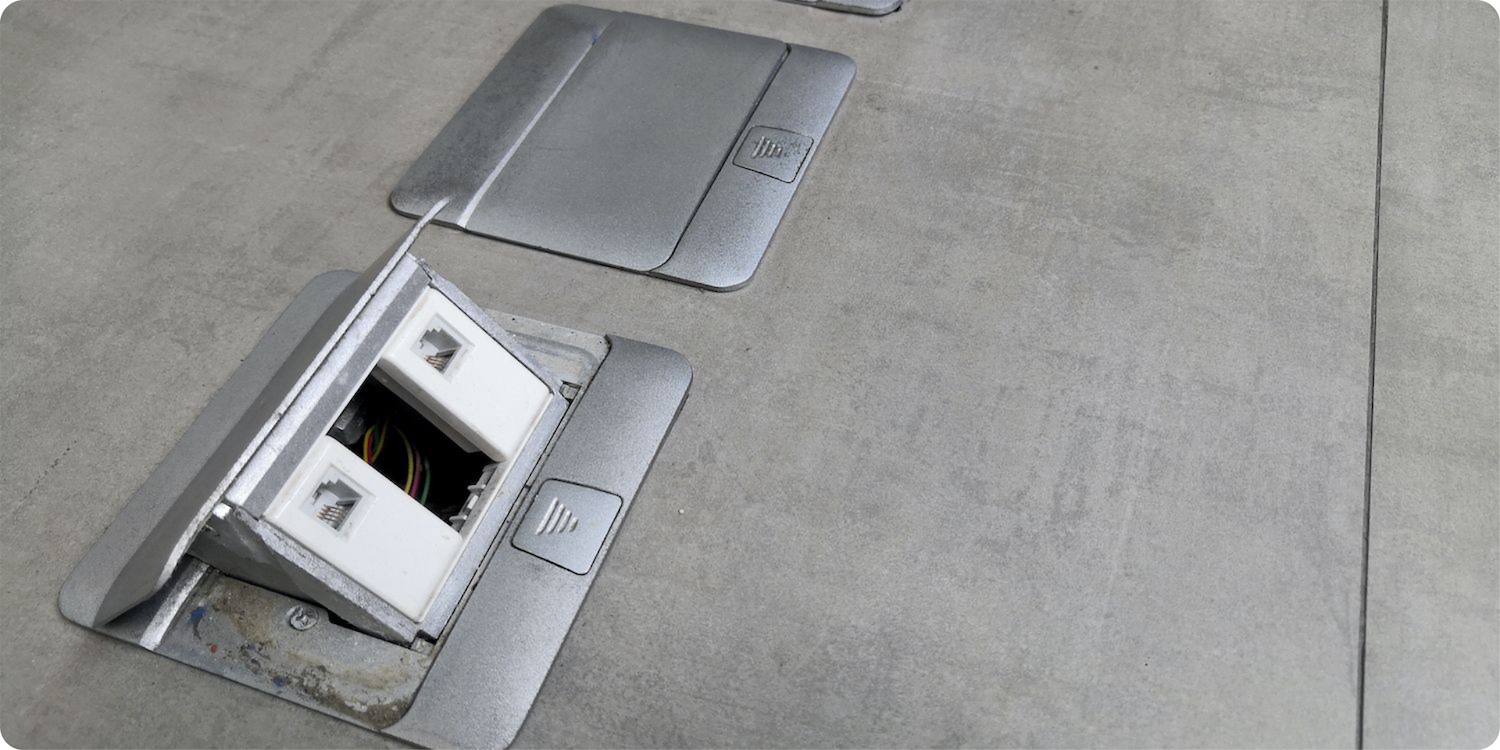
4 Reasons Why Investing In Commercial Electrical Panel Upgrades Is Good For Business

February 8th, 2021 | Cristina Dinulescu

Running a business is certainly no easy task. From finances to labor to marketing, all aspects are important in a business and operations are no exception. Business ops start first and foremost with facilities and electricity is a crucial part. Investing in the electrical system of your business, such as upgrading your commercial electrical panel, may seem expensive, but, in the long-term, it always pays off.

There are multiple requirements when it comes to the installation or upgrade of a commercial electrical panel, as well as any electrical equipment, lighting accessories or wiring systems contained within offices, as per Article 605 of the National Electrical Code. If you have a proactive attitude and make sure your electrical system is working just fine, you will make sure to comply with all requirements and avoid major problems, which can not only interrupt your daily activity, but can also cause financial loss. 

Why Is The Commercial Electrical Panel Important?

commercial electrical panels

The electrical panel has the same role in a commercial space as it does in a residential one. It is the point where power delivered from the utility company reaches your property. To make sure that electricity is efficiently used, the electrical panel must be inspected to ensure that it functions properly. However, the inspection could reveal that the electrical panel needs an upgrade. There are several signs that an upgrade is in fact necessary, some of which you might even notice yourself: 

  • the circuit breakers are tripping – if you notice that the circuit breakers are tripping often, it means that the electric panel is no longer up to the task. Your business needs may have exceeded its power. 
  • the commercial electrical panel is always hot – if the electric panel cannot handle your requirements, excess heat will build up and your wiring’s insulation will melt.
  • too many extension cords – having too many extension cords in your commercial space can overload the circuit, causing the breakers to trip. 
  • obvious signs of deterioration – if you notice rust or corrosion on the exterior of your electric panel, those are sure signs it needs replacing.

Why Is An Electric Panel Upgrade Good For Business?

Upgrading the electrical panel may be a costly endeavor and you might even perceive it as a strain on your budget, but it is an investment worth making. And here are 4 reasons why upgrading the commercial electric panel is in fact good for business. 

1. It Reduces The Risk Of Fire 

According to the U.S. fire administration, in 2018, there were 1,318,500 fires in the United State. Electrical malfunctions caused 7.8 % of non-residential fires. As a business owner, you are obligated to ensure the safety of both your staff and your products. Reducing fire risk needs to be a top priority. 

Upgrading an old electric panel is one of the measures you can take to ensure safety. Your staff may be using a large number of appliances and devices. These all operate on electricity, putting a strain on the electric panel. If it is old, the overheating risk is high. 

By deciding to invest in an electrical panel upgrade, you could reduce the fire risk considerably and ensure a safe environment for your employees. Additionally, in case of a fire, your commercial space could be significantly affected. The financial losses could be far greater than the investment made in an electrical panel upgrade. 

2. It Reduces Insurance Costs 

When upgrading the commercial electrical panel, you are reducing risks. Your business is safer and the risk of something happening is significantly lower, and this may qualify you for a discount. 

Insurance companies sometimes take into account behavior as well. When you make smart investments in your commercial property and run a safe environment, you are no longer perceived as a high risk. This could mean lower premiums and monthly payments.  

3. It Makes Your Business Technology-Friendly 

digital breakers for commercial electrical panel

Technology is now a big part of our lives. There are plenty of appliances and devices created to make life simpler. Small or big, all businesses make use of technology. Whether it’s computers, printers, monitors, refrigerators, copiers, it’s clear that your commercial electrical panel needs to handle greater power requirements. 

The average panel may no longer be equipped to handle your requirements. Plus, you may discover that having a business that runs on a smaller panel may not be up to code. This can cause many issues with both insurance companies and inspections. 

Upgrading the electric panel would not only allow you to properly power your technology without damaging the electrical system, but it also lets you plan ahead, for future technology investments or expansion of your business.

4. It Improves Your Lighting System 

office lighting supported by commercial electrical panel

Flickering or buzzing lights are not only signs that your electrical panel needs attention, but they are also annoying for your customers. It’s definitely something that requires immediate attention, whether your operating an office, a store, a warehouse or any commercial property.

Your lighting system relies heavily on your commercial electrical panel, and lighting is a crucial aspect when it comes to business operations. For offices, it’s essential for the well-being of your employees and your business productivity. For stores and commercial establishments, it is crucial to your presentation and customer perception. For warehouses, on the other hand, it plays an important role not just in productivity, but also safety. 

Work With Qualified Electricians

It is important to contact a team of qualified commercial electricians to upgrade the panel or panels in your business. This is not something you want to do on your own or even hire electricians who don’t have commercial experience. 

An important step is to plan your electrical panel upgrade. Make a list of all the devices and appliances your business is using and think about the changes you want to make. Make sure to include the lighting as well. Provide the electrician with these details, as these will help understand your business’ electrical load. 

The electrician might decide to install a sub panel if the wiring is in good condition and the electric panel is providing sufficient power. If this is not the case then upgrading the panel may be the only available solution. 

The right electrical upgrade can dramatically improve the value and appearance of any home or business. You’ll be amazed at what a difference the right electrical upgrade can make for your home or business. Make sure that when you select an electrical company to do the enhancement of your home and you have decided to take your enhancement to the level where you require an electrical upgrade that the technician at the company has a good working knowledge and the experience to properly guide you in this area.

When you decide to upgrade, our well-trained and certified electricians have all the experience and training needed to complete your electrical panel upgrade project from start to finish, with a minimum of fuss or disturbance. Please contact us right away at 310-800-2401
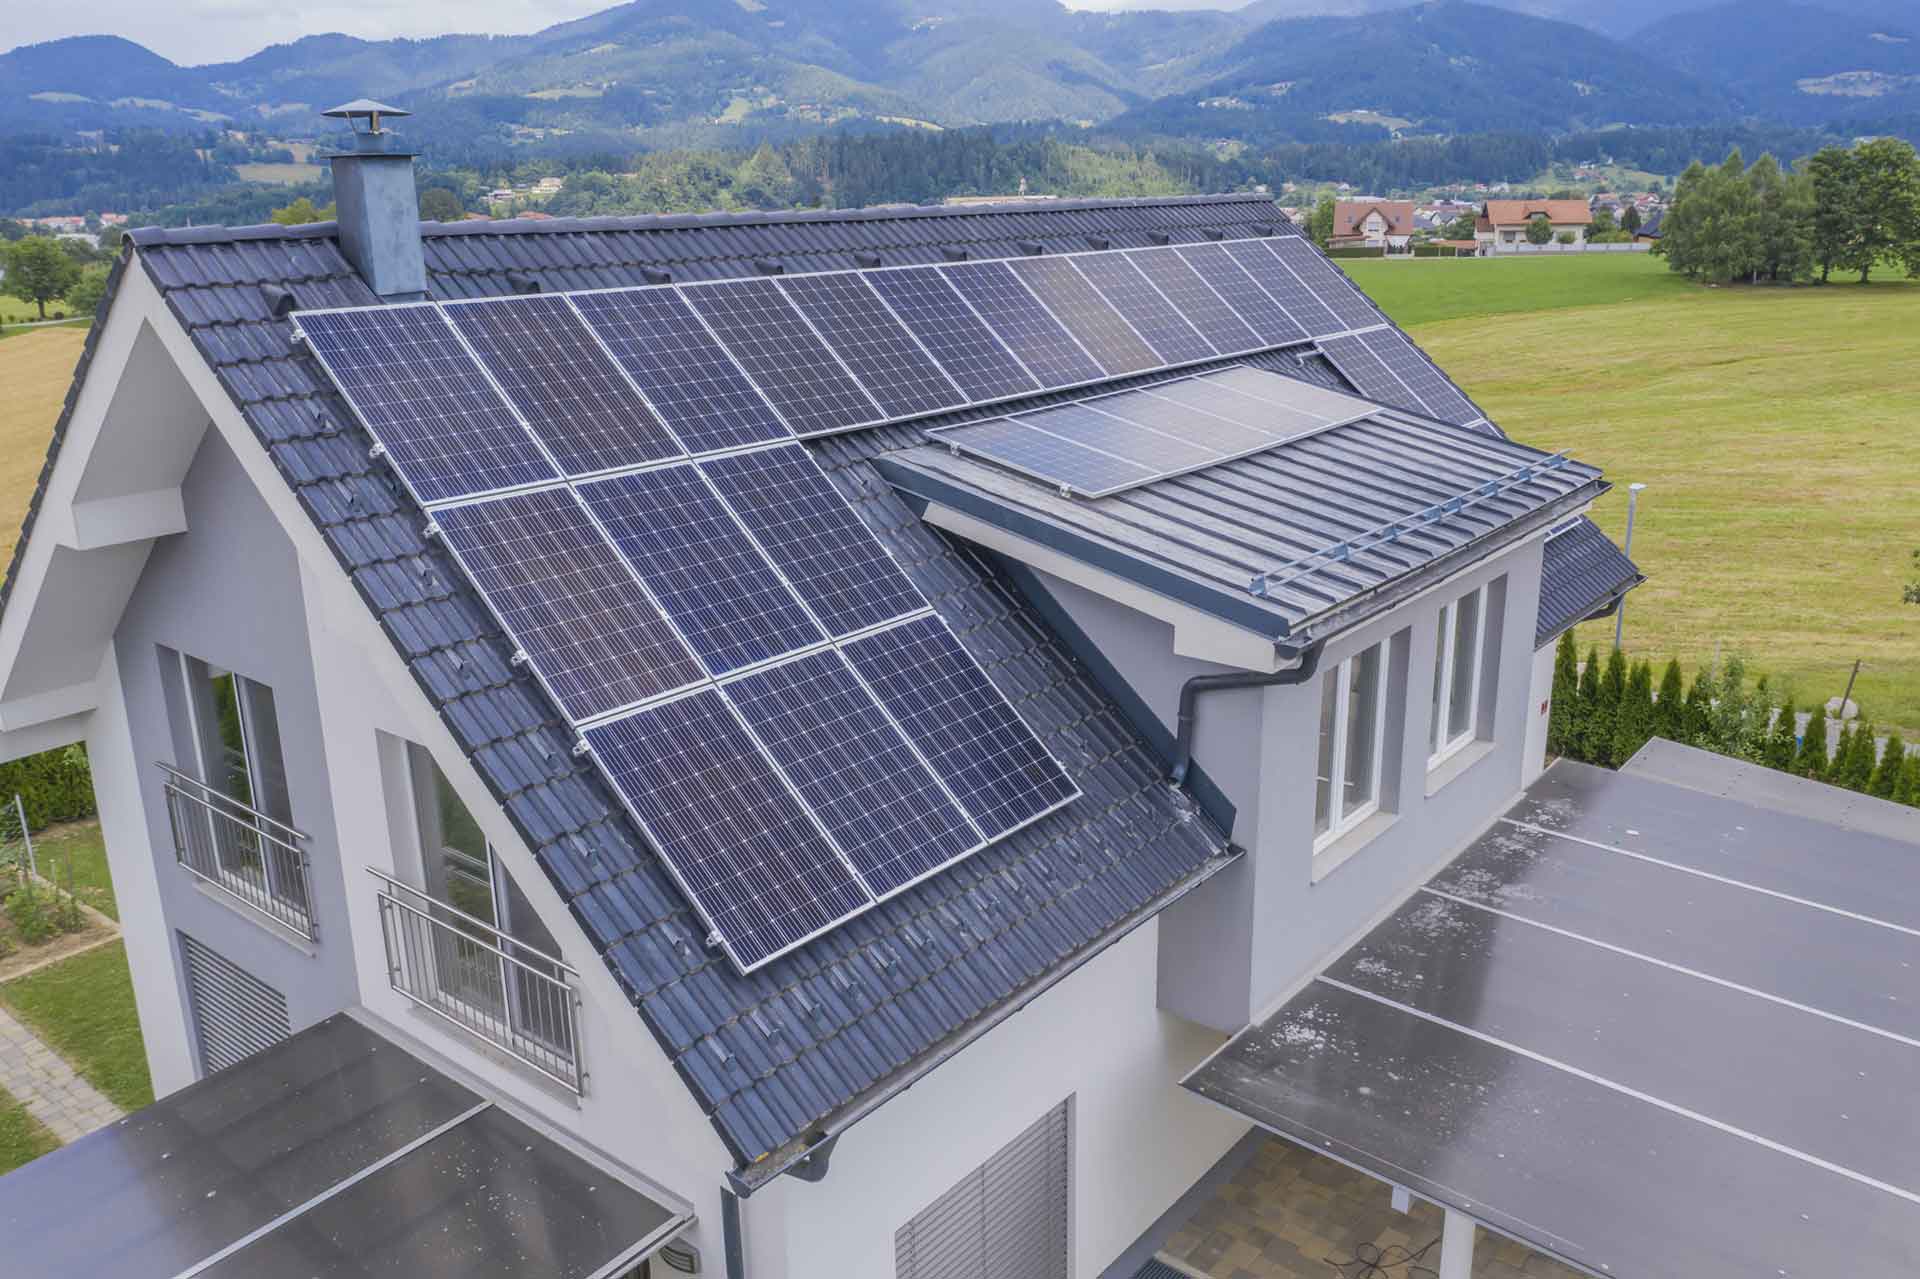
5 Signs Your Commercial Electrical Panel Needs An Upgrade

January 29, 2021 | Cristina Dinulescu

There comes a time when upgrading your commercial electrical panel or the circuit breakers, lighting and other electrical components becomes a necessity in a commercial property. The age and size of your building are not necessarily the defining factors here. Upgrading electrical components could very well be triggered by the need to save on energy costs or enhance workplace safety. The truth is that making different upgrades like replacing your commercial electrical panel can lead to significant improvements.

Just like in a residence, in a commercial building the electrical panel is the point where power from the utility provider reaches your property. In order to ensure that electricity is efficiently used, upgrading the electrical panel is sometimes necessary. It’s true that you can repair an outdated or faulty commercial electrical panel, but in the end, a full upgrade may be needed. Additionally, you always want to think about electrical safety in a commercial building.

As the panels age and the power required by a business changes, they become out-of-date. But just to be sure you are not rushing into anything, here are a few signs that an upgrade is necessary that you should be aware of. 

1. Your Workers Are Constantly Tripping Circuit Breakers

commercial electrical panel breakers

Probably the most obvious and common sign that your electrical system is having some technical issues and may need replacing is the fact that your circuit breakers trip. You’ve just arrived at the office, turned on the desk lights, and are getting ready to start the day by preparing a coffee in the cafeteria area. Just as you hit the coffee maker, everything shuts off. This is a clear sign that the individual circuit powering your office isn’t exactly up to the task. 

The most obvious solution to this particular issue appears to be replacing the circuit breaker, which is supplying your cafeteria area, with one that has a greater capacity. However, this may create difficulties if the wiring supplying the area is not fit to handle that load. 

If you are having problems with your circuit breakers, the best thing you could possibly do is contact a qualified electrician or contractor to learn about all your options. You might discover that changing the circuit breaker is enough, but you might need to install an additional circuit or upgrade the wiring. 

2. Your Commercial Electrical Panel Is Hot

If you notice that the panel is hot, or that one of your light switches or electrical outlets is unexpectedly warm when touching it, you might be facing a serious problem. When your electrical system is adequately designed and maintained, hot panels, receptacles or light switches are not common occurrences. You should contact an electrician as soon as possible and have them verify your electrical wiring. 

If your panel cannot handle the power requirements of your operations, it’s very likely that the excess heat will build up and your wiring’s insulation will melt. This can create sparks which can lead to a fire. 

Plus, if the individual circuit breakers aren’t fit to fulfill your business needs, they will most likely trip and shut the power off just when you need it. This is clearly a huge inconvenience, not to mention dangerous, as you are exposed to a significant fire risk. 

3. You’re Using Too Many Extension Cords

office extension cords

We’re all familiar with the jumble of cables under the desk. Sometimes extension cords make their way in conference rooms, hallways, break rooms and more, which means employees need to be cautious when walking around the office so they don’t trip. This is far from ideal. If you notice that you’re relying too heavily on extension cords, power strips, or multi-outlet power taps to plug in your devices, then you’re having a real problem. 

These are not only a messy solution, but they also increase the risk of overloading the circuit. In return, this could cause breakers to trip and the wiring to be overloaded. You need to consult with an electrician and ask them to add extra outlets in those areas that are heavily used. You might also consider upgrading the wiring and even the commercial electrical panel. 

4. Rust or Corrosion on Your Commercial Electrical Panel

If you’re experiencing any of the common signs mentioned above, then you should also check for signs of deterioration on the panel, like rust or corrosion. In an electrical connection, these create extra resistance to the electricity flow and consequently they create heat. In severe cases, excess heating and electrical arcing can occur inside the panel and both of these issues are fire hazards. 

If a panel is rusted on the outside, the electrician will also investigate the interior of the panel. Rust and corrosion are definitely red flags. If you notice any of these signs on the lugs, busbars, breakers, or wiring, you need to contact an electrician and have the panel checked. Corroded breakers: 

  • may fail to trip;
  • may be slow to trip;
  • may not come out with excessive force.

So, corrosion may cause the component not to operate adequately. Some may no longer function at all due to corrosion. 

5. Lights Are Flickering

office lights flickering

Another sign that could indicate potential issues with your business’ electrical system are flickering and dimming lights. To understand the type of problem you are faced with, you will have to categorize the behavior: 

  • When the load on the circuit is increased, your lights dim. If the lights in the cafeteria area dim when you turn on the coffee maker or if the lights in the office dim momentarily when you turn on different devices, it’s an indication that the wiring in that particular space cannot handle your demands. This can lead to overheating the wiring or the receptacles, which is of course a serious issue. 
  • A random flickering in your lights is yet another sign you should be aware of. First, you should pay attention to whether the flickering occurs with one or numerous lights. If the problem is limited to one light, then that wiring, in particular, is the problem. If there are numerous lights involved, then you might have a more complex problem. 

In any case, you need to pay attention to dimming or flickering lights. Consult a qualified electrician or contractor and have the panel and wiring checked. 

The right electrical upgrade can dramatically improve the value and appearance of any home or business. You’ll be amazed at what a difference the right electrical upgrade can make for your home or business. Make sure that when you select an electrical company to do the enhancement of your home and you have decided to take your enhancement to the level where you require an electrical upgrade that the technician at the company has a good working knowledge and the experience to properly guide you in this area.

When you decide to upgrade, our well-trained and certified electricians have all the experience and training needed to complete your electrical panel upgrade project from start to finish, with a minimum of fuss or disturbance. Please contact us right away at 310-800-2401

Power Outage vs. Power Surge: Differences You Need To Know

January 22, 2021 | Cristina Dinulescu

We are using more electricity today than ever before, having all sorts of devices and appliances at our disposal. However, even though modern electrical grids are very good at supplying power in a safe and even manner, there are still plenty of ways your electronics can be seriously affected, like a power surge or outage. Although they both pose a danger to your home’s electrical system, a power outage and a surge are not the same, and it’s important to know the difference between them. This will help you know what to do in case of a power outage, as well as what steps to take if a surge occurs.

The differences between an outage and a power surge are important not solely based on the steps you take, but also in terms of how they affect appliances. Check out below the main distinctions between the two and how to to react to each.

Power Outage vs. Power Surge: Definitions

power outage vs surge

A power outage is the loss of power usually caused by a problem with either your power infrastructure or supply. The majority of power outages will be over as soon as they begin. However, some might last longer, up to days or weeks. Freezing rain, high winds, and sleet storms can damage power lines and equipment and cause outages. During a power outage, you could find yourself left without lighting, heating/air conditioning, hot water, even running water. Plus, if you do not own a crank or battery-powered radio, you might not be able to monitor the news. 

A power surge, on the other hand, is different. It is a very fast, intense power spike in your home’s electrical current. Usually, a wall outlet supplies  120 volts AC power. Most home gadgets and appliances use around this much power, even though there may be level fluctuations between  0-169 volts.

When a surge enters your home’s electrical current, the voltage supplied spikes considerably above the safe limit. As you can imagine, home appliances aren’t built to tolerate that much power and that is why power surges can be dangerous and damaging. 

Lighting is one of the causes people tend to associate the most with a power surge, but it’s only one of multiple possible causes. When lightning strikes close to a power line, its energy discharge can increase the line’s electrical pressure by millions of volts. That boost travels through the power line into your home and your appliances are instantly damaged. 

It is true that lightning is one of the causes of power surges, but it is among the rarest. Surges are a bit more day-to-day. Power-hungry appliances like the refrigerator or the air conditioner need a lot of power to function. When these request power, a spike can appear. Even though these “switching surges” aren’t that severe as lightning ones, they can still cause damage. And, last but not least, your electric company could be responsible for a power surge, accidentally during maintenance or operation. 

Power Outage vs. Power Surge: How Do They Affect You?

With most modern devices, a power outage can cause problems associated with power loss, which can lead to data loss. If you own an older computer, which is not as stable as a modern one, a sudden power loss can lead to data corruption or other performance issues. However, generally speaking, power outages will not cause hardware damage unless they are followed by a power surge. 

In the case of power surges, things are a bit different, as they may have serious consequences. Surges can destroy plugged-in devices. The device can overheat, break down, or even ignite when too much electricity flows through it at once. 

However, the power will escape, forming an arc of electricity with the device. This generates heat, causing the components of the appliance to melt or erode and in the end, a fire could occur. 

Power Outage vs. Power Surge: What Can You Do?

what do in a power outage

A power outage is more likely to be announced, as opposed to a power surge. So, you have time to prepare for outages. Even though there isn’t a lot you can do in case of a power outage, you can do the following:

  • Make sure to back-up your data: one of the immediate risks during a power outage is the loss of data. To prevent information from being lost in the event of a storage drive failure, you can use some form of backup system. 
  • Disconnect your equipment: if you notice that there is something contributing to an inconsistent power supply at either your home or office like power outages, electrical storms, or brown-outs, which keep on appearing, then a good idea would be to simply unplug computers or sensitive electronics. 
  • Contact your power company: if a power outage takes place at home or at the office which is in no way related to the payment of your electricity bill, make sure to call the utility company for your area. The power company maintains the poles, the lines and the meters which bring the electricity to your home. 

When it comes to power surges, there are also steps you can take to protect your appliances and devices:

  • Surge Protector: the simplest way you can protect your home against a power surge is by using a surge protector. These come in the form of power strips. They have one input to be plugged into the wall, and several outlets to plug other devices into. What separates a power strip from a surge protector is that protectors absorb excess energy that is running through them. When a surge takes place, the protector redirects the excess voltage to the grounding wire to neutralize it. 
  • Hard-Wired Surge Breakers: this type of whole house surge protector is wired in line and installed either next to the main panel or in your main electrical panel. These are more effective than the power strip kind, as they keep excess current from reaching the circuit.
  • UPS Devices: UPS (short for uninterrupted power source) devices are perceived as a more complex solution for protecting sensitive electronics or computers against all levels of power surges, oscillation, interference, slumps, and other similar problems. There are several available options, depending on the demands of the application. Because of the high cost of UPS devices and their complex nature, they are used on a larger scale. However, they make one of the best options when used together with battery banks and generators for stabilizing voltage.
  • Reach out to your electrician: In case you need help with any electrical problem caused by a surge, contact your electrician. Only an expert can adequately diagnose the problem and fix it.  

The right electrical upgrade can dramatically improve the value and appearance of any home or business. You’ll be amazed at what a difference the right electrical upgrade can make for your home or business. Make sure that when you select an electrical company to do the enhancement of your home and you have decided to take your enhancement to the level where you require an electrical upgrade that the technician at the company has a good working knowledge and the experience to properly guide you in this area.

When you decide to upgrade, our well-trained and certified electricians have all the experience and training needed to complete your electrical panel upgrade project from start to finish, with a minimum of fuss or disturbance. Please contact us right away at 310-800-2401
What To Do In A Power Outage? 7 Dos and Don’ts

January 8, 2021 | Cristina Dinulescu

Power outages can be quite troublesome, but when they happen suddenly, they can also be extremely frustrating. If the power outage is 2 hours or even less, the impact may not be very significant. Your perishable foods, for instance, will be fine. However, for longer ones, you might want to learn what to do in a power outage in order to minimize losses as much as possible and keep everyone in the household comfortable.

Severe power outages can have a serious impact on the entire community and even the economy. Basically, a power outage is when the electricity goes out completely unexpectedly, which is why it can: 

  • Interrupt communications, transportation, and water. 
  • Close gas stations, ATMs banks, groceries, retail businesses, and other services. 
  • Limit the use of medical devices. 
  • Cause water contamination and food spoilage. 

The length of the interruptions in electricity service, as well as the frequency of these outages vary across the several distribution systems that serve about 145 million customers in the United States. 

The truth is that a local power outage can be a terrifying experience. Everything changes instantly. One minute, you are watching TV or casually enjoying dinner and the next, your entire home is completely silent and pitch black. You might be aware of what to do in a power outage, but do you know what not to do? Unfortunately, some myths of steps to take during an outage can be quite dangerous. So, here’s a list of things you should do and things you should never do during a power outage. 

1. Do Prepare in Advance

power outage preparedness

For power outages that are sudden, making advanced preparations is close to impossible. For those that can be predicted, you can certainly start prepping in advance and assemble your very own emergency preparedness kit. Make sure you keep your supplies within easy reach and that you can also take with you in case of evacuation. Here are some of the basic supplies you should have in your kit: 

  • Food: easy-to-prepare, non-perishable (make sure you pack a 3-day supply in case of evacuation and a 2-week supply for home); 
  • Water
  • Hand-crank (NOAA Weather Radio is ideal) or battery powered radio;
  • Extra batteries;
  • Flashlight; 
  • Multi-purpose tools;
  • Extra cash;
  • Cell phone with chargers; 
  • Deluxe family first aid kit;
  • Medications (7-day supply), plus any medical items if applicable;
  • Sanitation and personal hygiene items;
  • Emergency blanket;
  • Copies of personal documents; 
  • Family and emergency contact information.

2. Don’t Light Candles

Candles may be romantic and may help you set a certain atmosphere, but they’re definitely not what to do in a power outage. They are dangerous, as they may cause a fire. What’s more, they don’t produce that much light anyway. So, sticking to a bright lantern is a much better solution. 

Don’t forget that a power outage can affect your home security system as well. If that’s the case, you should consider alternative lighting solutions for your property too. 

3. Do Keep Food From Spoiling

power outage food tips

To keep our food from spoiling, you may need to keep freezers and refrigerators closed. Your fridge will keep the food cold for about 4 hours and a freezer will maintain the temperature for about 48 hours. 

Additionally, you might want to consider using extra coolers. Packed with ice, these can keep the food colder for a longer period. A digital quick-response thermometer is also useful because this way you can monitor the temperature and make sure that it’s cold enough for your food to be properly preserved. 

4. Don’t Keep Electronics Plugged In

Before the storm hits, you should unplug all your electronics. A lightning strike could cause significant damage to your equipment. However, it’s best to unplug your electronics all-around your house, because this offers protection, especially when you can’t see the storm coming. 

In these cases, a good idea to keep your equipment safe is installing a surge protector breaker, which is usually hard-wired to your electric panel. Some people use surge-protected power strips for sensitive electronics, but a whole-house protector is a much better solution. 

5. Do Pay Attention To Carbon Monoxide

Carbon monoxide poisoning is a real risk during a local power outage, and you should know how to avoid it. One way is to make sure you use generators, charcoal grills or camp stoves outdoors and 20 feet away from windows. Avoid using an oven or a gas stovetop to heat your home. 

If you do have a generator, make sure you install carbon monoxide alarms outside sleeping areas and on every level of your home. This way, in case something goes wrong, the alarm will go off and warn you. 

6. Don’t Play On Your Phone

While this isn’t a tip you’ll often find when searching what to do in a power outage, it is important to avoid playing on your phone, no matter how appealing it may seem. When you’re sitting in the dark, with no electricity and nothing to do, your smartphone does seem like the only way to make time go faster. However, you should avoid doing it, as you don’t know how long the power outage will be. The last thing you want is for your phone to die and you not being able to make important calls, such as to emergency services

7. Do Stay Safe After The Power Outage

power outage

Once the local power outage passes, it’s important to still be aware of some safety guidelines. If you aren’t exactly sure that the food left in the refrigerator is still good to be consumed, you might be better off throwing it away. Dispose of any food that has been exposed to temperatures of 40 degrees or higher, for a period of two hours or more. 

When it comes to refrigerated medicine, you need to dispose of anything that has been out for more than a day. Make sure you check the label for more information. And consult with either the doctor or the pharmacist for a new supply. 

The right electrical upgrade can dramatically improve the value and appearance of any home or business. You’ll be amazed at what a difference the right electrical upgrade can make for your home or business. Make sure that when you select an electrical company to do the enhancement of your home and you have decided to take your enhancement to the level where you require an electrical upgrade that the technician at the company has a good working knowledge and the experience to properly guide you in this area.

When you decide to upgrade, our well-trained and certified electricians have all the experience and training needed to complete your electrical panel upgrade project from start to finish, with a minimum of fuss or disturbance. Please contact us right away at 310-800-2401

5 Energy Saving Tips For New Homeowners

January 4, 2021 | Cristina Dinulescu

There are several things to consider when purchasing a new home. However, people admit they aren’t giving much thought to the level of comfort in their homes during the colder seasons.  A lot of properties are purchased during the summer so comfort in the cold seasons isn’t exactly a priority. In fact, the period from May to July accounts for more than 40% of annual home sales.

When it comes to expenses though, everyone cares about the energy bill. It’s only natural, and it’s why people are always looking for energy saving tips. Energy efficiency is highly important to all homeowners, especially new owners. So, when investing in a property, it is very important for homeowners to consider several aspects like energy-efficient appliances or solid roofing. However, during the colder seasons, like fall or winter, comfort, in addition to efficiency, becomes increasingly important. 

It is during this time that people start noticing things like a cold draft, high heating bills, the difference in temperature between floors, and so on. Each home requires different considerations, especially when making preparations for the cold season. It’s true that making big improvements right after moving in can be quite difficult, especially from a budget perspective. But, you can make small energy-saving changes, which are not that costly and can make your home a lot more comfortable. 

1. Seal Air Leaks With Caulk

hand sealing air leaks to save energy

Cold drafts in your home, together with some of the crown molding trim are clear signs that you need to look for air leaks. Once you identify them, you should seal them with caulk. This is a simple and effective solution that can bring about other benefits too. It’s important to limit the amount of air that leaks in and out of your house because this is how you can cut down on your heating and cooling expenses, increase the level of comfort in your home, improve durability and create a healthier indoor environment. The caulking method is a simple and effective way to seal the air leaks, offering you a fast return on investment. 

2. Weatherstrip Windows That Leak Air

weatherstrip windows to save energy

Another method for you to stop air leaks, that is just as simple and effective as caulking, is weatherstripping. This technique can be used in your home to stop air leaks around doors or operable windows. Plus, window weatherstripping can be easily found at your local hardware store and you can install yourself, which of course is a huge advantage.

Weatherstripping is a viable solution for movable building components. However, for stationary ones, it would be better to use caulks for filling cracks and gaps. Before applying weatherstripping, make sure you first detect the air leaks and take the time to assess your ventilation. 

Use weatherstripping that can withstand weather, temperature changes, friction, and wear and tear associated with its location. When applied on a threshold, it can erode the carpet due to foot traffic. Also, when applying it in a window sash, you need to accommodate the sliding of panels. 

3. Use Foam Sealant On Larger Gaps 

hand using foam sealant to save energy

Foam sealant is a highly effective solution for sealing gaps that are large and allow air to leak out. Usually, the attic is accessible through the upper floor’s ceiling. And this is usually where a significant amount of heat is lost, through the access panel. In order to fix it, you can use a foam sealant to seal the gaps around the panel. Another idea would be to install an insulating cover box, located on your attic access stairs. 

Installing an insulating cover box and sealing gaps in the opening can both increase comfort and save energy and money. The attic stairs cover box should: 

  • offer an air seal.
  • have an R-value similar to the rest of the attic insulation
  • be durable enough to endure repeated openings and closings

4. Cover Drafty Windows

window coverings that save energy

To improve the comfort level in your home, as well as lower your heating and cooling bills, window coverings are definitely a solution, as they can reduce energy loss. It’s a fact that about 30% of a home’s heating energy is lost through windows. So, investing in curtains and blinds is also something you might want to consider. In cold seasons, around 6% of the sunlight that falls on standard double-pane windows enters the house and becomes heat. 

It is true that window treatments in general result in energy savings. However, the amount of savings depends on the climate, season, and how the attachment is used. Additionally, storm windows with low e-coatings are effective when it comes to improving the thermal performance of windows. 

5. Install Foam Gaskets

When checking your home, you might discover that your walls aren’t adequately insulated. If this is the case, you should consider installing foam gaskets behind outlets, together with switch pallets. Later on, you should however consider adding more insulation. But, for the time being, adding foam gaskets around electrical outlets is a low-cost solution, and it provides protection from air leaks. 

Covering your floors with carpets and using padded rug backings is definitely something you should consider. This quick solution can also keep out the cold. 

While all these tips can have a positive effect on the level of comfort in your home, as well as lower your bills, you should definitely consider conducting a home energy audit to figure out where you can save more energy. Plus, an energy audit can show you where large investments can be made, leading to further energy savings.

5 Reasons To Consider LED Light Installation For Your Home

December 21, 2020 | Cristina Dinulescu

Working from home can be quite the challenge and an entire summer of remote work has most definitely confirmed this idea. During this time, we’ve managed to rediscover passions, hobbies, and even make plans for different improvements we’d like to make. Surely, staying at home has given us the opportunity to notice our homes’ shortcomings and now it’s time to take action. If you haven’t considered it yet, LED light installation should be at the top of your list, as it can drastically improve your living, working, and learning spaces, bringing them back to life in style.

Over the past six months, you’ve had plenty of time to grow tired of your furniture, windows, and even walls. But redecorating doesn’t have to cost a small fortune. Sometimes, all it takes to bring a fresh look to your home is a coat of paint, new curtains, and a throw rug. However, as far as function and productivity go, they won’t get you far. 

Now that the days are getting shorter and it’s getting dark earlier, lighting becomes even more important. Here are 5 benefits you will enjoy once you switch from incandescent bulbs and fixtures to LED and why LED light installation is, in the end, worth it. 

1. It Will Save You Money

LED lights efficiency

Lowering your energy bill is always a much appreciated payoff of any investment in your home. Why spend hard-earned money on your electric bill when you could be using that money for something else? One simple way to lower your energy consumption and by extension, the energy bill is to start using LED lights. Traditional bulbs use a lot of energy, whereas LED lighting manages to reduce energy consumption by more than 75%. 

Plus, LED produces amazing light, remains cool, and lasts 10 to 20 years, as opposed to incandescents’ two-year average lifespan. So, when switching to a LED light installation, not only are you saving money on your energy bills, but you are also reducing the cost and time required to change the bulbs. And you aren’t making any compromises when it comes to lighting. 

There is also the matter of environmental impact that needs to be considered, especially when thinking of disposal fees. LED lighting has minimal waste and no toxic mercury, therefore a safe solution for the environment. Unlike other lighting options, LED poses no threat to the environment. 

2. LED Lighting Is More Durable 

LED lights durability

Another advantage you’ll enjoy when switching to LED lighting is its durability. LED lights in general are at the very top as far as durability is concerned. The incandescent bulb lasts for about 1,000 hours, a fluorescent bulb is even better with  8,000 hours, but none compare with the LED light. These lights can function for as long as 60,000 hours. 

Since the LED light doesn’t have a glass enclosure or a filament, it has proven to be considerably more resistant to heavy impacts or vibrations. 

3. Trend-Setting Styles

Recently LED lighting has become not only the eco-friendly solution or the money-saving solution, but also one of the hottest trends for all purposes. And it’s simple to understand why. The LED semiconductor technology is highly versatile, which gives designers great freedom when it comes to lighting styles. 

You will discover a truly creative diversity, from modern, sleek arrays to retro, vintage options like pendants with Edison bulbs. It’s impossible not to find something that matches your personal style and needs. Here are a few of the options and benefits you get with LED lighting styles: 

  • ambient room illumination & mood lighting;
  • appealing aesthetics & designs;
  • accent lighting for art & architecture;
  • task lighting for any workspace;
  • shelf, cabinet & niche lighting.

Plus, when choosing LED, you gain access to different color temperatures, which can come in-handy throughout the day, especially when you’re spending more and more time at home. For instance, LED lighting can warm up your space, mimic daylight’s freshness, or even create a sense of welcome. You can even play with the lighting in any room and around the house to highlight different areas or brighten up the space, which sometimes is enough to give you the sense of a home refresh.

4. LED Lighting Is Eco-Friendly

Eco-friendliness is a big advantage. LED is energy-efficient, which reduces the carbon footprint and the greenhouse emissions from power plants. In fact, a single LED bulb can reduce greenhouse gas emissions by almost half a ton, which is a huge gain. 

Its long life helps reduce landfill waste and it’s mercury-free. This means safe disposal, carrying no threat to the environment. Because a 6-to-8-watt LED bulb has a light output of 800 lumens, you do not require a large number of bulbs, as these do not need to change them very often.

LED bulbs generate less heat, so the associated cooling costs are lower. Even though LED lamps lose around 5 percent of the energy generated to heat, everything else is turned to light. 

5. They Offer More Light

LED lights offer more light

LEDs can emit a surprisingly high level of brightness, producing many more lumens per watt than fluorescent or incandescent bulbs.  So, really, simply looking at wattage is no longer a solid measurement for the lighting level. 

Thus, when making the switch to LED lighting, what you need to do instead is to look at a bulb’s lumen output. A good rule of thumb you should definitely remember is that 1600 lumens equal about the same amount of light as a 100-watt incandescent bulb. This way, you will be able to choose the right bulbs for your lighting needs and benefit from all the LED advantages. 

Creative Christmas Light Ideas That Will Make Your House Both Merry And Bright

Christmas light ideas

December 19, 2020 | Cristina Dinulescu

Christmas is getting closer and closer, and everyone’s getting ready for one of the biggest holidays of the year. Now, odds are you already have your own Christmas decoration collection, which only gets bigger and bigger each year, and most likely includes LED Christmas lights and displays. So why don’t you put all of them to good use with these Christmas light ideas? Follow our tips and your home will surely be shrouded in the holiday spirit.

From the subtle options to the extreme ones, you are bound to find something that fits your home and style perfectly. Just make sure, no matter what you go for, that you carefully consider safety practices when it comes to installing the lights. If you need to, you can even do a little research and learn more about how holiday lights work and the difference between parallel and series lights.

1. Christmas Light Ideas For The Roof

roof christmas light ideas

When decorating your home for the Christmas holidays, a good place to start is the roof. In any display, Christmas roof lights occupy a leading position. They are the foundation of the entire arrangement so it’s important to pay attention to details. 

Here are a few tips to consider regarding the best roof lights: 

  • C7/C9 Bulbs: These are the classic option, the C7 and C9 bulbs being a highly popular option in terms of Christmas lights. This is because of the larger size, which makes them much more visible than other alternatives on the market. This way, they can be viewed from a distance.  You can create light arrangements using light strings and C-bulbs separately or you can choose hardwired C7 & C9 light sets, which are highly convenient. 
  • The Icicle Lights: These are highly popular and elegant and a preferred choice for roof,  overhangs, peaks, awnings, and windows displays. Traditional white lights are the ones people love the most, but there are combinations which make a lovely choice. For instance, a red with green combination makes a great Christmas theme.  
  • Cascade Light Tubes & Falling Icicles: If you are looking to get that unique dripping icicle effect and subtle motion, then this is the option for you. It’s true that with this option you are thinking outside the box. Also, know that cascading light tubes and falling icicles fit standard C9 and C7 receptacles. 

If you are looking for extra creativity, why not consider alternating bulb colors to create playful patterns which always catch the eye? These would make a lovely addition to the Christmas roof light arrangement. You can play with color combinations with C7 and C9 bulbs or you can even choose from themed light sets, which combine bulbs and strings. These LED Christmas lights definitely bring on the Christmas spirit and help you create a fantastic outdoor holiday display. In terms of a few themes, here are some options: 

  • Christmas Classic – Red and Green
  • Winter Wonderland – Blue and White
  • Candy Cane – Red and White
  • Unique Aquatic – Blue and Green

2. Christmas Light Ideas For The Yard 

yard Christmas light ideas

If there is one thing that says holiday display, then that’s the Christmas yard decorations, which are usually appreciated by the entire neighborhood. And the good news is that there are many yard decoration ideas you can choose from, making the road to your doorstep a fairytale one. You can decorate your yard with lights, garlands, and even bows to draw attention this holiday season. 

Here are a few other fun DIY outdoor Christmas decorating ideas you might want to consider: 

1. Create Popular Christmas Light Balls 

Christmas light balls

Placing various size balls of lights across the lawn to catch the eye of all the passersby. It’s an innovative and interesting Christmas light idea, and not so difficult to achieve. To get that amazing effect, you can create a whimsical scene in your yard simply by wrapping Christmas lights around chicken wire balls. All you need for this project are strings of LED mini lights, wire cutters, and chicken wire. 

2. Add Animation With A Tree of Lights 

Another great idea would be to have a tree of lights that can shine brightly and be the centerpiece of your Christmas yard decorations. And here’s how you do it. With the help of a basketball pole, gutter hooks, a tree topper, C7 light strings, and light stakes, you can make your own tree. To add animation, play with twinkle and regular bulbs. 

3. Decorate an Outdoor Christmas Tree

If you are fortunate enough to have evergreen trees in your yard, then why not create an outdoor Christmas tree? This will certainly brighten up the entire space. Choose a theme based on the outdoor decoration and string mini lights throughout the branches. Also, you can string a few lights on the interior branches instead of draping them on the exterior branches. This way, you’ll get that brighter effect. 

4. Decorate with Topiary Animals

There is nothing that can bring the warmth of the holiday season better than lighted topiary animals in the yard, placed next to trees or nestled near bushes. Use lighted creatures made of either grapevine or artificial greenery to create a group of grazing deer. You can position them to illustrate Santa’s reindeer pulling the sled. Topiary animals can be found in warm incandescent or LED light colors, coming in differing heights. 

3. Christmas Light Ideas For Walkways 

yard Christmas lights

To top it all off, outline the walkway using pathway lights. This way, you will be creating a bright and welcoming path for your family and your guests. Remember that the stakes hold the light strings in place. So, when deciding on the height of the light stakes, do consider local weather patterns and make decisions accordingly. 15-inch stakes are recommended for yards with lots of snow, but for areas without snow, 4.4-inch stakes are suitable. Pathway light kits come with the popular C7 and C9 bulbs. You can choose between LED or incandescent bulbs, although LED lights are far more popular now. You can also choose between clear lights and multicolor. 

If your walkway doesn’t have natural hedges, you can place walkway trees along the sidewalk to accompany the lights. Also, consider the colors of the lights as to complement them and those used to decorate the rest of your home. If you are using a particular color theme for your home, then cool white lighting for your walkways will pair with your home lighting beautifully. 

Snowflake and star motif lights look amazing when hung on the gate. This is another Christmas decorating idea you can use to create a winter wonderland display. Also, hanging garlands on the fences can bring that sparkle you’re looking for. You can use pre lit garlands or wrap unlit ones with the lights of your choice to quickly decorate your home. Choose long garlands for your fences and add a ribbon to make the decor look even better. Another idea would be to use the drape icicle lights over fences. This way, you’ll be creating the impression of falling snow.

5 Safety Tips For Outdoor Christmas Lights

outdoor christmas lights

December 16, 2020 | Cristina Dinulescu

The winter holidays are almost here and you probably already feel the need to deck the halls. Even though decorating your home for Christmas is fun and exciting, you don’t want to get carried away. Safety always comes first, especially when it comes to outdoor Christmas lights. There are plenty of safety measures you can take in order to enjoy the decorating process and the end results worry-free.

Setting the mood for Christmas is most easily done with holiday lighting. However, this is also the most dangerous, as Christmas lights could easily put your entire home at risk.  According to the National Fire Protection Association, between 2012 and 2016, the fire departments had to respond to 170 home fires each year, caused by Christmas trees. 43% of these fires were caused by either lighting equipment or electrical distribution. 

Unfortunately, these tree fires result in an annual average of 15 injuries, $12 million in property damage, and even death. It’s true that outdoor lighting is not usually used to decorate something as combustible as the Christmas tree. However, this doesn’t mean that it can’t still pose a threat if the equipment is damaged or the circuits are overloaded. So when planning your Christmas decorations, here are five safety tips to keep you, well…safe. 

1. Use The Right Outdoor Christmas Lights

man and woman stringing outdoor Christmas lights

Using seven-volt light bulbs is not the best of ideas and you might want to avoid them. It’s true that they are bigger, even brighter, but they also burn much hotter than usual Christmas lights. One of the main causes of Christmas fires is placing big bright bulbs too close to gutters filled with dried-out leaves. 

It is important to check if the strings of lights installed outside have fuses on the lines. These fuses might be located in the actual plug. Additionally, if your string of lights has a blown bulb you need to replace it using one with the same wattage. 

Another thing to check is that the Christmas lights you plan on hanging on the house are indeed meant to be used outdoors. Indoor-rated lights might not withstand the weather conditions and they might break down much faster. You should always choose waterproof lights, and there is a variety of such lights available on the market today. 

Pay attention that the water-resistant lights you choose come with a tag marked Underwriters Lab (UL). This tag lets you know that the lights meet the national industry standards with the American National Standards Institute. It’s not just the Christmas lights that need to be rated for outdoor use, but the extension cords as well. 

In order to be safe, you need to use Christmas electric equipment and lights that have been verified and approved by a reliable testing laboratory like UL or ETL. Check for either one of the logos on the packaging. If you cannot find one of the two logos, it might not be a good idea to use them. 

2. Fasten Your Outdoor Christmas Lights

fastened Christmas lights

It is important to fasten your lights to a stable mounting surface when running wires outside. Still, you might want to avoid using nails or staples because wire insulation can be pierced accidentally and this can cause shorts or hard-to-find breaks. 

Plus, a wind-blown wire can have its insulation worn away while rubbing against staples or nails, and this can also increase the chances of a short circuit or fire risk. Instead, you can use plastic light mounting clips or hooks. 

You need to keep your lights and wires clear of electrical service lines that connect to your house when stringing them. Use only outdoor-rated extension cords and make sure the plug unions are protected against moving or getting wet. 

3. Install Them Correctly 

Christmas lit house

Proper installation is one of the most important steps when it comes to outdoor Christmas lights. It’s not a good idea to tap into your home’s feeder line to power your Christmas lights. Also, don’t hang decorations on it. To secure the Christmas lights, make sure you don’t use nails, metal staples, or tacks. Insulated hooks are a far better option and also, try to avoid stringing your lights tightly. This way you will avoid causing damage from the wind. Avoid installing the lights on outside trees that come into contact with power lines. 

Try not to connect more than three light strings to one extension cord. GFCI-protected outlets should be used outside. And when trying to remove the string of lights, don’t pull the wires. This might cause the wires to break free from the sockets, breaking the bulbs in the process. 

If you have a complex display or lights that cover your entire house and yard, it might be a good idea to resort to professional installation. Get a licensed electrician out there who can help ensure the installation is done correctly and safely.

4. Be Cautious When Hanging The Lights 

man on ladder hanging Christmas lights

Apart from the electrical hazard, outdoor Christmas lights have the added risk of falling when installed on the roof or at certain heights. Make sure you use a good ladder. To be extra safe, you might want to have a second person give a helping hand. 

Unfortunately, this aspect is often overlooked by many when hanging Christmas lights on the house. An average of 5,800 injuries caused by falls occurred during the installation of Christmas lights were registered between 2000 and 2003. 43% of those injuries took place on the ladder and 13% on roofs. 

Set your ladder on stable ground and about one foot away from the wall for every four feet the ladder reaches up. If possible, have someone hold the ladder for you. And most importantly, of course, don’t drink and climb the ladder. 

5. Keep Your Tree Watered

Outdoor Christmas tree

Of course, the best way to prevent a fire is to keep the light strings in good shape and avoid overloading the circuits.

Still, a combination that can prove to be deadly is that between electric lights and a tinder-dry tree. Many people like decorating trees in the yard, the driveway or just in front of the house. Some of these trees can get really dry. According to theU.S. Fire Administration,  each year, 250 Christmas tree fires take place, as well as 14 related deaths. So, make sure your tree is well-watered in case you notice it’s getting dry. 

And remember, the NEC code allows you to keep your Christmas lights up for a limited time of 6 months. This is because of the quality of the cord and sockets. There are specific types of cable that are allowed to be installed as a more permanent lighting. This is usually found in a festoon lighting.

4 Reasons Why You Shouldn’t Just Replace Circuit Breakers

replace circuit breaker

November 30, 2020 | Cristina Dinulescu

Generally speaking, circuit breakers do not require replacing. A circuit breaker is built to reset, unlike a fuse, for instance. However, from time to time, it may happen that one breaks or malfunctions and you might think to replace a circuit breaker with a new one. In the majority of residential homes, there is the main circuit breaker and separate branch circuit breakers which connect to different areas in the house. 

However, it is not advisable to just replace circuit breakers if they do malfunction, and you should seriously consider upgrading your panel altogether or adding sub-panels. Here are 4 reasons why.

1. It’s Not As Easy As You Think

If you are wondering how to replace circuit breakers, it’s really not all that complicated. To replace a circuit breaker, all you need to do is follow step-by-step instructions and take a few measures of precaution. 

However, buying the circuit breaker may turn out to be more difficult than you think. The biggest problem you may be faced with when replacing a breaker in the panel is that you first need to find one that is of the same size and preferably the same brand as your old circuit breaker. It will not function unless it is replaced with a new circuit breaker of the exact same make and model. 

Of course, in order to find one that is exactly the same as your previous breaker, you will need to get some details, such as the brand and model number. You will be able to find these either off your old breaker or inside the breaker panel box. 

2. It Can Be Dangerous To Replace A Circuit Breaker

hand replacing circuit breaker

When doing electrical work, replacing outlets or even working with different electrical devices, there are safety considerations at every step. Because circuit breakers and panels house a large amount of electricity, it’s absolutely necessary to take the right safety precautions. In addition, any work on circuit breakers requires specific tools, and not having the right tools can pose a danger in itself.

High visibility is extremely important, so part of the essential equipment is having adequate lighting. Any electrical work requires the ability to properly and clearly see all the wires and how they are connected to each other. A touch of a live wire can be sufficient to provoke a fatal accident.

An insulated flashlight is a good option, but not if you have to hold on to it. Trying to change the circuit breaker with one hand while holding on to the flashlight with the other can be pretty difficult, especially for amateurs. So not only can it be dangerous, but now you also have to invest in freestanding lighting, one that comes with a power supply. Considering that the power is off when the replacement of the circuit breaker takes place, you won’t be able to use any of the existing outlets. You can find these lights in any hardware or electrical supply store.

3. It Can Damage Your Appliances

The problem with circuit breakers is that when they trip, they impact electrical appliances. The more complicated a device is, the less thrilled it will be to be switched off by a breaker. While a dryer will be just fine by switching it with a breaker, a computer is an entirely different matter. Computers hate having the power interrupted. 

If you don’t want to have it happen again, you need to find out what caused it to trip in the first place. In some situations, the breaker itself might be damaged, but it’s also possible that the breaker is functioning just right when it happens to pop

4. It Will End Up Costing More To Replace Circuit Breakers

There must be something causing your circuit breakers to trip often. It could be any of the following possibilities: 

  • an overloaded circuit: This is probably the most common reason for a tripping circuit breaker. Overload appears when a circuit is trying to draw a larger electrical load than it was designed to carry. When too many devices are functioning at the same time, the circuit’s internal sensing mechanism heats up and the breaker trips by means of a spring-loaded component within the breaker itself. 
  • a short circuit: This is a more serious reason for a breaker tripping. A short circuit takes place when a hot wire (black) touches a neutral wire (white). This allows for an abrupt unimpeded electricity flow due to low resistance. The abrupt increase of electricity going into the breaker may activate the tripping mechanism. 
  • a ground fault: This is a particular type of short circuit and it occurs when a hot wire comes in contact with a ground wire, a metal box or wood framing members. These can be particularly dangerous if they take place in places with a high humidity level like bathrooms, kitchens or outdoor locations. You should know that a ground fault carries a certain shock risk. 
  • an arc fault: This applies only to AFCI breakers. The power fluctuations which happen when sparking, take place between contact points in a wire connection. The reason for this could be loose screw terminal connections in an outlet or switch. Basically, an AFCI breaker senses early wiring issues before these can cause ground faults or short circuits. 

No matter which of the ones above is the actual cause, in the end you’ll probably have to upgrade your electrical system anyway. Each of them can have serious consequences, so you’ll need to upgrade the entire panel to keep your home safe. Unfortunately, by that time, you will need to cover greater expenses. 

Plus, if electrical devices are ruined in the process, these will need replacing as well, meaning additional costs. Clearly, the greater the damage, the higher the cost. By choosing to upgrade your panel from the beginning, you can save money, time and headache.

The right electrical upgrade can dramatically improve the value and appearance of any home or business. You’ll be amazed at what a difference the right electrical upgrade can make for your home or business. Make sure that when you select an electrical company to do the enhancement of your home and you have decided to take your enhancement to the level where you require an electrical upgrade that the technician at the company has a good working knowledge and the experience to properly guide you in this area.

When you decide to upgrade, our well-trained and certified electricians have all the experience and training needed to complete your electrical panel upgrade project from start to finish, with a minimum of fuss or disturbance. Please contact us right away at 310-800-2401
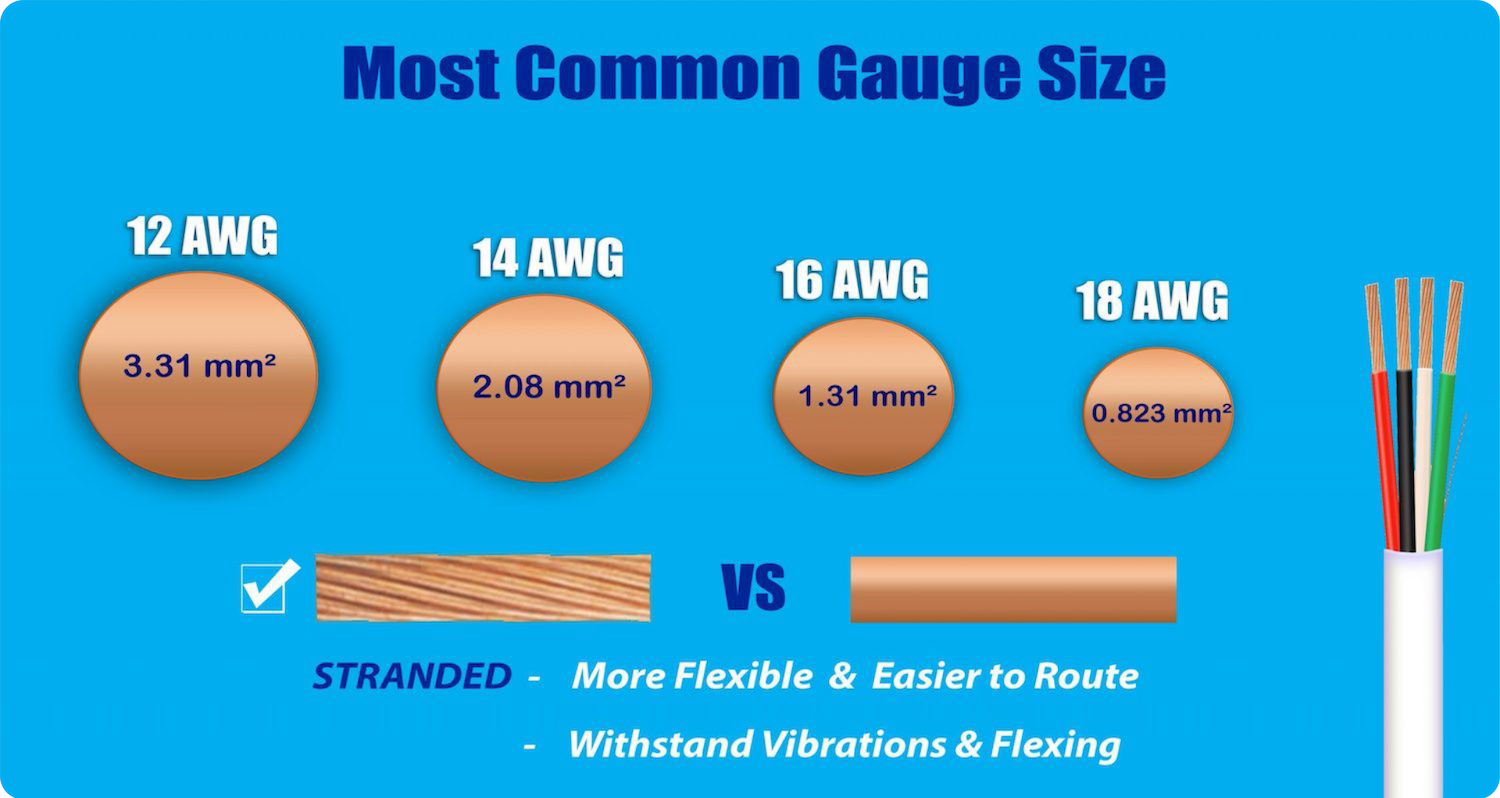
A Complete Guide To Your Home Electrical Inspection

November 27, 2020 | Cristina Dinulescu

When you do electrical work for a new construction or part of a remodeling project, a home electrical inspection is a must. Whether you do it yourself or you’re looking to hire an expert to do it for you, you need to schedule a visit from an inspector, employed by the community’s building code office.

Usually, complete inspections of this kind are needed when you do electrical work that requires a building permit, such as a major room addition or the construction of a new home. It’s important to remember that major remodeling kitchen or bathroom projects require both electrical inspections and permits. 

Another reason to have electrical inspections done is if you plan on selling your home or buying a new one. Oftentimes, in these instances, people choose to have more than an electrical assessment, and opt for their home energy score as well. 

What Is A Home Electrical Inspection?

what is a home electrical inspection

An electrical inspection is a thorough analysis of your home’s electrical system performed by a licensed, qualified electrician. The expert doing the inspection needs to verify if your system respects the electrical code. The purpose is to ensure compliance with the applicable electrical code to reduce structural and personal electrical hazards. 

Additionally, the inspector will check to see if the right equipment has been used for the job, as well as verify the correct installation and compliance with the approved departmental plans, when and if applicable. 

An electrical home inspection is recommended when: 

  • you are planning to undergo a major renovation; 
  • your home is 40 years old or over;
  • you are on the point of purchasing a pre-owned home; 
  • you have added large new appliances in the last 10 years. 

Why Do I Need Two Rounds of Inspection?

inspector performing an electrical home inspection

The whole point of the home electrical inspection process is to thoroughly verify if the applicable electrical codes are followed and to ensure whether or not the installation is safe. This is why the designated inspector will visit your property on two different occasions. 

The Rough-in Inspection

The first visit is known as the rough-in inspection. In the home building and remodeling field, the rough-concept refers to the stage of the construction taking place after the basic framing is completed, together with the wiring and plumbing installation and before the walls and the ceilings are closed up with wallboard. 

This stage is verified by the inspector because, in the absence of walls and floor coverings, modifications are easily done. The homeowners can make any changes in case the rough-in stage does not pass the inspection. 

It is important to have the inspection done before installing all of the electrical boxes, conduit, cables, and wires, even before installing the insulation. This way, the inspector will have a complete view of the entire wiring that runs through the house, from the service panels to the appliances and fixtures. 

The Final Inspection

The second inspection takes place when the entire project is complete, but just before you are given permission to use the space. In this phase of the project, all the walls are closed in, the floors are complete, the painting is done and you are on the verge of installing the furniture. You need to verify that all of the circuits are working and that every light fixture has been installed and connected.  If the inspector approves your work, then it means that your work has passed and that all professional standards are met, respecting the code. 

When the electrical work is done by a professional, inspections can be a bit swift and superficial, especially when the inspector knows the contractor doing the work and is accustomed to the work done. However, when you are the one doing the work you should expect a more detailed inspection. There is a very good reason for this. The inspector wants to know that the work done is up to code and perfectly safe. If you make a mistake, it’s not the end of the world. You will be able to correct it and receive feedback from a professional inspector. 

What Does The Inspector Look At During A Home Electrical Inspection?

what inspectors look at in an electrical home inspection

If you are looking to learn what an electrical inspector looks at during the inspection, here’s a quick look: 

  1. Proper circuits: The inspector will make sure that your home or the addition has the right number of circuits, considering the electrical demand of the space. This means verifying if there are dedicated circuits for the appliances in need of them, especially in the kitchen areas. Here, it is crucial to have dedicated circuits for appliances like the garbage disposer, microwave oven, and the dishwasher. Additionally, the inspector will be verifying to see if there is an appropriate number of general lighting for each room. 
  2. GFCI and AFCI circuit protection: In outdoor locations, below-grade or near sources of water like sinks, GFCI circuit protection is required. Small-appliance outlets located in the kitchen, for instance, require GFCI protection and the inspector will check to see if the installation includes such outlets or circuit-breakers. Another electrical code requirement is the AFCI (arc-fault circuit interrupters) protection. The inspector will make sure that this requirement is also met. 
  3. Electrical boxes: All electrical boxes have to be flush with the wall and should accommodate the needed number of wire conductors, as well as other devices they might contain. The box should be securely fastened and homeowners doing the work should use large, spacious electrical boxes. This will make it simpler to complete wire connections and pass the inspection. 
  4. Box heights: During the inspection, the outlet and switch heights will be measured to check if these are consistent. Normally, these outlets should be at least 12 inches above the floor and switches should be at least 48 inches above the floor. 
  5. Cables and wires: Inspectors will check how the cables are fixed in the boxes. The cable sheathing should stick into the box at least 1/4 inch. This way, the cable clamps grip the sheathing and not the conducting wires. Having at least 8 inches of usable wire length extending from the box, it should be sufficient wire to connect to the device and allow future trimming. Additionally, the inspector will check the wire gauge and make sure it is right for the amperage of the circuit. 
  6. Cable anchoring: The cables should be attached to wall studs to be secured. The first cable shouldn’t be farther than 8 inches from the box and then every 4 feet thereafter. All cables should run through the center of the wall studs so that wires are safe from penetration from nails or drywall screws. Each wall stud penetration should be protected by a metal protective plate. 
  7. Wire labeling: Even though it is not required by the code, some homeowners and professional electricians label the wires to indicate the circuit number and amperage. It is highly reassuring for an inspector to see this.
  8. Surge protection: The inspector may recommend isolated ground systems in case you have delicate electronic devices like TVs, stereos, sound systems, or other equipment. Isolated ground systems protect against current fluctuations and interference. In addition to this type of receptacles, surge protectors can also guard sensitive devices.

The right electrical upgrade can dramatically improve the value and appearance of any home or business. You’ll be amazed at what a difference the right electrical upgrade can make for your home or business. Make sure that when you select an electrical company to do the enhancement of your home and you have decided to take your enhancement to the level where you require an electrical upgrade that the technician at the company has a good working knowledge and the experience to properly guide you in this area.

When you decide to upgrade, our well-trained and certified electricians have all the experience and training needed to complete your electrical panel upgrade project from start to finish, with a minimum of fuss or disturbance. Please contact us right away at 310-800-2401
All You Need To Know About An Electrical Permit

November 25, 2020 | Cristina Dinulescu

When planning to take on a major remodeling project, determining whether or not you need an electrical permit, often known as a building permit, can be quite difficult. The departments in charge of granting applicants with permits usually frustrate and confuse homeowners. Contractors, builders, and the trades are the majority of applicants and often the requests coming from homeowners come second.

Of course, the rules and regulations differ between cities and counties. If you are looking to find out what type of work is exempt from permits in California, you can find out more here. However, certain types of work may require you to determine whether or not a permit is mandatory. 

Generally speaking, work in areas like public and personal safety, electrical, plumbing, and natural gas, will require permits. In fact, given the many changes within existing safety codes, plus a need for a bigger revenue, more and more projects are moved to the “permit-required” list. 

What Is An Electrical Permit?

what is an electrical permit

The electrical permit represents an official approval issued by the local government agency, which gives you or your contractor permission to:

  • alter or install any permanent  wiring, or appliance;
  • install a light fixture, electrical outlet, or garage-door opener receptacle, run additional wiring, or convert a fuse box to circuit breakers;
  • alter or install low-voltage systems like security alarms, computer, or stereo systems.

However, the good news is that a permit is not required for appliances or electrical maintenance on existing installations. If you aren’t sure whether or not you require a permit for your project, you should call the building department responsible for your area.

When Do I Need an Electrical Permit?

when you need electrical permit

As mentioned above, not just any home renovation or construction requires a permit. You need to separate the types of work you will be doing to determine whether or not a Los Angeles electrical permit is needed. For instance, in most cases, replacements or simple repairs can be done by an expert, professional contractors, or even homeowners without having to apply for a permit beforehand. 

Projects that involve major changes to your home’s electrical or mechanical system, however, do require you to apply for the right permit from the local building department. On the bright side, if you hire an expert to do the work, he will also handle the process of obtaining a permit for you. Of course, you would have to cover the costs involved. 

If you decide to do the work all by yourself, then it will be your responsibility to apply for the permit. However, know that your building department may require that part of the work involved in the process be done by a licensed professional and not by you, the homeowner. 

Because the requirements for permits tend to differ from one region to the next, really the only way you can tell whether or not a permit is necessary and what the exact requirements are is to call your local building office and describe the type of work you need to do. 

Permits are usually required for: 

  • General electrical: installing new electrical wiring or adding circuits;
  • HVAC: installing an air conditioner or a new furnace; 
  • Water Heaters: Installing a new water heater. 

Permits are not always required for minor electrical work like:

  • replacing a light fixture or an electrical outlet; 
  • replacing a circuit breaker in-kind. 

What Is The Process of Applying for a Permit?

electrical permit process

As said, when you decide to hire a professional electrician, obtaining an electrical permit is no longer your concern. However, if you want to do the work by yourself, then here are the steps you will need to follow: 

  1. Get in touch with your local building office and explain what type of project you want to do. In case a permit is required, you will be provided with an application form, which outlines the requirements for the permit. You may notice that some jobs require more than one permit. For major remodeling projects, you might be required to apply for a plumbing permit, a construction permit, and an electrical one. 
  2. Prepare your permit application. Include details regarding the materials you may need to use and offer drawings of the work you plan on doing if required. 
  3. Submit the application and pay the required fees. The licensing office will grant you with the official permit certification. 
  4. Once you start the work, make sure you post the building certificate as required. You may need to tap the permit to a window or a door to ensure it is visible. 
  5. Make sure you contact an inspector to review the worksite. If the inspector requires changes to be made, complete them and ask him to review. 
  6. Once the inspector approves them, you no longer have to keep the permit on display. 

Can I Skip The Permit?

Unfortunately, skipping the entire process is something very common among homeowners. Some do not go through the trouble of contacting the local building office, collecting the necessary information, paying the requested fees, and calling an inspector to review the worksite. However, it is not advisable to bypass the official permit process. There may be consequences, which include: 

  • If you attempt to sell the house, the inspection may reveal certain remodeling or additions which were completed without having the proper permits and which may not be fully up to code. This may prevent you from selling the home and force you to undo the entire work and start all over again, only this time with the right permits. 
  • In case of a structural collapse, major plumbing problems, or a fire, if it is discovered that the cause of the issue is the result of the work realized with having a permit, it’s possible for the homeowner’s damage and liability policy to decline to cover the damage. 

The right electrical upgrade can dramatically improve the value and appearance of any home or business. You’ll be amazed at what a difference the right electrical upgrade can make for your home or business. Make sure that when you select an electrical company to do the enhancement of your home and you have decided to take your enhancement to the level where you require an electrical upgrade that the technician at the company has a good working knowledge and the experience to properly guide you in this area.

When you decide to upgrade, our well-trained and certified electricians have all the experience and training needed to complete your electrical panel upgrade project from start to finish, with a minimum of fuss or disturbance. Please contact us right away at 310-800-2401
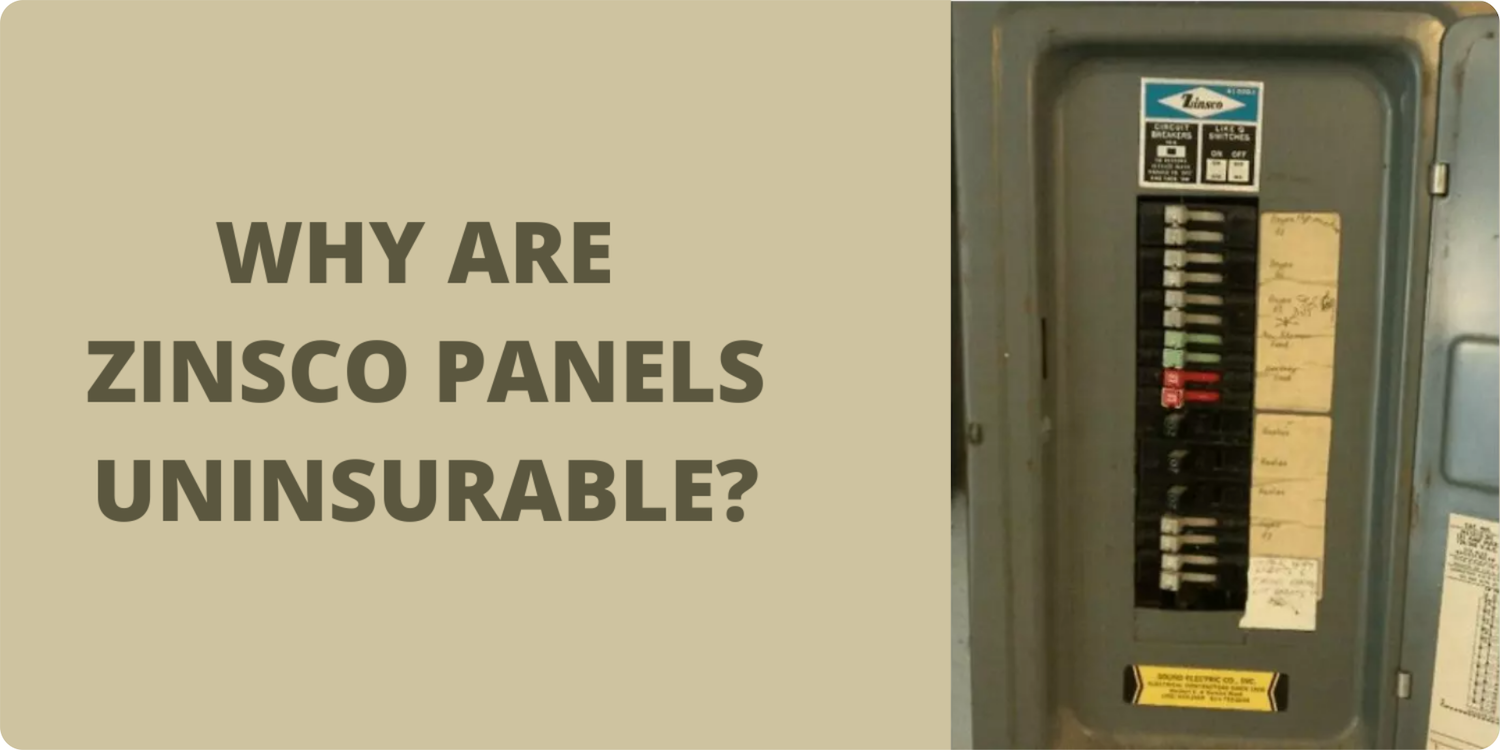
What Is Cloth Wiring & Why You Shouldn’t Have It

cloth wiring

November 23, 2020 | Cristina Dinulescu

When electricians perform a home inspection, especially if the house was built before 1960, one of the most frequent issues they find is cloth wiring. This is actually a common trait in older homes, as before plastic insulation was invented, electrical wiring was insulated using a cotton cloth.

As major advancements in electrical wiring were made and plastic insulated wires started being used in homes and office buildings, cloth wiring became an obvious issue. Old wiring has been a hazard for years in terms of residential electrical fires and home safety.

A major problem when it comes to this type wiring is that you don’t know when something goes wrong. You won’t be able to tell when it becomes high risk, because the decay takes place behind the walls. Not only do you want to keep your home and family safe at all times, but having this type of wiring may be a problem when looking to get insurance. Let’s take a deeper look into what cloth wiring is and why you should make sure you don’t have it.

What Is Cloth Wiring?

what is cloth wiring

Commonly used before 1960, this type of wiring consists of a cloth-insulated wiring complex. The copper is wrapped in cotton or rayon. Additionally, rubberized insulation or asbestos paper was also used in the mix. 

Over time, the wiring becomes frailer and frailer, turning into a major risk for your appliances, as well as yourself. Your home is exposed to several dangers, sometimes without you even knowing it. Here are 5 of the most common hazards: 

  • Health issues: older cloth wiring may contain asbestos, which means your health could be at great risk, as long-term asbestos exposure can cause serious harm and it’s even linked to cancer. 
  • Excessive heat: this type of wiring may have difficulties containing heat and this may pose a threat to surrounding areas, exposing them to excessive heat. 
  • Electrical fires: cotton wiring may become brittle and when that happens, your home is exposed to fire risks. 
  • Lack of grounding: old wiring, in general, is seldom properly grounded and cloth wiring makes no exception. Ungrounded wiring can be dangerous.
  • Increased risk of damage: this wiring is much more susceptible to insect and rodent damage. Insects and rodents may chew on the wiring causing greater damage and increasing fire risk. 

How Do You Know If Your Home Has Cloth Wiring?

cloth wiring

If your home is older than 40 years, then you should be asking yourself whether there is cloth wiring present in your house. One way to tell whether or not this is the case is to search for knob-and-tube wiring. Usually, if you have knob-and-tube wiring, chances are cloth wiring is also present in your home. 

However, you might be tempted to assume that because your wiring looks rubberized, this type of wiring is not present. That’s actually not true. Even if your wiring looks rubberized, you could still have cloth wiring, composed of rubber with an insulating cloth. 

When in doubt, ask an expert. If you cannot find any indication that you might have this old wiring or you simply want to make sure, then call in a professional. An electrician will be able to tell you more about the wiring systems in your home, even make a few recommendations in terms of repairs or rewiring. 

What To Do In Case Of Cloth Wiring

rubberized cloth wiring

If you do find that you have this type of wiring, you might be wondering what the next steps are. Here are a few things you need to do to protect your home and family. 

Hire a professional to examine the system 

First thing’s first. Until you have an expert’s confirmation that cloth wiring is present in your home, there is no point in taking any measures. The best part of hiring an electrician is that you’ll not only get an accurate answer to that question, but also a comprehensive assessment of the state of your house wiring. This is usually followed by knowledgeable recommendations.

Test the wires for asbestos 

Asbestos is a serious threat, both for your family and for the electricians who will remove the wiring. Because asbestos paper is known to be used in the cloth wiring mix, in the early 20th century, you need to act cautiously. 

Before having it removed you need to hire a professional company to test the wires. In case asbestos is identified, certain measures need to be taken to make sure that the wiring is removed safely.  You will need to hire a specialized expert to remove it, to ensure that no toxic asbestos fibers are released into the air. 

Replace the cloth wiring 

It is possible, rare but possible, to have cloth wiring without having the knob-and-tube system. This means that you have to replace the cloth wiring with plastic-coated, modern wiring. If your electrician feels that everything is safe simply by replacing the cloth wiring and nothing more, then you are looking at a more affordable solution. 

The knob-and-wiring isn’t dangerous by default. But due to unsafe modifications, it tends to fail over time. If this is not your case and the electrician believes that you don’t have to replace it, then you are all good. But you might want to check with your insurance company and see if a home with knob-and-tube wiring is accepted. 

Can You Replace Cloth Wiring By Yourself?

The short answer is No. Do-It-Yourself electrical work is not advisable, especially when it comes to replacing wiring systems. Not only are you exposing yourself to unnecessary risks, but you might also do it the wrong way and make mistakes which, in time, may lead to further, more complicated issues. 

We strongly recommend you hire a professional who can analyze, diagnose, and fix your problems. This way, you can rest assured that your home wiring is done right, and your family is safe. 

Everything You Need To Know About The Electrical Weatherhead

weatherhead

November 20, 2020 | Cristina Dinulescu

When it comes to home improvements, there are some investments you need to make to be sure your home is  properly protected. An electrical weatherhead can be such an investment. Climate change is real and we’ve  seen more and more significant weather changes over the last decade, including drastic or sudden changes. Being prepared for storms and heavy rains just makes good sense.

Just as you invest in air cooling systems to protect you from the summer heat or heating units to keep you warm during the winter, you need to consider your options when it comes to rain. And weatherheads can be exactly the solution you are looking for. 

A weatherhead can protect your electrical system from water during rough weather like heavy rain or snow, as long as all components are properly installed and sealed. So before anything else, make sure you contact a certified electrician that can help with the installation process. If it’s not properly installed, then you risk water leakages, which can cause significant damage and may end up costing you a lot. 

What Is A Weatherhead?

Simply put, an electrical weatherhead is a rounded cap, meant to keep the water out of the pipes. It is also known as a weathercap, a service head, a gooseneck or a service entrance cap, and it’s quite popular. There are plenty of homes and buildings that have it installed and chances are you’ve seen it several times before. 

Not only does it protect against water, but this service entrance cap is also an essential part of the transfer of power from the utility company to your house. It is installed where the service wires coming from the utility company reach your house if this happens through overhead wires instead of an underground entrance. It’s role  is to protect the connection. 

The whole point of this waterproof cap is to prevent water from coming in and safeguarding the conduit and the metal pipe through which the wires enter your home. Shaped like a hood, the weatherhead is facing down at an angle of at least 45°. It also has a rubberized gasket to ensure a tight seal. 

Anatomy of The Weatherhead

weatherhead anatomy

The requirements for the weatherhead are dictated by the National Electrical Code. They’re traditionally anchored to the mast, which is a metal pole rising through the roof. However, not all service caps are mounted to the masts, some types have clamps that anchor into the wall. However, they all follow the same structure. Each weatherhead has a service entrance and a service point.

The service entrance 

The service entrance represents the group of wiring and structural parts used to connect your home to the utility power grid. The service entrance starts at the transformer, which is installed on the utility’s power pole. The service drop is the assembly of heavy insulated wires and metal cables installed overhead from the transformer to your home. As mentioned above, this is either attached to the exterior of your home or anchored to a metal pole which is rising through the roof. The pole is known as the mast, containing the service entrance conductors, which are several individual wires. 

The wires that enter the house through a weathercap drop down through a conduit to an electric meter, which measures the power usage, and then enter the main service panel. This contains the main circuit breaker, which controls the entire electric current entering the house. Usually, there are also several other breakers to protect individual branch circuits, unless these reside in a separate service panel. For residential buildings, in the USA, the 120/240 V split phase system is used. Basically, the service drop is made up of two 120 V lines, plus a neutral line. 

The neutral line is connected to the service panel through a conductive rod, which is driven into the earth. The service drop offers the building two 120 V lines of opposite phase, which means that 240 V are provided. These circuits are used to feed energy-hungry devices such as water heaters, air conditioners, clothes dryers, boilers and ovens. 

The service point

Because of the shape of the weatherhead, rain and snow are kept out of the mast. On the one hand, the service cap covers the mast so that rain and snow do not fall in. But it does more than that. Due to the way in which the service drop is anchored, a drip loop is created. Because of it, any rain that drips on the service drop wires will flow downward and fall off the bottom of the drip loop instead of the service drop. 

The service point is where the service drop wires connect to the service entrance conductors and it’s the official point of transfer. Because of this, everything on the utility side of the service point is taken care of by the utility company and everything on the house side is handled by an electrician. 

Fixing The Weatherhead

electrical weatherhead

Because the weatherhead is directly connected to the utility power pole, an untrained homeowner should not be touching the wires. Even though it might be the homeowner’s responsibility, only an electrician should handle the installation and maintenance of the weatherhead. So, if you notice that the weathercap is damaged due to falling trees, heavy winds or any other cause, call an expert to handle all related issues and do not attempt to intervene yourself. It is very dangerous and risky. 

3 Steps To Check If Your Home Has a Ground Wire

check for ground wire

November. 13, 2020 | Cristina Dinulescu

It is very important to have your electrical wiring grounded. Considering that electricity follows the path of least resistance, when there is too much supply, without a ground wire, electricity might go straight into your appliances, electronics, and even you. This could lead to electrocution which can have tragic outcomes. Electrocution is unfortunately a common cause of death, leading to more than half of the deaths in the construction industry and among homeowners.

Apart from protection against overload, which is a very good reason to invest in grounding in the first place, choosing to do so will help you direct electricity. Grounding the wires in your home will allow electricity to travel through the system safely and efficiently. Additionally, grounding helps in stabilizing the voltage levels, so you don’t have to deal with electricity overloads, to begin with. 

When grounding a home’s electrical wiring, a wire firmly buried in the ground is attached to the electrical system so that electricity has a place to escape. Unfortunately, older houses, built before the 1990s, don’t have grounding, as this was a standard introduced and enforced in the late 80’s. But you could easily check. This is done using a circuit tester. And here are a few steps you need to follow. 

Step 1: Check Your Outlets 

Usually, the outlets in your home will tell you many things. And some of them are related to the ground wire and electricity. To check if your home’s electrical wires have been grounded or not, you need to look at the outlets in your home. You need to determine whether you have two or three-prong receptacles. This is an important detail because it is the first sign of ground wire. 

A three-prong outlet has a narrow slot, a larger one, and a U-shaped one. The U-shaped slot is the grounding element. So if you have three-prong outlet chances are your home has grounding. However, you still need to check a few extra elements, just to be sure. 

In many cases, people have replaced the two prong outlets with 3-prong even though there is no ground wiring. The best way to tell is in your electrical panel. There should be as many green wires or bare conductors as there are white wires.

Step 2: Test Your Outlet 

To test your outlet, you need to use a tool called multimeter. You should be able to put one of the leads of the tester in the smaller slotted hole, and the other large one that is the neutral to read 120 volts. 

Then, from the smaller hole, put the other lead into the u-shape hole (or ground terminal) and  it should also read 120 volts. If you have voltage from the hot to the ground it is usually grounded.

In addition to the multimeter, which tests for grounding, there are also plug in testers that can read if the outlet is properly wired or not.

Step 3: Repeat 

Even if you have discovered that one of your outlets is grounded. You shouldn’t just assume that all of them are. The safest course of action is to repeat the steps outlined above and test each outlet in your house. 

Older homes might have had multiple renovations. Some might not have benefitted from an entire home renovation in the first place. So, there may be parts of your home that have not had any work done. Take the time to verify each outlet closely. 

If you have determined that your home does have grounding, you need to check whether or not this has been correctly done. Unfortunately, faulty grounding is not that uncommon and it can lead to significant dangers. Here are some of the common electrical grounding mistakes. 

A poor understanding of resistivity and impedance guidelines 

Soil resistivity is an important aspect of any grounding system. When designing the grounding system, you need to consider several aspects, like soil type, moisture content levels, and temperatures. 

It is not considered safe to design a grounding system in high resistance earth, because it increases the risk of equipment failure and most importantly, the injury potential. Understanding impedance guidelines is essential in creating a safe grounding system. 

Not measuring the grounding system after installation 

It is crucial to measure the grounding system once it has been fully designed and installed. The electrician should check that variances do not appear, because these can cause a higher ground resistance than initially desired. The three-point method is the best way to measure the grounding system, before connecting it. 

Using the ground wire incorrectly 

Paying attention to the conductor bends and lengths is an important step in the installation of a ground wire or the inspection of the entire system. The ground wire should not be bunched up or coiled together, because it creates high impedance paths, causing higher voltages. 

To ensure safe electrical grounding, secure connections, and gradual bends, short wire lengths should be used. 

Selecting the wrong ground wire

When selecting a wire as a down conductor, you want the thicker gauge wire. This has lower resistance, allowing an easy path for the current to reach the ground. Additionally, the size of the ground wire should apply to the short-circuit current ratings of the system. 

Grounding is an essential part of a safe and efficient electrical system. You need to make sure your home has ground wires and that these are installed properly. While there are several other methods you can use to verify whether or not your home has grounding, the best solution is to hire an expert electrician to conduct the assessment for you.