Learn what an EV charger installation involves, why it’s important to have it done by a professional, and why.
Continue readingHow To Choose The Best Location For Your Electrical Panel
July 29, 2020 | Cristina Dinulescu
Throughout the United States, the National Electrical Code, or the NEC, a book published by the National Fire Protection Association, sets the foundation for electrical safety in residential, commercial, and industrial occupancies. It also addresses the requirements and restrictions for installing electrical panels and safety guidelines as to the best places to do so.
Although you’ll need a certified and qualified electrician for the installation work and they should be able to suggest the best location for the electrical panel in the first place, it’s wise for homeowners to have a general idea of the requirements and considerations. These generally apply for both new constructions and replacement panels.
3 Factors to Consider For Your Electrical Panel Location
“Where should I place my electrical panel” is not an easy question to answer if you don’t have a basic understanding of your electrical meter and panel. While you don’t have to be up to speed with all the provisions in the NEC, a bit of knowledge and advance planning can save you money and increase efficiency in terms of the electrician’s time or use of electrical cable. Here are the 3 most important factors to consider for your electrical panel location:
- Safety & Accessibility: the best location for an electrical panel is one that’s easily accessible and safe. This means you can’t place a breaker box in cramped spaces, which would make it difficult for both yourself and an electrician to gain access. It also means you can’t place it in a bathroom, for instance, as that would not be safe, and if there’s plumbing in the vicinity of the electrical panel, then the box needs to be weatherproofed.
- Your utility company: the utility company ultimately determines the location of the electrical panel, but an electrician or homeowner can request a certain location, which is usually at the closest point of attachment to the utility lines. They also enforce the height and clearance around the meter socket – the height is not below 4′ and not higher than 6’7″, while there is a 12″ clearance from either side of the meter.
- Efficiency: as mentioned above, advance planning can help minimize the number and lengths of runs, as well as the electrician’s time, so before installation make sure you discuss and carefully design the system. You might want to consider using prefabricated circuits or 500-ft. rolls of Romex as opposed to more expensive labor or smaller boxed lengths, respectively.
Restrictions for Electrical Panel Locations
During the schematic design process, your electrician should be able to go over the restrictions with you. These are set by the National Electrical Code, and they’re generally used by the state and local authorities as a reference to establish building codes.
Electrical Panel Placement Restrictions
The National Electrical Code 110.26 states that breaker boxes, and electrical equipment in general, must be placed in areas that provide sufficient working clearance around them. More specifically, the breaker box needs 3 feet of clearance in front of it. Also, as mentioned above, if the placement is done neary plumbing, then a weatherproof box is required.
Other placement provisions include the height of installation. An electrical panel must be installed at least 4 feet off the ground, but cannot be higher than 6 feet. You need to also allow for the panel door to open at least 90 degrees.
Working Space Restrictions
You cannot place an electrical panel in any tight space that does not provide for a clear working space. Breaker boxes must have at least 30” wide clear working space laterally in front of them. The electrical panel doesn’t need to be centered within the clear working space, but as said, the door needs to open to 90 degrees. If there are other panels adjacent to the breaker box, the working space can be shared.
The working space provisions also include detail based on the voltage rating of the equipment, as well as the installation conditions. The minimum clearance for nominal voltage of 0-150V to ground is 36”, regardless of conditions. However, for higher voltages ranging from 151 to 600V, the clearance requirement varies based on the installation requirements, and it can be anywhere between 36” and 48”.
Overcurrent Devices Restrictions
The NEC states that circuit breakers and implicitly electrical panels, or any other overcurrent devices cannot be located nearby material that ignites easily, such as clothes closets. It also
prohibits overcurrent devices from being installed over steps of a stairway. When it comes to guest rooms or guest suites, such as bedrooms with ensuite bathrooms, these devices, other than supplementary overcurrent protection, cannot be placed in bathrooms.
Best Locations for Electrical Panel
Taking into account all considerations and restrictions from the NEC, there are a few options for your electrical panel location. Although the breaker box needs to be easily accessible, most homeowners want the panel out of sight. Some common areas that could meet all the requirements are:
- Garages – attached garages are the best location for an electrical panel, as they provide enough space to comply with the clear workspace requirements, but are also quite hidden.
- Basements – the basement is another preferable location for your electrical panel. It’s even more out of sight than the garage, and can easily comply with the space requirements. One thing to consider though, is emergency lighting, as in case of a power outage, you’d need to easily find your way to the main breaker box.
- Under staircases – although less of a popular choice, some stairways can provide sufficient space and easy access for the electrical panel to be installed there.
Even though out of sight locations are popular amongst most homeowners, electrical panels can very well be installed in main areas of the house, as long as the area is clear and spacious. If your home doesn’t have a basement or a garage, and you need to have the breaker box in the main house, then there are a few tricks you can do to blend it in, such as painting its door to match the décor.
Cost To Replace Electrical Panel: Factors & Prices
If you worry about how much it costs to replace an electrical panel, learn more about the factors that impact the cost and what to expect.
Continue readingIs Rewiring a House Messy: What To Expect?
July 24, 2020 | Cristina Dinulescu
For many homeowners, the thought of rewiring a house makes them skip a bit. It’s a big project, sometimes very complex depending on the house and the original wiring, and sometimes yes, rewiring a house can be messy. Of course, how messy it all gets depends on a few factors, the most important of which are your level of comfort with clutter and debris and how tidy your electrician is.
What Is Involved in Rewiring a House?
Popular belief has homeowners think that rewiring a house causes great disruption, but the truth is that today there are plenty of modern tools and techniques that limit the disruption considerably. To more accurately understand how things changed, it’s important to have a clear image as to what the requirements are. While every project is different depending on the needs of every homeowner and status of each house, these are usually the steps of the process and how they’ve changed:
- Lifting carpets and floorboards – you’ll read a lot on how electricians used to lift carpets, remove any linoleum, or lift floorboards in order to remove old electrical cables and run the new ones. However, a good electrician will do none of that today. Most of the work happens underneath the house, where the crawl space is, and there’s no need to lift carpets or floors. Even if the house doesn’t have a raised foundation and it’s built on a slab, then the electrician can run the wires through the attic, horizontally through the walls, all the way down to the receptacles.
- Chasing – this is the process through which some electricians will cut holes and channels into your walls to be able to run the cables and it’s the messiest step in rewiring a house. It’s also usually followed by replastering. However, there are ways to avoid this step and, again, the choice of electrician plays a huge role. Some companies don’t use chasing as a method, but rather fish wiring through the walls.
Can You Live In A House While It’s Being Rewired?
The short answer is YES. Of course, if you have just bought a house and the electrical survey noted that the property needs rewiring, then the best course of action would be not to move in until the rewiring is finished. This way, you won’t have to be present for any disruption or messiness, and also you don’t have to worry about your furniture being ruined or all your possessions getting dirty.
It’s also a good idea because, if you and your family are not actively living in the house, chances are the work will be carried out faster, as there will be no furniture or other items to move out of the way.
On the other hand, if you already live in the house that needs rewiring, it doesn’t mean you have to worry about finding new accommodation. Many people consider, or are being told that moving out would be the easier way. That’s not necessarily true. While going away for the duration will indeed mean you won’t have to see any mess, hear any noise, or deal with any of it, you can definitely live in your house for the duration.
The best electricians will cover all your furniture and lay drop cloths down where they’re working. They may also use specific tools that capture all the dust when drilling. In fact, new and more modern tools really do significantly limit the amount of dust created.
Additionally, you don’t have to lose power during the rewiring. Talk to your electrician about the process, but a good electrician should be able to leave electricity going into existing outlets. The new wiring can be run to a junction box under the house, and left very close to the openings. Then, when it’s all ready, the old wiring can be taken out and the new one connected.
Are There Alternatives to the Messy Rewiring?
Because rewiring a house is such a big and messy project, many homeowners wonder if there are quicker, less invasive alternatives. You’ll be able to determine this if you call for an electrical survey.
A thorough electrical inspection will tell you the status of your electrical panel and wiring, and the electrician should be able to recommend the ebay course of action and whether or not quick fixes can solve your problems. For instance, if the only discovery is faulty outlets, then fixing or replacing the outlets will be a faster, less expensive solution.
However, if your wiring is old or there are other, major signs of faulty wiring then remedial work is not the way to go. It will not ensure the electrical safety of your home. Rewiring, as daunting as it may be, might be inevitable when:
- The house hasn’t been rewired in 20 years or more – old homes usually have old wiring which in most cases is not safe or up to code anymore, and might need replacing.
- You’re remodeling – for major remodeling projects, such as conversion of rooms or expanding the house and adding extra rooms, electrical rewiring is required, as you need to make sure that new power demand is met by the electrical system safely.
- Increased convenience – sometimes the wiring of a house may be safe and functioning properly, but homeowners might want to add appliances, switches and outlets throughout the house for convenience. In order to accommodate that, rewiring may be required.
There’s also the option of part rewiring a house, although that’s not really an alternative, but more of a way to keep cost under control. It is possible to part rewire a house, but it is not generally advisable. You need to make sure that the extent of the project is documented and clearly defined, in order to be able to properly complete the work at the later time. In most cases, if you add it all up at the end, it will cost you more. Plus, you’ll have to deal with the messiness twice.
How Do Electricians Check Wiring & Why It’s Important?
An electrical inspection is important for the safety of your home and should be done regularly. Find out how electricians check the wiring in your home.
Continue readingBreaker Box Anatomy: How Do Electrical Panels Work?
Breaker Box Anatomy: How Do Electrical Panels Work?
Continue readingFaulty Wiring: How Do You Know If Your House Needs Rewiring?
July 17, 2020 | Cristina Dinulescu
The National Fire Protection Association reported that between 2013-2017, 10% of all home structure fires were caused by electrical distribution and lighting. What’s more concerning, another NFPA report shows that “electrical failures or malfunctions were the second leading cause of U.S. home fires in 2012-2016 (behind fires caused by unattended equipment), accounting for 13% of home structure fires.”
It is important to ensure the electrical safety of your home, and sometimes that means looking for signs your house needs rewiring. Not only will that keep your family and home safe, but it will also come in handy for insurance purposes.
The US Fire Administration estimates that every year domestic fires cause approximately 280 deaths, 1,125 injuries, and over $1 billion in property damage. But you can be fire smart with electricity in your home and if you’re wondering “how can I tell if my house needs rewiring?”, here are the most common signs.
1. Old Wiring
If your home is more than 40 years old, then that in itself can be a sign of faulty wiring. Chances are you have aluminum wiring, which was very popular from the mid-1960s to late 70s. At that time, the technology to mine copper didn’t exist, therefore copper was very expensive and aluminum was a more affordable option.
However, aluminum wiring is more prone to electrical issues than copper. It’s more susceptible to overheating, which is why the most common signs of faulty wiring with aluminum are scorching and burnt smell. You can check if this is the wiring in your house by looking on the outer jacket of the cables at your electrical panel for the letters AL or ALUM.
Another type of old wiring is Knob & Tube wiring, also known as Open Wiring. This is typically the case for older, historic home builts before the 50s. The knob and tube wiring lacks ground wiring, which means you can’t plug in any electronics or appliances that use three-pronged plugs. This increases the risk of electrical shock and fires.
2. Sizzling Sounds and Burning Smells
Some signs of faulty wiring require less technical knowledge and rely more on your senses, specifically hearing and smell. In certain instances, you might not be able to see the electrical problem, but you will surely be able to hear it or smell it.
The buzzing or sizzling sounds are also signs of faulty wiring. A loose wire or a fault in the circuit can cause vibration, therefore the buzzing sound. Sizzling noises can sometimes be accompanied by occasional sparks. This happens also because of loose wires, or frayed wires in the circuit.
When these issues happen near an outlet, then the resulting sparks burn the plastic, which will result in a very particular smell. In some cases, this happens inside the wall, and the sparking wire burns the casing within that wall. If you can smell this persistently in your home, even faint, then you probably do have wiring issues.
3. Frequent Blown Fuses and Tripped Breakers
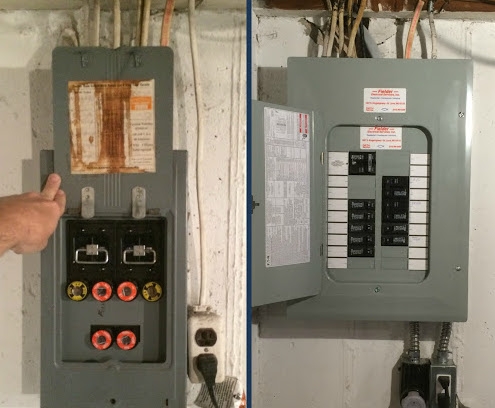
If you notice your fuses are blown frequently or your circuit breakers tripped, then those are your first signs you have faulty wiring. When a circuit exceeds the amperage it can handle, it trips as a safety measure. It is designed so as to shut down the power supply to avoid overheating.
Sometimes, a tripped breaker can simply mean there’s an issue with a particular appliance, but if this happens all the time, then it can be a sign your house needs rewiring, or at the very least you might need to replace your electrical panel.
The same is valid for blown fuses, which also show that you might have an overloaded circuit. Since both fuses and circuit breakers prevent dangerous surges that may cause electrical fires, when they frequently malfunction, it’s important to think about rewiring.
4. Outlet Signs
Loose outlets, discoloration of outlets, as well as switches, and arcs or sparks coming from an outlet are all signs of faulty wiring. The discoloration of an outlet can also be an indicator of a loose connection. If it starts to blacken or turn brown, then that’s a sign of electrical arcing, which can spark a small fire.
Both loose connections and degraded wiring only aggravate over time. The more the problem persists, the bigger the sparks get, which means the fire hazard becomes greater. If you notice the sparks often, or if the discoloration is noticeable around the house, then it’s time to call the electrician.
5. Lighting Problems
Flickering lights
Flickering lights can also indicate faulty wiring, whether the circuit is overloaded, or there’s a loose connection. Lighting circuits are usually the first to show signs your house needs rewiring, due to the fact that they typically have lower ratings in comparison to outlet circuits.
In some cases, the problem may not be as serious, and a flickering or dimming light can be caused by the bulb not being properly connected. However, if you change the bulbs regularly and the flickering persists, then this points to a fault wiring. Another sign that this is the case is if the lights flicker throughout the house.
Dimming lights are also a sign to look into your wiring. If the wires aren’t working correctly, then electricity running through them won’t always reach its destination. The irregular connection can make the light flicker or dim, if they’re receiving too little voltage.
Burnt Out Bulbs
If your light bulbs frequently burn out in a socket, that’s a sign that your fixtures can’t handle the bulb wattage. This can be a problem with the fixture itself, or a wiring problem. Here are some steps you can take to determine if it’s one or the other:
- Use the same type of light bulb in a different fixture
- If it still burns out, buy higher quality light bulbs with a longer lifespan and use in both fixtures
- If it only burns out in the original fixture, then there’s a problem with the lighting fixture itself
- If it burns out in both, then you might be dealing with faulty wiring.
6. Electrical Shocks
If you feel a tingling sensation when you touch a cord or plug something in, then that’s an electrical shock. They vary in intensity, but even the lowest intensity electrical shock is a sign of faulty wiring.
Electrical shocks are very serious, even if they may not feel that way in the moment, and can cause anything from numbness to burns to long-term issues, including memory loss. More serious shocks can be even deadly, causing heart or respiratory failure.
Electrical Inspection: Take The First Step Towards Electrical Fire Safety
These are the most common signs that you’re dealing with faulty wiring and keeping an eye out for them will help you know if your house needs rewiring. If you do notice them, or simply want to be on the safe side with older homes, then the first step is to schedule an electrical safety inspection and risk assessment.
Find a qualified, certified, and experienced electrician who not only can help you make an informed decision, but also carry on with any house rewiring or electrical system upgrade needs you may have.
Rewiring a House: 5 Steps and Professional Tips
July 15, 2020 | Cristina Dinulescu
Upgrading the electrical system is a common need amongst house owners, especially if it is a historic home or an older house. When these were built and first wired, there weren’t as many appliances and electronics. So chances are that the wiring system is either outdated or undersized.
Due to the fact that rewiring a house is quite the financial undertaking, not to mention messy and complex, a common question that electricians get asked all the time is “Can you rewire a house in stages?” Theoretically, it is possible to do this bit by bit, but there are many reasons why you shouldn’t:
- You’ll need to leave the old cables in place – because you’re not doing the entire house at the same time, you’ll have to leave the new cables on the reel until the next area is ready for rewiring, to connect all of them up to the board, sockets and switches at the end, and thus still keep the old cables in place.
- Junction boxes will need extra room – since you’re keeping both the old cables and the new ones, the junction box needs to have the extra room to accommodate that. If there is no room, then you’ll need to leave the new cables out, which means there will be a patch to fill later.
- It will end up costing more – you may only pay for one room or one area at a time, therefore costing you less in the moment, but there will be extra work and visits for the electricians and possibly the decorators, so in the end you’ll end up paying more.
That said, there are a few steps one can take to ensure a smoother process, which may result in less time, as well as the safety of the house and everyone in it. In the end, upgrading your electrical system may even save you money on electrical bills, so it’s definitely worth taking it on. Here are 5 steps to help you get through the process comfortably and safely.
1. Make a Plan
Rewiring a house can be a very complex process, especially if your home was built before 1980 and features a 60-amp panel. The same applies if your usage is generally high, or the size of your house is bigger than average. All of these factors influence whether or not it’s just the cables that need replacing or the electrical panel, also known as breaker box, as well.
Doing an electrical inventory of your home will help you assess some of these factors. You can start by making a list of all the appliances and electronics in the house and where you’re using them. Include light fixtures in the inventory as well, not just devices like TVs, refrigerators and computers or game consoles. The inventory should also help you identify any extra needs or future wishes, such as additional lighting in the kitchen or the bedroom, installing a hot tub or spa, or buying a treadmill.
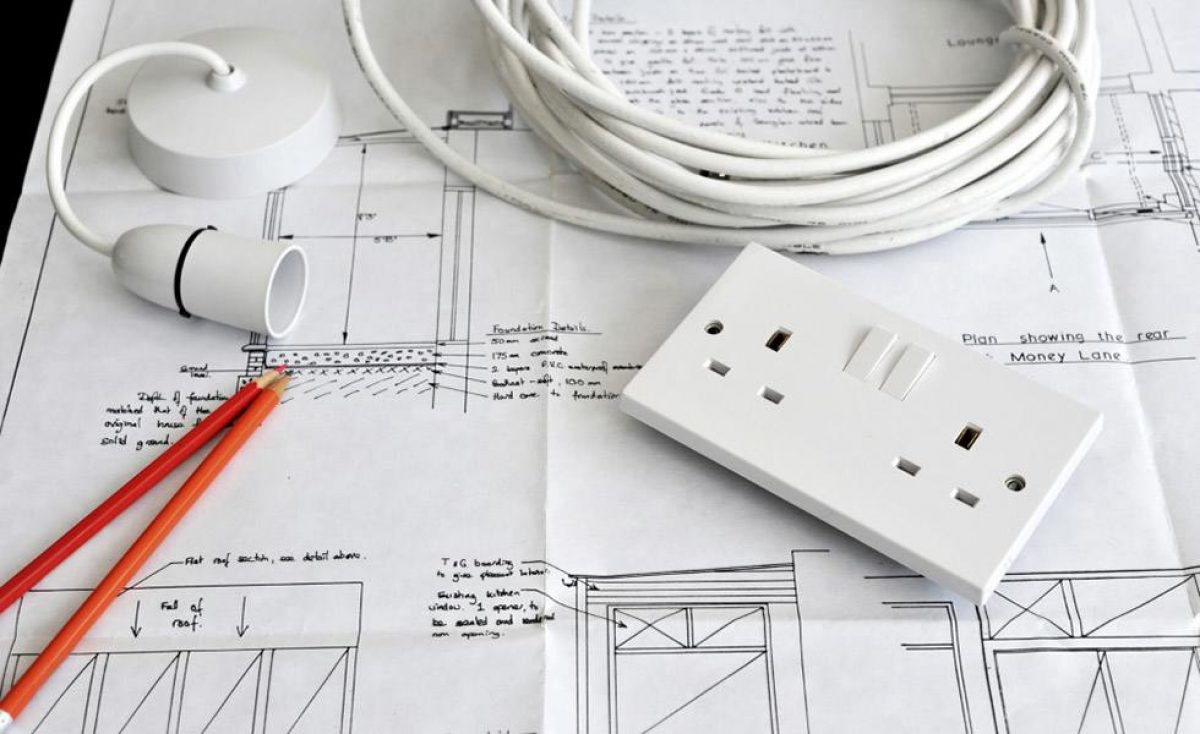
Evaluate your usage based on the inventory and take this opportunity to research local codes and any permits that may be needed. Then, you can simply draw your home and include the items on your inventory, like major appliances, electronics, lights, switches, and receptacles. This type of visual representation will help the electrician plan the home’s electrical circuits based on your goals.
Pro Tip: Have an electrician review your drawing to ensure safety and practicality. It’s always more expensive to make changes once the work has started.
2. Decide How to Rewire the House
If you’re looking to modernize your home, there are several options now for modern wiring that carries not only electricity, but also fire, data and security too. You should look into wiring systems that function in multiple ways.
Today, wireless systems are becoming more and more affordable, as well as more sophisticated, so they might just make your life easier. Talk to your electrician beforehand, in order to properly prioritize your needs.
Another aspect you should decide before the work starts is where to start. Rewiring a house usually has two stages:
- Replacing – this first stage refers to the replacements of all cables, wires, circuits and mounting boxes.
- Installing – this second stage refers to the installation of lighting fixtures, switches and faceplates on receptacles.
Because you won’t have electricity to all areas during the rewiring, deciding where to start can impact whether you’ll be able to live in your home or not. The work can take anywhere from 3 days to entire weeks, depending on the complexity of the projects and your requirements.
Pro Tip: Be prepared for disruption, as rewiring a house oftentimes involves lifting carpets and floorboards, or opening up walls and ceilings. How long it takes to rewire the house ultimately depends on the existing wiring system and your new plan.
3. Set a Budget
Setting a budget when rewiring a house is essential, not only because you will be able to make decisions quickly, but also because it will allow you to consider all aspects, and plan for the inevitable. The cost to rewire a house depends on the electrician you hire, the size of your house, the specific requirements you have, as well as the inevitable demolition and reconstruction that ensues.
Pro Tip: Reduce spending by taking on some of the preparation or cleanup yourself, but don’t cut costs with materials. Cheap materials will not make your system work safely and efficiently for 25 years.
4. Get the Updated Electrical Plan in Writing
You may have discussed your electrical inventory and your requirements with the electrician, but before any work starts, make sure you get the update plan in writing. This will help not only with the price estimate, but also to ensure that nothing has been overseen or left out.
Having the plan to refer back to is also a good way to address any issues that may arise. In fact, just by writing down the rewiring plan, one can prevent problems before they even crop up. However, it’s good to keep in mind that very often, after the work starts, electricians might run into problems they couldn’t have predicted.
Pro Tip: After seeing the written rewiring plan and the cost estimate, allow for a slush fund for any unforeseen issues that may arise.
5. Get a Residential Electrician with Considerable Experience
Rewiring a house is not a job for your local handyman. You need a certified electrician, preferably with 10+ years of experience in the field. Be sure to check their license and certifications.
The expertise and experience of your electrician are important for every step, not just the actual work being done. As said, they should be able to help with your electrical inventory and plan, make suggestions and changes, and lead you towards the best rewiring option for your home. The last thing you want is an inexperienced electrician causing damage to your house or, worse, putting you and your family’s life in danger.
Pro Tip: Look for electricians who carry both an electrical contractor license and a Journeyman’s electrician license.
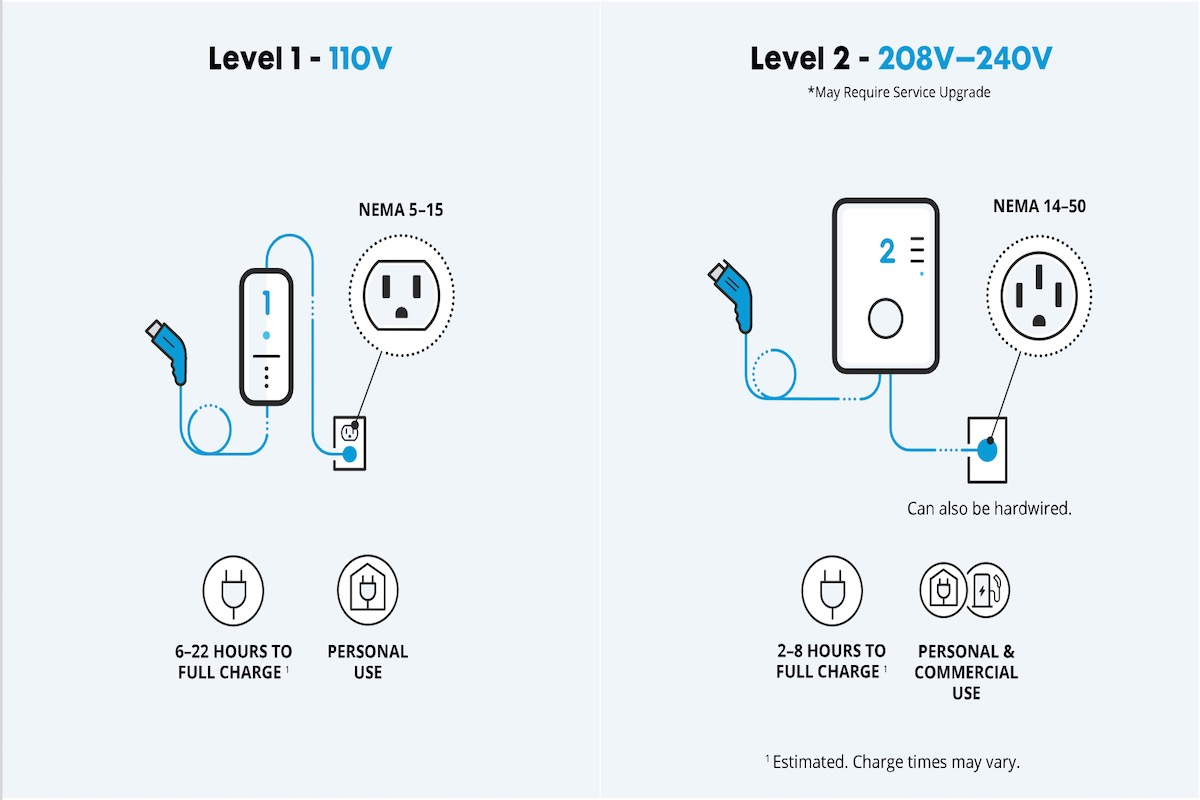
EV Charger Options: Level 1 vs. Level 2 EV Charger
Learn all there is to know about the difference between a level 1 and a level 2 EV charger in terms of efficiency, cost, and time to charge.
Continue reading


