4 Reasons Why You Shouldn’t Just Replace Circuit Breakers

replace circuit breaker

November 30, 2020 | Cristina Dinulescu

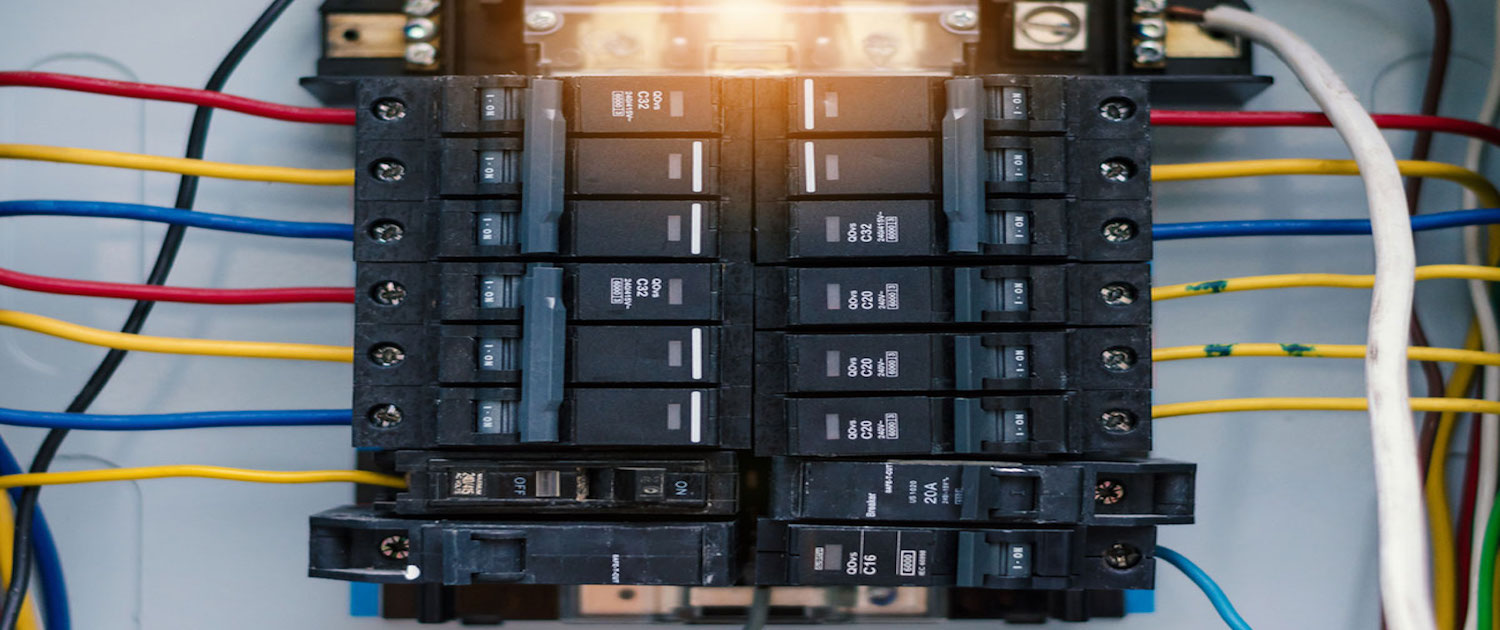
Generally speaking, circuit breakers do not require replacing. A circuit breaker is built to reset, unlike a fuse, for instance. However, from time to time, it may happen that one breaks or malfunctions and you might think to replace a circuit breaker with a new one. In the majority of residential homes, there is the main circuit breaker and separate branch circuit breakers which connect to different areas in the house. 

However, it is not advisable to just replace circuit breakers if they do malfunction, and you should seriously consider upgrading your panel altogether or adding sub-panels. Here are 4 reasons why.

1. It’s Not As Easy As You Think

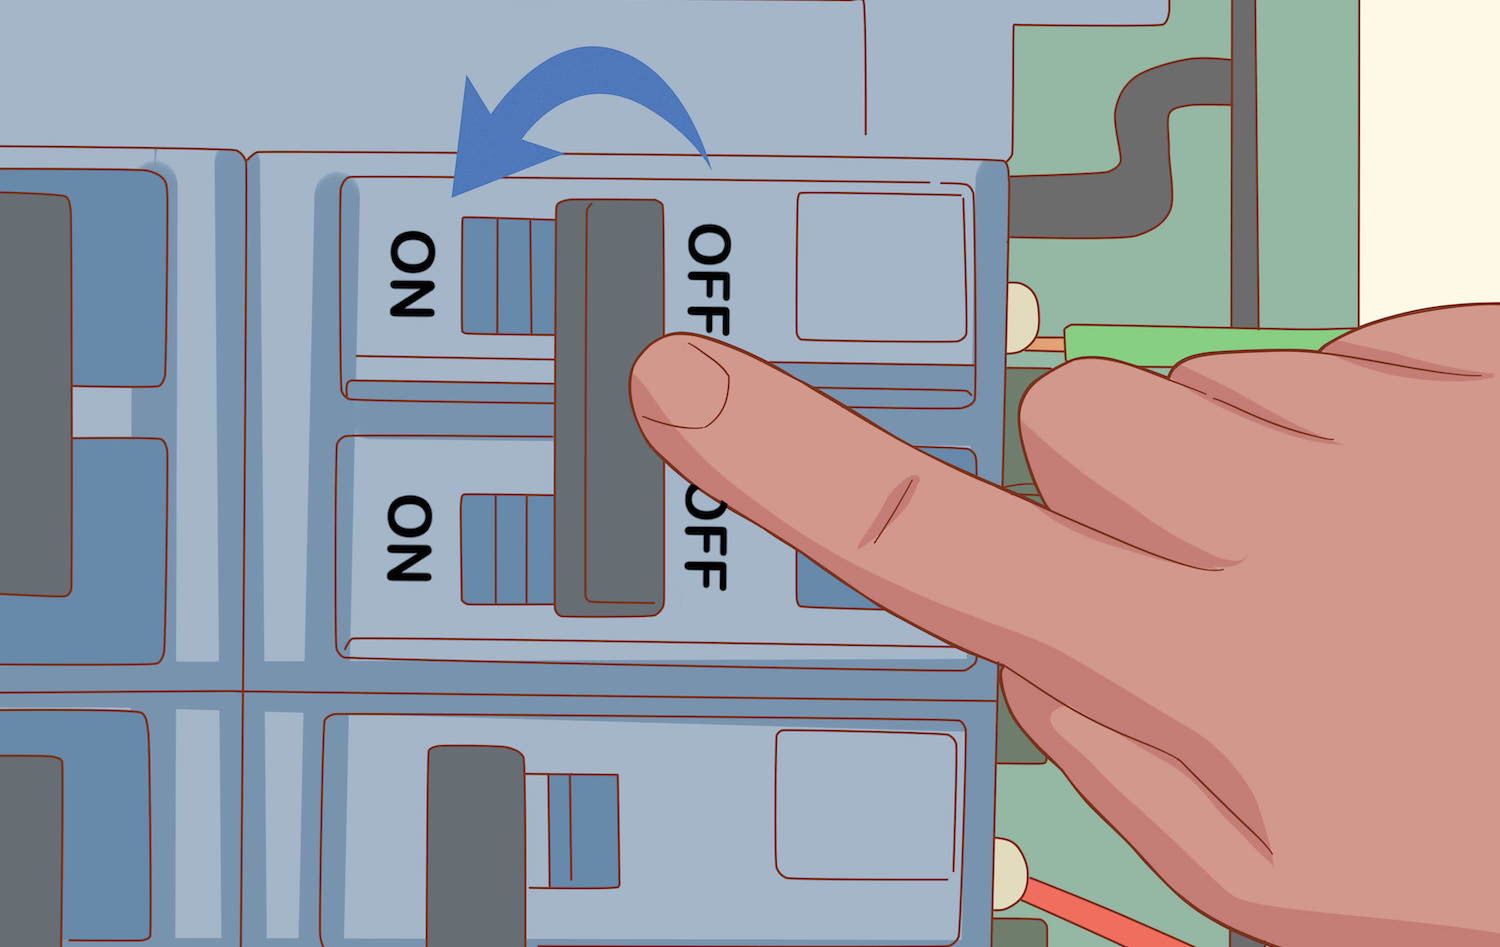
If you are wondering how to replace circuit breakers, it’s really not all that complicated. To replace a circuit breaker, all you need to do is follow step-by-step instructions and take a few measures of precaution. 

However, buying the circuit breaker may turn out to be more difficult than you think. The biggest problem you may be faced with when replacing a breaker in the panel is that you first need to find one that is of the same size and preferably the same brand as your old circuit breaker. It will not function unless it is replaced with a new circuit breaker of the exact same make and model. 

Of course, in order to find one that is exactly the same as your previous breaker, you will need to get some details, such as the brand and model number. You will be able to find these either off your old breaker or inside the breaker panel box. 

2. It Can Be Dangerous To Replace A Circuit Breaker

hand replacing circuit breaker

When doing electrical work, replacing outlets or even working with different electrical devices, there are safety considerations at every step. Because circuit breakers and panels house a large amount of electricity, it’s absolutely necessary to take the right safety precautions. In addition, any work on circuit breakers requires specific tools, and not having the right tools can pose a danger in itself.

High visibility is extremely important, so part of the essential equipment is having adequate lighting. Any electrical work requires the ability to properly and clearly see all the wires and how they are connected to each other. A touch of a live wire can be sufficient to provoke a fatal accident.

An insulated flashlight is a good option, but not if you have to hold on to it. Trying to change the circuit breaker with one hand while holding on to the flashlight with the other can be pretty difficult, especially for amateurs. So not only can it be dangerous, but now you also have to invest in freestanding lighting, one that comes with a power supply. Considering that the power is off when the replacement of the circuit breaker takes place, you won’t be able to use any of the existing outlets. You can find these lights in any hardware or electrical supply store.

3. It Can Damage Your Appliances

The problem with circuit breakers is that when they trip, they impact electrical appliances. The more complicated a device is, the less thrilled it will be to be switched off by a breaker. While a dryer will be just fine by switching it with a breaker, a computer is an entirely different matter. Computers hate having the power interrupted. 

If you don’t want to have it happen again, you need to find out what caused it to trip in the first place. In some situations, the breaker itself might be damaged, but it’s also possible that the breaker is functioning just right when it happens to pop

4. It Will End Up Costing More To Replace Circuit Breakers

There must be something causing your circuit breakers to trip often. It could be any of the following possibilities: 

  • an overloaded circuit: This is probably the most common reason for a tripping circuit breaker. Overload appears when a circuit is trying to draw a larger electrical load than it was designed to carry. When too many devices are functioning at the same time, the circuit’s internal sensing mechanism heats up and the breaker trips by means of a spring-loaded component within the breaker itself. 
  • a short circuit: This is a more serious reason for a breaker tripping. A short circuit takes place when a hot wire (black) touches a neutral wire (white). This allows for an abrupt unimpeded electricity flow due to low resistance. The abrupt increase of electricity going into the breaker may activate the tripping mechanism. 
  • a ground fault: This is a particular type of short circuit and it occurs when a hot wire comes in contact with a ground wire, a metal box or wood framing members. These can be particularly dangerous if they take place in places with a high humidity level like bathrooms, kitchens or outdoor locations. You should know that a ground fault carries a certain shock risk. 
  • an arc fault: This applies only to AFCI breakers. The power fluctuations which happen when sparking, take place between contact points in a wire connection. The reason for this could be loose screw terminal connections in an outlet or switch. Basically, an AFCI breaker senses early wiring issues before these can cause ground faults or short circuits. 

No matter which of the ones above is the actual cause, in the end you’ll probably have to upgrade your electrical system anyway. Each of them can have serious consequences, so you’ll need to upgrade the entire panel to keep your home safe. Unfortunately, by that time, you will need to cover greater expenses. 

Plus, if electrical devices are ruined in the process, these will need replacing as well, meaning additional costs. Clearly, the greater the damage, the higher the cost. By choosing to upgrade your panel from the beginning, you can save money, time and headache.

The right electrical upgrade can dramatically improve the value and appearance of any home or business. You’ll be amazed at what a difference the right electrical upgrade can make for your home or business. Make sure that when you select an electrical company to do the enhancement of your home and you have decided to take your enhancement to the level where you require an electrical upgrade that the technician at the company has a good working knowledge and the experience to properly guide you in this area.

When you decide to upgrade, our well-trained and certified electricians have all the experience and training needed to complete your electrical panel upgrade project from start to finish, with a minimum of fuss or disturbance. Please contact us right away at 310-800-2401

A Complete Guide To Your Home Electrical Inspection

November 27, 2020 | Cristina Dinulescu

When you do electrical work for a new construction or part of a remodeling project, a home electrical inspection is a must. Whether you do it yourself or you’re looking to hire an expert to do it for you, you need to schedule a visit from an inspector, employed by the community’s building code office.

Usually, complete inspections of this kind are needed when you do electrical work that requires a building permit, such as a major room addition or the construction of a new home. It’s important to remember that major remodeling kitchen or bathroom projects require both electrical inspections and permits. 

Another reason to have electrical inspections done is if you plan on selling your home or buying a new one. Oftentimes, in these instances, people choose to have more than an electrical assessment, and opt for their home energy score as well. 

What Is A Home Electrical Inspection?

what is a home electrical inspection

An electrical inspection is a thorough analysis of your home’s electrical system performed by a licensed, qualified electrician. The expert doing the inspection needs to verify if your system respects the electrical code. The purpose is to ensure compliance with the applicable electrical code to reduce structural and personal electrical hazards. 

Additionally, the inspector will check to see if the right equipment has been used for the job, as well as verify the correct installation and compliance with the approved departmental plans, when and if applicable. 

An electrical home inspection is recommended when: 

  • you are planning to undergo a major renovation; 
  • your home is 40 years old or over;
  • you are on the point of purchasing a pre-owned home; 
  • you have added large new appliances in the last 10 years. 

Why Do I Need Two Rounds of Inspection?

inspector performing an electrical home inspection

The whole point of the home electrical inspection process is to thoroughly verify if the applicable electrical codes are followed and to ensure whether or not the installation is safe. This is why the designated inspector will visit your property on two different occasions. 

The Rough-in Inspection

The first visit is known as the rough-in inspection. In the home building and remodeling field, the rough-concept refers to the stage of the construction taking place after the basic framing is completed, together with the wiring and plumbing installation and before the walls and the ceilings are closed up with wallboard. 

This stage is verified by the inspector because, in the absence of walls and floor coverings, modifications are easily done. The homeowners can make any changes in case the rough-in stage does not pass the inspection. 

It is important to have the inspection done before installing all of the electrical boxes, conduit, cables, and wires, even before installing the insulation. This way, the inspector will have a complete view of the entire wiring that runs through the house, from the service panels to the appliances and fixtures. 

The Final Inspection

The second inspection takes place when the entire project is complete, but just before you are given permission to use the space. In this phase of the project, all the walls are closed in, the floors are complete, the painting is done and you are on the verge of installing the furniture. You need to verify that all of the circuits are working and that every light fixture has been installed and connected.  If the inspector approves your work, then it means that your work has passed and that all professional standards are met, respecting the code. 

When the electrical work is done by a professional, inspections can be a bit swift and superficial, especially when the inspector knows the contractor doing the work and is accustomed to the work done. However, when you are the one doing the work you should expect a more detailed inspection. There is a very good reason for this. The inspector wants to know that the work done is up to code and perfectly safe. If you make a mistake, it’s not the end of the world. You will be able to correct it and receive feedback from a professional inspector. 

What Does The Inspector Look At During A Home Electrical Inspection?

what inspectors look at in an electrical home inspection

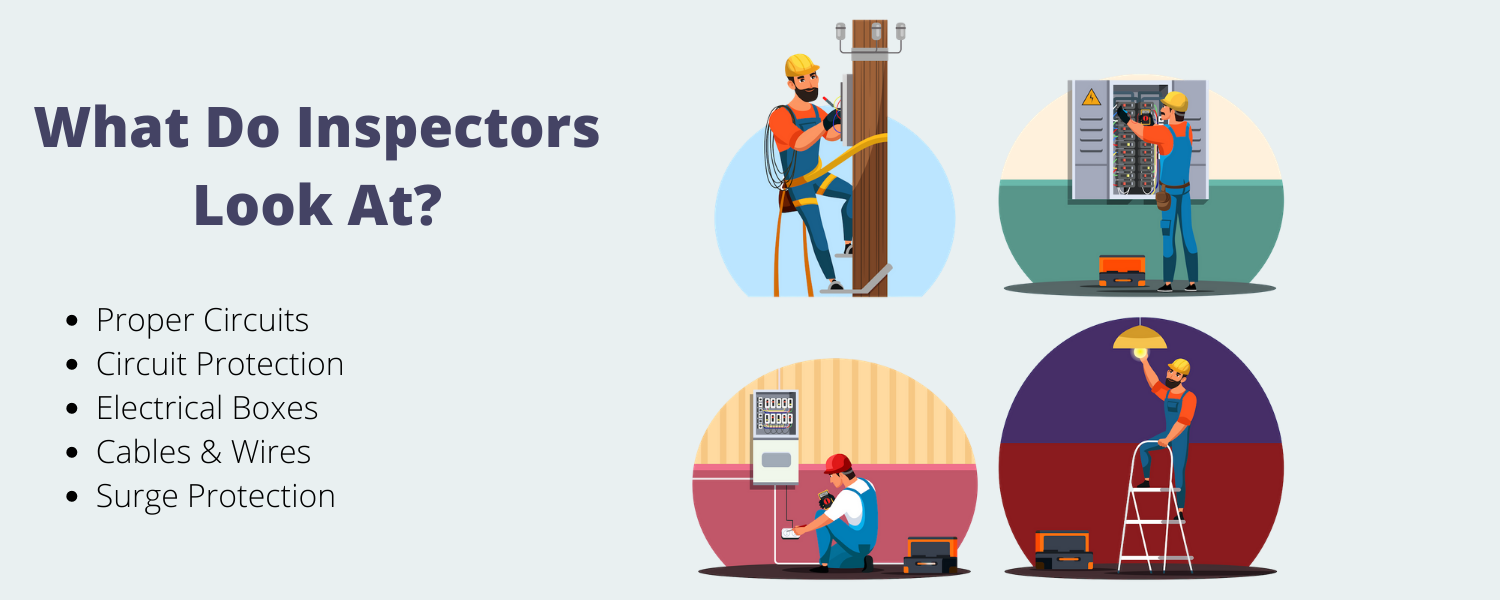
If you are looking to learn what an electrical inspector looks at during the inspection, here’s a quick look: 

  1. Proper circuits: The inspector will make sure that your home or the addition has the right number of circuits, considering the electrical demand of the space. This means verifying if there are dedicated circuits for the appliances in need of them, especially in the kitchen areas. Here, it is crucial to have dedicated circuits for appliances like the garbage disposer, microwave oven, and the dishwasher. Additionally, the inspector will be verifying to see if there is an appropriate number of general lighting for each room. 
  2. GFCI and AFCI circuit protection: In outdoor locations, below-grade or near sources of water like sinks, GFCI circuit protection is required. Small-appliance outlets located in the kitchen, for instance, require GFCI protection and the inspector will check to see if the installation includes such outlets or circuit-breakers. Another electrical code requirement is the AFCI (arc-fault circuit interrupters) protection. The inspector will make sure that this requirement is also met. 
  3. Electrical boxes: All electrical boxes have to be flush with the wall and should accommodate the needed number of wire conductors, as well as other devices they might contain. The box should be securely fastened and homeowners doing the work should use large, spacious electrical boxes. This will make it simpler to complete wire connections and pass the inspection. 
  4. Box heights: During the inspection, the outlet and switch heights will be measured to check if these are consistent. Normally, these outlets should be at least 12 inches above the floor and switches should be at least 48 inches above the floor. 
  5. Cables and wires: Inspectors will check how the cables are fixed in the boxes. The cable sheathing should stick into the box at least 1/4 inch. This way, the cable clamps grip the sheathing and not the conducting wires. Having at least 8 inches of usable wire length extending from the box, it should be sufficient wire to connect to the device and allow future trimming. Additionally, the inspector will check the wire gauge and make sure it is right for the amperage of the circuit. 
  6. Cable anchoring: The cables should be attached to wall studs to be secured. The first cable shouldn’t be farther than 8 inches from the box and then every 4 feet thereafter. All cables should run through the center of the wall studs so that wires are safe from penetration from nails or drywall screws. Each wall stud penetration should be protected by a metal protective plate. 
  7. Wire labeling: Even though it is not required by the code, some homeowners and professional electricians label the wires to indicate the circuit number and amperage. It is highly reassuring for an inspector to see this.
  8. Surge protection: The inspector may recommend isolated ground systems in case you have delicate electronic devices like TVs, stereos, sound systems, or other equipment. Isolated ground systems protect against current fluctuations and interference. In addition to this type of receptacles, surge protectors can also guard sensitive devices.

The right electrical upgrade can dramatically improve the value and appearance of any home or business. You’ll be amazed at what a difference the right electrical upgrade can make for your home or business. Make sure that when you select an electrical company to do the enhancement of your home and you have decided to take your enhancement to the level where you require an electrical upgrade that the technician at the company has a good working knowledge and the experience to properly guide you in this area.

When you decide to upgrade, our well-trained and certified electricians have all the experience and training needed to complete your electrical panel upgrade project from start to finish, with a minimum of fuss or disturbance. Please contact us right away at 310-800-2401

All You Need To Know About An Electrical Permit

November 25, 2020 | Cristina Dinulescu

When planning to take on a major remodeling project, determining whether or not you need an electrical permit, often known as a building permit, can be quite difficult. The departments in charge of granting applicants with permits usually frustrate and confuse homeowners. Contractors, builders, and the trades are the majority of applicants and often the requests coming from homeowners come second.

Of course, the rules and regulations differ between cities and counties. If you are looking to find out what type of work is exempt from permits in California, you can find out more here. However, certain types of work may require you to determine whether or not a permit is mandatory. 

Generally speaking, work in areas like public and personal safety, electrical, plumbing, and natural gas, will require permits. In fact, given the many changes within existing safety codes, plus a need for a bigger revenue, more and more projects are moved to the “permit-required” list. 

What Is An Electrical Permit?

what is an electrical permit

The electrical permit represents an official approval issued by the local government agency, which gives you or your contractor permission to:

  • alter or install any permanent  wiring, or appliance;
  • install a light fixture, electrical outlet, or garage-door opener receptacle, run additional wiring, or convert a fuse box to circuit breakers;
  • alter or install low-voltage systems like security alarms, computer, or stereo systems.

However, the good news is that a permit is not required for appliances or electrical maintenance on existing installations. If you aren’t sure whether or not you require a permit for your project, you should call the building department responsible for your area.

When Do I Need an Electrical Permit?

when you need electrical permit

As mentioned above, not just any home renovation or construction requires a permit. You need to separate the types of work you will be doing to determine whether or not a Los Angeles electrical permit is needed. For instance, in most cases, replacements or simple repairs can be done by an expert, professional contractors, or even homeowners without having to apply for a permit beforehand. 

Projects that involve major changes to your home’s electrical or mechanical system, however, do require you to apply for the right permit from the local building department. On the bright side, if you hire an expert to do the work, he will also handle the process of obtaining a permit for you. Of course, you would have to cover the costs involved. 

If you decide to do the work all by yourself, then it will be your responsibility to apply for the permit. However, know that your building department may require that part of the work involved in the process be done by a licensed professional and not by you, the homeowner. 

Because the requirements for permits tend to differ from one region to the next, really the only way you can tell whether or not a permit is necessary and what the exact requirements are is to call your local building office and describe the type of work you need to do. 

Permits are usually required for: 

  • General electrical: installing new electrical wiring or adding circuits;
  • HVAC: installing an air conditioner or a new furnace; 
  • Water Heaters: Installing a new water heater. 

Permits are not always required for minor electrical work like:

  • replacing a light fixture or an electrical outlet; 
  • replacing a circuit breaker in-kind. 

What Is The Process of Applying for a Permit?

electrical permit process

As said, when you decide to hire a professional electrician, obtaining an electrical permit is no longer your concern. However, if you want to do the work by yourself, then here are the steps you will need to follow: 

  1. Get in touch with your local building office and explain what type of project you want to do. In case a permit is required, you will be provided with an application form, which outlines the requirements for the permit. You may notice that some jobs require more than one permit. For major remodeling projects, you might be required to apply for a plumbing permit, a construction permit, and an electrical one. 
  2. Prepare your permit application. Include details regarding the materials you may need to use and offer drawings of the work you plan on doing if required. 
  3. Submit the application and pay the required fees. The licensing office will grant you with the official permit certification. 
  4. Once you start the work, make sure you post the building certificate as required. You may need to tap the permit to a window or a door to ensure it is visible. 
  5. Make sure you contact an inspector to review the worksite. If the inspector requires changes to be made, complete them and ask him to review. 
  6. Once the inspector approves them, you no longer have to keep the permit on display. 

Can I Skip The Permit?

Unfortunately, skipping the entire process is something very common among homeowners. Some do not go through the trouble of contacting the local building office, collecting the necessary information, paying the requested fees, and calling an inspector to review the worksite. However, it is not advisable to bypass the official permit process. There may be consequences, which include: 

  • If you attempt to sell the house, the inspection may reveal certain remodeling or additions which were completed without having the proper permits and which may not be fully up to code. This may prevent you from selling the home and force you to undo the entire work and start all over again, only this time with the right permits. 
  • In case of a structural collapse, major plumbing problems, or a fire, if it is discovered that the cause of the issue is the result of the work realized with having a permit, it’s possible for the homeowner’s damage and liability policy to decline to cover the damage. 

The right electrical upgrade can dramatically improve the value and appearance of any home or business. You’ll be amazed at what a difference the right electrical upgrade can make for your home or business. Make sure that when you select an electrical company to do the enhancement of your home and you have decided to take your enhancement to the level where you require an electrical upgrade that the technician at the company has a good working knowledge and the experience to properly guide you in this area.

When you decide to upgrade, our well-trained and certified electricians have all the experience and training needed to complete your electrical panel upgrade project from start to finish, with a minimum of fuss or disturbance. Please contact us right away at 310-800-2401
What Is Cloth Wiring & Why You Shouldn’t Have It

cloth wiring

November 23, 2020 | Cristina Dinulescu

When electricians perform a home inspection, especially if the house was built before 1960, one of the most frequent issues they find is cloth wiring. This is actually a common trait in older homes, as before plastic insulation was invented, electrical wiring was insulated using a cotton cloth.

As major advancements in electrical wiring were made and plastic insulated wires started being used in homes and office buildings, cloth wiring became an obvious issue. Old wiring has been a hazard for years in terms of residential electrical fires and home safety.

A major problem when it comes to this type wiring is that you don’t know when something goes wrong. You won’t be able to tell when it becomes high risk, because the decay takes place behind the walls. Not only do you want to keep your home and family safe at all times, but having this type of wiring may be a problem when looking to get insurance. Let’s take a deeper look into what cloth wiring is and why you should make sure you don’t have it.

What Is Cloth Wiring?

what is cloth wiring

Commonly used before 1960, this type of wiring consists of a cloth-insulated wiring complex. The copper is wrapped in cotton or rayon. Additionally, rubberized insulation or asbestos paper was also used in the mix. 

Over time, the wiring becomes frailer and frailer, turning into a major risk for your appliances, as well as yourself. Your home is exposed to several dangers, sometimes without you even knowing it. Here are 5 of the most common hazards: 

  • Health issues: older cloth wiring may contain asbestos, which means your health could be at great risk, as long-term asbestos exposure can cause serious harm and it’s even linked to cancer. 
  • Excessive heat: this type of wiring may have difficulties containing heat and this may pose a threat to surrounding areas, exposing them to excessive heat. 
  • Electrical fires: cotton wiring may become brittle and when that happens, your home is exposed to fire risks. 
  • Lack of grounding: old wiring, in general, is seldom properly grounded and cloth wiring makes no exception. Ungrounded wiring can be dangerous.
  • Increased risk of damage: this wiring is much more susceptible to insect and rodent damage. Insects and rodents may chew on the wiring causing greater damage and increasing fire risk. 

How Do You Know If Your Home Has Cloth Wiring?

cloth wiring

If your home is older than 40 years, then you should be asking yourself whether there is cloth wiring present in your house. One way to tell whether or not this is the case is to search for knob-and-tube wiring. Usually, if you have knob-and-tube wiring, chances are cloth wiring is also present in your home. 

However, you might be tempted to assume that because your wiring looks rubberized, this type of wiring is not present. That’s actually not true. Even if your wiring looks rubberized, you could still have cloth wiring, composed of rubber with an insulating cloth. 

When in doubt, ask an expert. If you cannot find any indication that you might have this old wiring or you simply want to make sure, then call in a professional. An electrician will be able to tell you more about the wiring systems in your home, even make a few recommendations in terms of repairs or rewiring. 

What To Do In Case Of Cloth Wiring

rubberized cloth wiring

If you do find that you have this type of wiring, you might be wondering what the next steps are. Here are a few things you need to do to protect your home and family. 

Hire a professional to examine the system 

First thing’s first. Until you have an expert’s confirmation that cloth wiring is present in your home, there is no point in taking any measures. The best part of hiring an electrician is that you’ll not only get an accurate answer to that question, but also a comprehensive assessment of the state of your house wiring. This is usually followed by knowledgeable recommendations.

Test the wires for asbestos 

Asbestos is a serious threat, both for your family and for the electricians who will remove the wiring. Because asbestos paper is known to be used in the cloth wiring mix, in the early 20th century, you need to act cautiously. 

Before having it removed you need to hire a professional company to test the wires. In case asbestos is identified, certain measures need to be taken to make sure that the wiring is removed safely.  You will need to hire a specialized expert to remove it, to ensure that no toxic asbestos fibers are released into the air. 

Replace the cloth wiring 

It is possible, rare but possible, to have cloth wiring without having the knob-and-tube system. This means that you have to replace the cloth wiring with plastic-coated, modern wiring. If your electrician feels that everything is safe simply by replacing the cloth wiring and nothing more, then you are looking at a more affordable solution. 

The knob-and-wiring isn’t dangerous by default. But due to unsafe modifications, it tends to fail over time. If this is not your case and the electrician believes that you don’t have to replace it, then you are all good. But you might want to check with your insurance company and see if a home with knob-and-tube wiring is accepted. 

Can You Replace Cloth Wiring By Yourself?

The short answer is No. Do-It-Yourself electrical work is not advisable, especially when it comes to replacing wiring systems. Not only are you exposing yourself to unnecessary risks, but you might also do it the wrong way and make mistakes which, in time, may lead to further, more complicated issues. 

We strongly recommend you hire a professional who can analyze, diagnose, and fix your problems. This way, you can rest assured that your home wiring is done right, and your family is safe. 

Everything You Need To Know About The Electrical Weatherhead

weatherhead

November 20, 2020 | Cristina Dinulescu

When it comes to home improvements, there are some investments you need to make to be sure your home is  properly protected. An electrical weatherhead can be such an investment. Climate change is real and we’ve  seen more and more significant weather changes over the last decade, including drastic or sudden changes. Being prepared for storms and heavy rains just makes good sense.

Just as you invest in air cooling systems to protect you from the summer heat or heating units to keep you warm during the winter, you need to consider your options when it comes to rain. And weatherheads can be exactly the solution you are looking for. 

A weatherhead can protect your electrical system from water during rough weather like heavy rain or snow, as long as all components are properly installed and sealed. So before anything else, make sure you contact a certified electrician that can help with the installation process. If it’s not properly installed, then you risk water leakages, which can cause significant damage and may end up costing you a lot. 

What Is A Weatherhead?

Simply put, an electrical weatherhead is a rounded cap, meant to keep the water out of the pipes. It is also known as a weathercap, a service head, a gooseneck or a service entrance cap, and it’s quite popular. There are plenty of homes and buildings that have it installed and chances are you’ve seen it several times before. 

Not only does it protect against water, but this service entrance cap is also an essential part of the transfer of power from the utility company to your house. It is installed where the service wires coming from the utility company reach your house if this happens through overhead wires instead of an underground entrance. It’s role  is to protect the connection. 

The whole point of this waterproof cap is to prevent water from coming in and safeguarding the conduit and the metal pipe through which the wires enter your home. Shaped like a hood, the weatherhead is facing down at an angle of at least 45°. It also has a rubberized gasket to ensure a tight seal. 

Anatomy of The Weatherhead

weatherhead anatomy

The requirements for the weatherhead are dictated by the National Electrical Code. They’re traditionally anchored to the mast, which is a metal pole rising through the roof. However, not all service caps are mounted to the masts, some types have clamps that anchor into the wall. However, they all follow the same structure. Each weatherhead has a service entrance and a service point.

The service entrance 

The service entrance represents the group of wiring and structural parts used to connect your home to the utility power grid. The service entrance starts at the transformer, which is installed on the utility’s power pole. The service drop is the assembly of heavy insulated wires and metal cables installed overhead from the transformer to your home. As mentioned above, this is either attached to the exterior of your home or anchored to a metal pole which is rising through the roof. The pole is known as the mast, containing the service entrance conductors, which are several individual wires. 

The wires that enter the house through a weathercap drop down through a conduit to an electric meter, which measures the power usage, and then enter the main service panel. This contains the main circuit breaker, which controls the entire electric current entering the house. Usually, there are also several other breakers to protect individual branch circuits, unless these reside in a separate service panel. For residential buildings, in the USA, the 120/240 V split phase system is used. Basically, the service drop is made up of two 120 V lines, plus a neutral line. 

The neutral line is connected to the service panel through a conductive rod, which is driven into the earth. The service drop offers the building two 120 V lines of opposite phase, which means that 240 V are provided. These circuits are used to feed energy-hungry devices such as water heaters, air conditioners, clothes dryers, boilers and ovens. 

The service point

Because of the shape of the weatherhead, rain and snow are kept out of the mast. On the one hand, the service cap covers the mast so that rain and snow do not fall in. But it does more than that. Due to the way in which the service drop is anchored, a drip loop is created. Because of it, any rain that drips on the service drop wires will flow downward and fall off the bottom of the drip loop instead of the service drop. 

The service point is where the service drop wires connect to the service entrance conductors and it’s the official point of transfer. Because of this, everything on the utility side of the service point is taken care of by the utility company and everything on the house side is handled by an electrician. 

Fixing The Weatherhead

electrical weatherhead

Because the weatherhead is directly connected to the utility power pole, an untrained homeowner should not be touching the wires. Even though it might be the homeowner’s responsibility, only an electrician should handle the installation and maintenance of the weatherhead. So, if you notice that the weathercap is damaged due to falling trees, heavy winds or any other cause, call an expert to handle all related issues and do not attempt to intervene yourself. It is very dangerous and risky. 

3 Steps To Check If Your Home Has a Ground Wire

check for ground wire

November. 13, 2020 | Cristina Dinulescu

It is very important to have your electrical wiring grounded. Considering that electricity follows the path of least resistance, when there is too much supply, without a ground wire, electricity might go straight into your appliances, electronics, and even you. This could lead to electrocution which can have tragic outcomes. Electrocution is unfortunately a common cause of death, leading to more than half of the deaths in the construction industry and among homeowners.

Apart from protection against overload, which is a very good reason to invest in grounding in the first place, choosing to do so will help you direct electricity. Grounding the wires in your home will allow electricity to travel through the system safely and efficiently. Additionally, grounding helps in stabilizing the voltage levels, so you don’t have to deal with electricity overloads, to begin with. 

When grounding a home’s electrical wiring, a wire firmly buried in the ground is attached to the electrical system so that electricity has a place to escape. Unfortunately, older houses, built before the 1990s, don’t have grounding, as this was a standard introduced and enforced in the late 80’s. But you could easily check. This is done using a circuit tester. And here are a few steps you need to follow. 

Step 1: Check Your Outlets 

Usually, the outlets in your home will tell you many things. And some of them are related to the ground wire and electricity. To check if your home’s electrical wires have been grounded or not, you need to look at the outlets in your home. You need to determine whether you have two or three-prong receptacles. This is an important detail because it is the first sign of ground wire. 

A three-prong outlet has a narrow slot, a larger one, and a U-shaped one. The U-shaped slot is the grounding element. So if you have three-prong outlet chances are your home has grounding. However, you still need to check a few extra elements, just to be sure. 

In many cases, people have replaced the two prong outlets with 3-prong even though there is no ground wiring. The best way to tell is in your electrical panel. There should be as many green wires or bare conductors as there are white wires.

Step 2: Test Your Outlet 

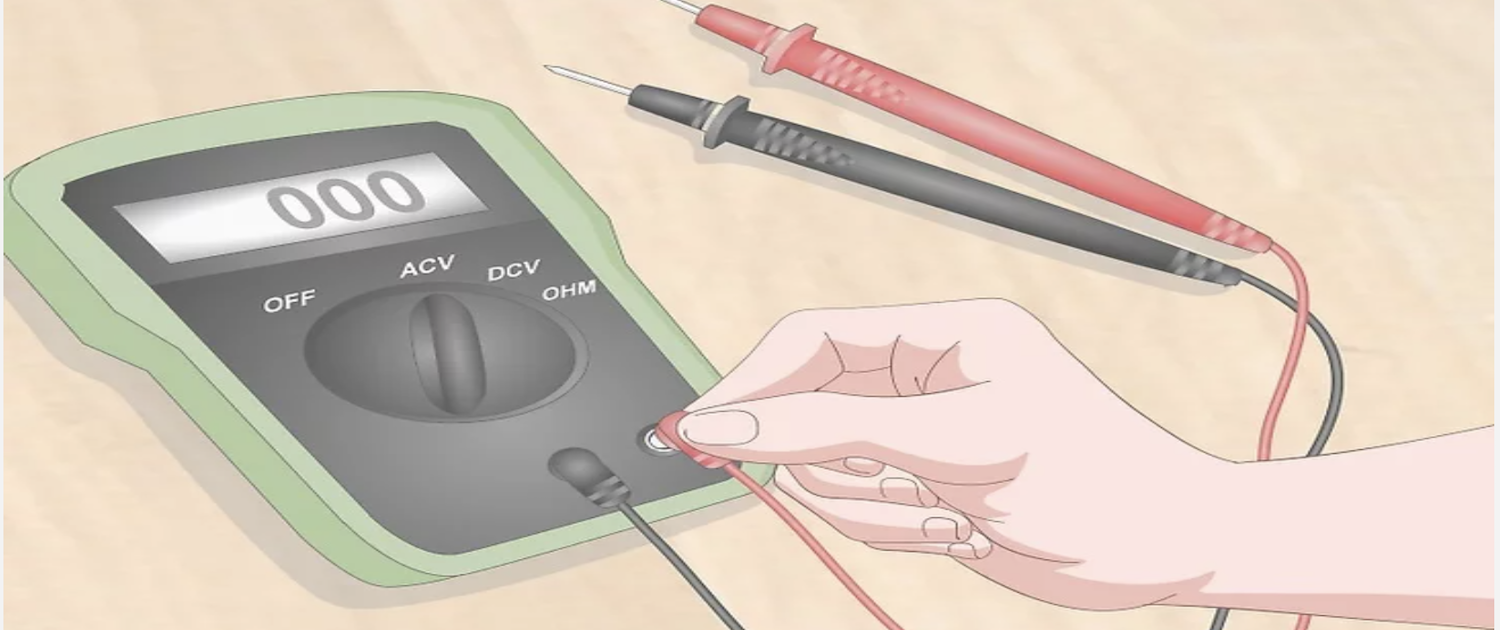
To test your outlet, you need to use a tool called multimeter. You should be able to put one of the leads of the tester in the smaller slotted hole, and the other large one that is the neutral to read 120 volts. 

Then, from the smaller hole, put the other lead into the u-shape hole (or ground terminal) and  it should also read 120 volts. If you have voltage from the hot to the ground it is usually grounded.

In addition to the multimeter, which tests for grounding, there are also plug in testers that can read if the outlet is properly wired or not.

Step 3: Repeat 

Even if you have discovered that one of your outlets is grounded. You shouldn’t just assume that all of them are. The safest course of action is to repeat the steps outlined above and test each outlet in your house. 

Older homes might have had multiple renovations. Some might not have benefitted from an entire home renovation in the first place. So, there may be parts of your home that have not had any work done. Take the time to verify each outlet closely. 

If you have determined that your home does have grounding, you need to check whether or not this has been correctly done. Unfortunately, faulty grounding is not that uncommon and it can lead to significant dangers. Here are some of the common electrical grounding mistakes. 

A poor understanding of resistivity and impedance guidelines 

Soil resistivity is an important aspect of any grounding system. When designing the grounding system, you need to consider several aspects, like soil type, moisture content levels, and temperatures. 

It is not considered safe to design a grounding system in high resistance earth, because it increases the risk of equipment failure and most importantly, the injury potential. Understanding impedance guidelines is essential in creating a safe grounding system. 

Not measuring the grounding system after installation 

It is crucial to measure the grounding system once it has been fully designed and installed. The electrician should check that variances do not appear, because these can cause a higher ground resistance than initially desired. The three-point method is the best way to measure the grounding system, before connecting it. 

Using the ground wire incorrectly 

Paying attention to the conductor bends and lengths is an important step in the installation of a ground wire or the inspection of the entire system. The ground wire should not be bunched up or coiled together, because it creates high impedance paths, causing higher voltages. 

To ensure safe electrical grounding, secure connections, and gradual bends, short wire lengths should be used. 

Selecting the wrong ground wire

When selecting a wire as a down conductor, you want the thicker gauge wire. This has lower resistance, allowing an easy path for the current to reach the ground. Additionally, the size of the ground wire should apply to the short-circuit current ratings of the system. 

Grounding is an essential part of a safe and efficient electrical system. You need to make sure your home has ground wires and that these are installed properly. While there are several other methods you can use to verify whether or not your home has grounding, the best solution is to hire an expert electrician to conduct the assessment for you.  

7 Home Electrical Hazards You Need To Know About

electrical hazards at home

November 4, 2020 | Cristina Dinulescu

We live in a world that relies tremendously on electricity. Our entire life and work revolve around electricity-powered appliances and devices, especially now, given the new circumstances. Working from home has made us even more dependent on the home’s electrical network and it has resurfaced the importance of ensuring safety from any electrical hazard.

Without realizing, you are exposed to different silent dangers which can cause significant losses, injuries, and even deaths. In fact, each year, approximately 1000 deaths are caused by electrical hazards of different types. Furthermore, 20% of all injuries caused by electrical hazards occur in toddlers and adolescents. 

An electrical hazard can cause serious injuries, which is why it is important to identify it correctly. Below, you can find the seven most dangerous electrical hazards that are often found in US homes. 

1. Defective or old wiring 

defective wiring as electrical hazard

This is usually the leading cause of electric shock. It has the potential to cause power surges, arc faults, or even electrical fires. This is why it’s essential that your home wiring conforms to safety standards and that you avoid doing any DIY electrical work. To keep your home and family safe and out of harm’s way, make sure you contact professional electricians to check the electrical wiring in your home. 

Wiring becomes an electrical hazard when you notice: 

  • loose connections like electrical switches or receptacles; 
  • worn-out extension cords or appliances;
  • pierced or pinched wire insulation;
  • overheated cords or wires; 
  • electrical wires that have been chewed up by rodents;
  • cracked wire insulation due to age, heat, or corrosion.

These are all signs of faulty wiring and chances are that you will need to have your home rewired, especially if it’s an older house that hasn’t had any wiring updates. 

2. Water

water as an electrical hazard
Elderly hand with electrical outlet spark at home

Water and electricity don’t make good companions. Issues like wet hands or outlets installed close to water are all hazards. Water is an electrical conductor and you need to be very careful when using appliances around it. To make sure you are not turning water into an electrical hazard, consider the following tips: 

  • in bathrooms and kitchens, as well as other areas that are close to water, install electrical outlets at a safe distance from water; 
  • avoid using the radio, hairdryer, or other appliances in the bath, near the pool, sink, or jacuzzi; 
  • make sure to dry your hands before picking up any appliance. 

3. Lightbulbs

light bulbs as electrical hazard

Lightbulbs are not an electrical hazard by themselves, but they can become one if not handled properly. Like all electricity sources, they can cause electric shocks. So, here is what you need to do to make sure that lightbulbs will not become a danger to your family or home: 

  • always turn off the light before replacing a light bulb;
  • choose the right wattage light bulb to prevent overheating; 
  • never replace a bulb with wet hands; 
  • keep lightbulbs away from flammable materials like beds, drapes, plastics, or upholstery.

4. Covered Electrical Cords & Wires

Electrical wires irradiate heat, and carpets as well as other coverings can be flammable. Even though it is not very common for covered electrical wires and cords to cause fires, it can happen. But it’s always best to be safe than sorry. So, here are a few tips you need to consider: 

  • never cover the cords and wires and keep them away from other items; 
  • make sure that items like televisions or computers have enough room for ventilation, thus preventing overheating. 

5. Extension Cords

extension cords as electrical hazard

Extension cords might not seem dangerous and they aren’t, as long as you consider extension cord safety rules. Extension cords are a tripping hazard and falling is yet another injury cause, so you need to be careful when using them. Here are a few things you need to consider: 

  • carefully fix extension cords in place to reduce tripping chances; 
  • make sure you are using plastic covers on unused receptacles; 
  • don’t turn extension cords into additional power outlets; 
  • avoid using too many devices at the same time; 
  • Check the cords for bends, damage, or fraying.

6. Curious Children 

An electric hazard can be very dangerous and it can cause serious injuries. It is very important to follow strict safety rules to make sure kids, who are extremely inquisitive, are not exposed to any dangers at home. 

Kids are constantly pulling appliances down from their cords or placing objects into receptacles, sometimes even their fingers. Of course, supervising them is crucial. However, there are other steps you can take in order to make sure you limit the risk: 

  • use plastic covers for every electrical outlet within the kids’ reach or tamper resistant receptacles, which are a better option;
  • ensure that appliance cords are tucked safely out of reach of children.

7. Pouring Water on Electrical Fires

One of the most common errors homeowners make is pouring water over an electrical fire. If an electrical fire starts for whatever reason, don’t try to use water, as this will only fuel the fire. 

It’s always a good idea to invest in a fire extinguisher and to keep it in a location that’s quickly and easily accessible. In case an electrical fire occurs, use the fire extinguisher to put it out.

Safety Rules You Need to Remember

Electricity is vital for the modern lifestyle and respecting a few safety guidelines will help you avoid turning it into a hazard, putting your home and family at risk. Here are a few, most important rules to remember:

  • avoid making DIY electrical work and always contact an electrician to help you fix electrical problems; 
  • regularly check your appliances and wiring to make sure there aren’t any faults; 
  • always dry your hands before handling electrical appliances;
  • avoid using devices in the tub, shower, or near the pool area; 
  • before cleaning the bathroom, the kitchen, or laundry room, make sure that all appliances are turned off.

The right electrical upgrade can dramatically improve the value and appearance of any home or business. You’ll be amazed at what a difference the right electrical upgrade can make for your home or business. Make sure that when you select an electrical company to do the enhancement of your home and you have decided to take your enhancement to the level where you require an electrical upgrade that the technician at the company has a good working knowledge and the experience to properly guide you in this area.

When you decide to upgrade, our well-trained and certified electricians have all the experience and training needed to complete your electrical panel upgrade project from start to finish, with a minimum of fuss or disturbance. Please contact us right away at 310-800-2401